The Oracle Database Cloud Service (ODCS) Virtual Image option gives you some extra flexibility on how to deploy databases in the Oracle Cloud. When deploying an instance using the normal Oracle Database Cloud Service it will per default create an instance within the database installed and pre-configured for you, but on the other side, if deploying it as Virtual Image it will create an empty image with the Oracle account configured (Running on Oracle Enterprise Linux 6.6) with access to the Oracle RDBMS Installation software (so, Oracle Database is not automatically installed, nor is a database automatically created). It gives you more flexibility to install Oracle as per your own preferences and also, gives you the ability to deploy Oracle 12c as Non-CDB.
The manual process to allow us to install an configure an Oracle Database when using Virtual Image is very simple. Basically the steps are:
- Deploy the Virtual Image Instance
- Increase Storage volume for the Oracle Database software, the database files, and then format and mount them.
- Stage the Oracle Database software on the mount point you created for it.
- Create a database and start the database instance.
- Start the listener for the database instance.
- Change one parameter to allow table spaces to be created without encryption
- Create Oracle Compute Cloud Service security rules to permit access to services of the database from outside the Oracle Cloud.
1. Deploying the Virtual Image Instance
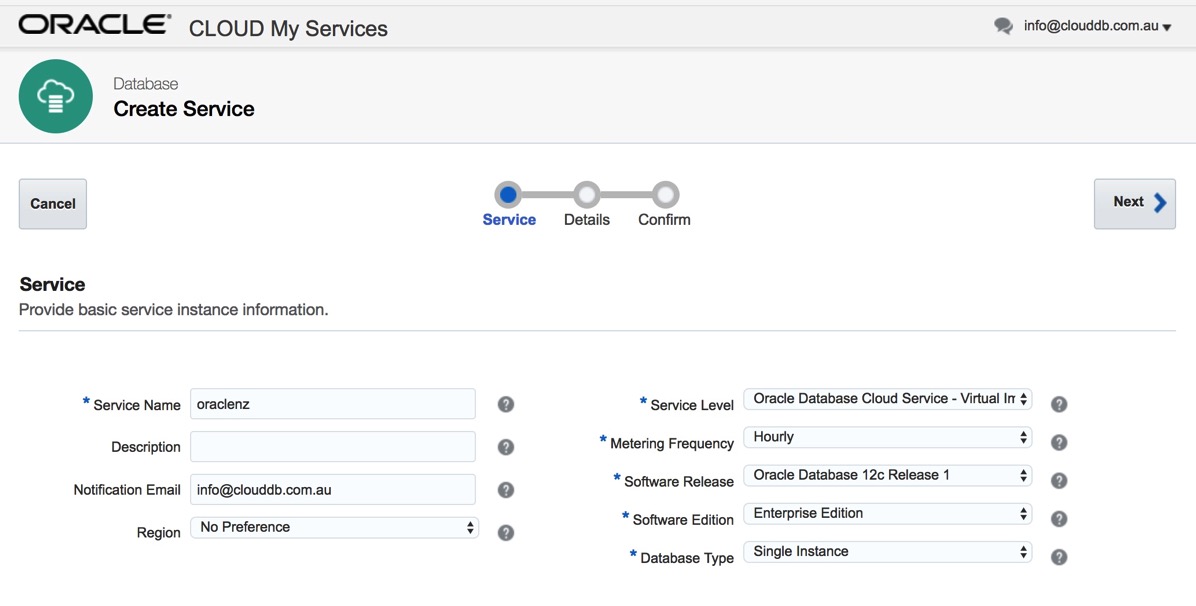
When connected to the Oracle Database Cloud Service page, select the option Create Service as shown bellow.

Next, enter a name for your new service ( a Service Name is the name that your Cloud Instance will have), a description if you want, an email account you will like to use to receive any notification, the region of your preference (if any) to run your Service, then chose the service level as Virtual Image, choose your metering frequency (Hourly or Monthly), next select your desired Database Software Release of your preference – it could be 11gR2 or 12R1), next select the software edition of your preference (Standard Edition, Enterprise Edition, Enterprise Edition High Performance or Enterprise Edition Extreme Performance), finally choose the Database Type that could be:
- Single Instance
- Database Clustering with RAC
- Single Instance with Data Guard Standby
- Data Guard Standby for Hybrid DR
- Database Clustering with RAC and Data Guard Standby
For this example I have selected Single Instance and then press Next.
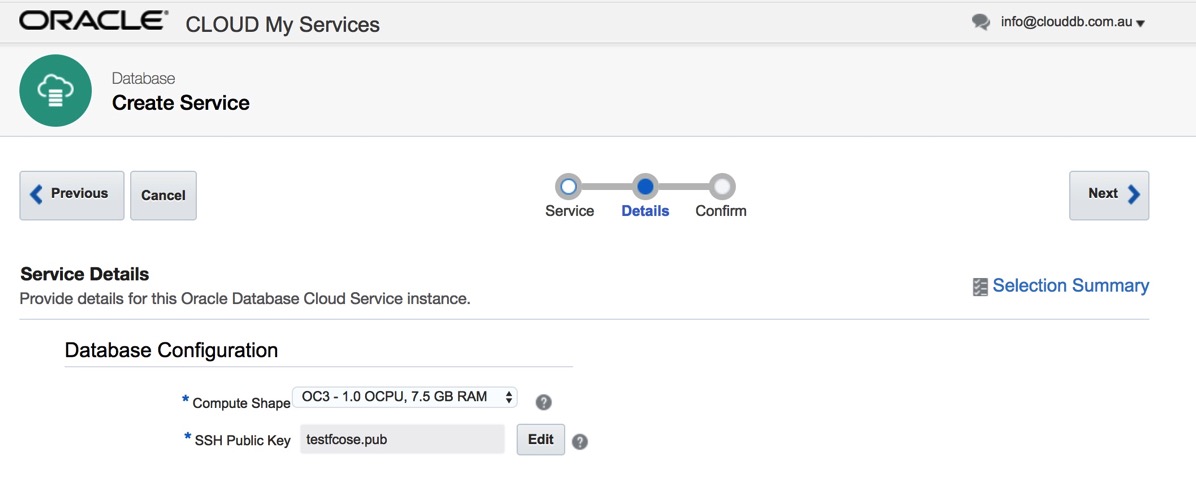
Select the resources that would be used by your Instance (Compute Shape – Number of Oracle CPUs and desired Memory, for this example we have selected the basic size of 1 OCPU and 7.5 GB RAM) plus enter the SSH Public Key that will grant you a secure access to your instance (Details of how to generate and setup a SSH Key could be found here ). Then click Next.
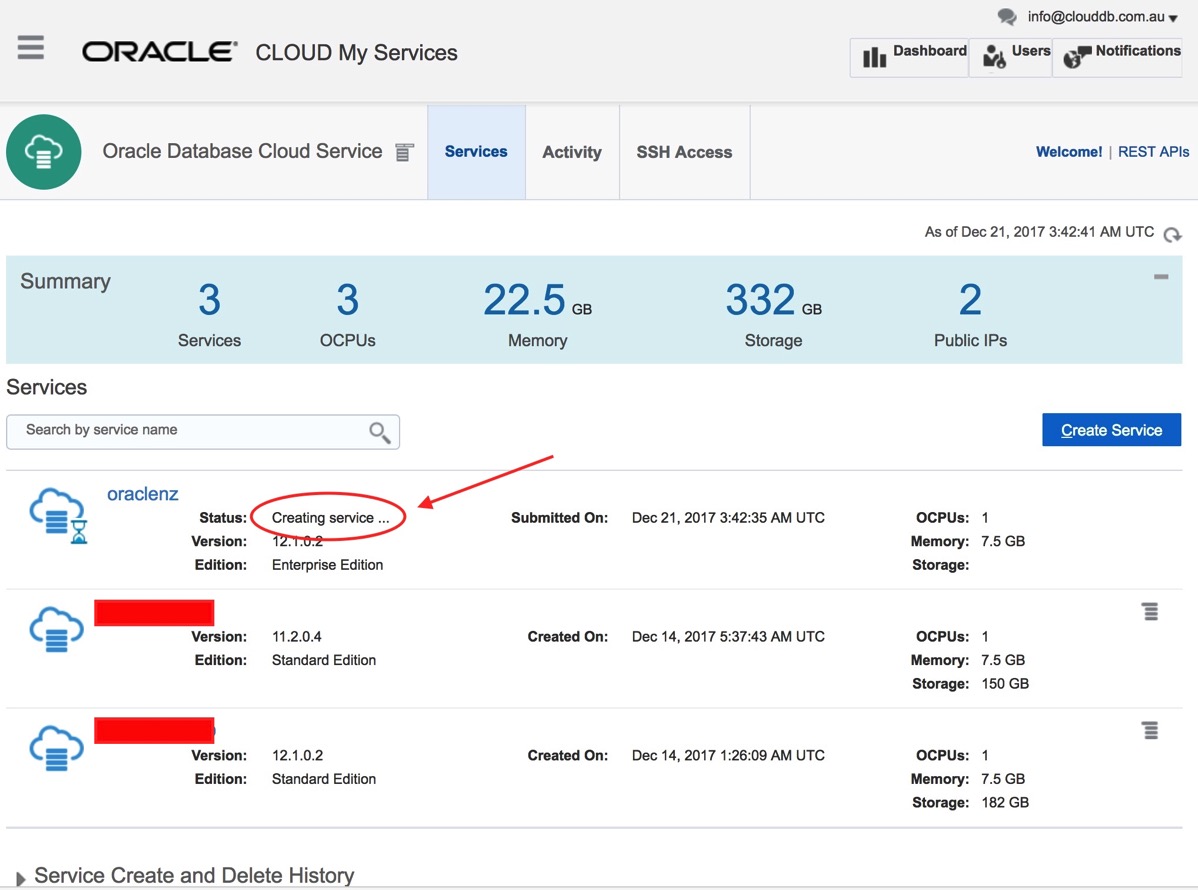
Finally, review and confirm all your responses and press Create.

2. Increase Storage volume for the Oracle Database software, the database files, and then format and mount them.
When the service is created, we will proceed to increase the storage volume to install the Oracle Database RDBMS. BY default the instance is created with only 32GB of storage (Note that the creation processes never asked us for our storage size requirement).
Click on the service name you just create (As per image bellow)
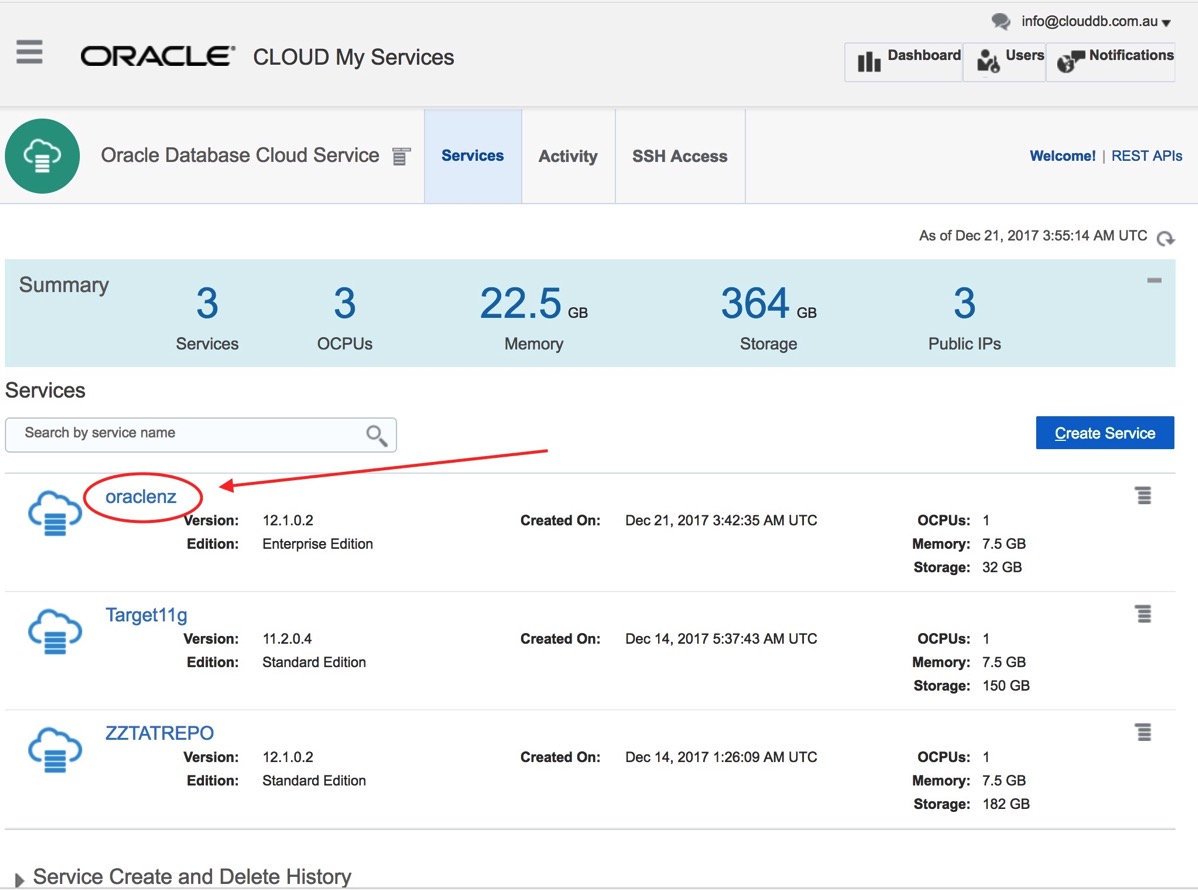
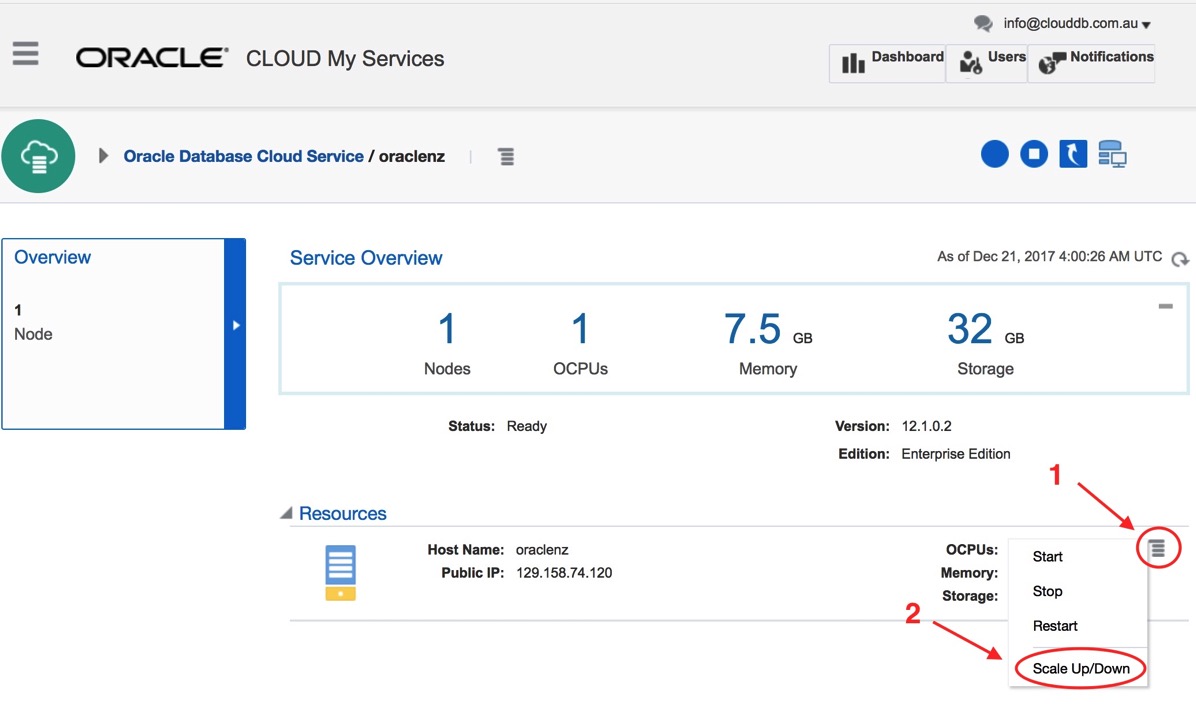
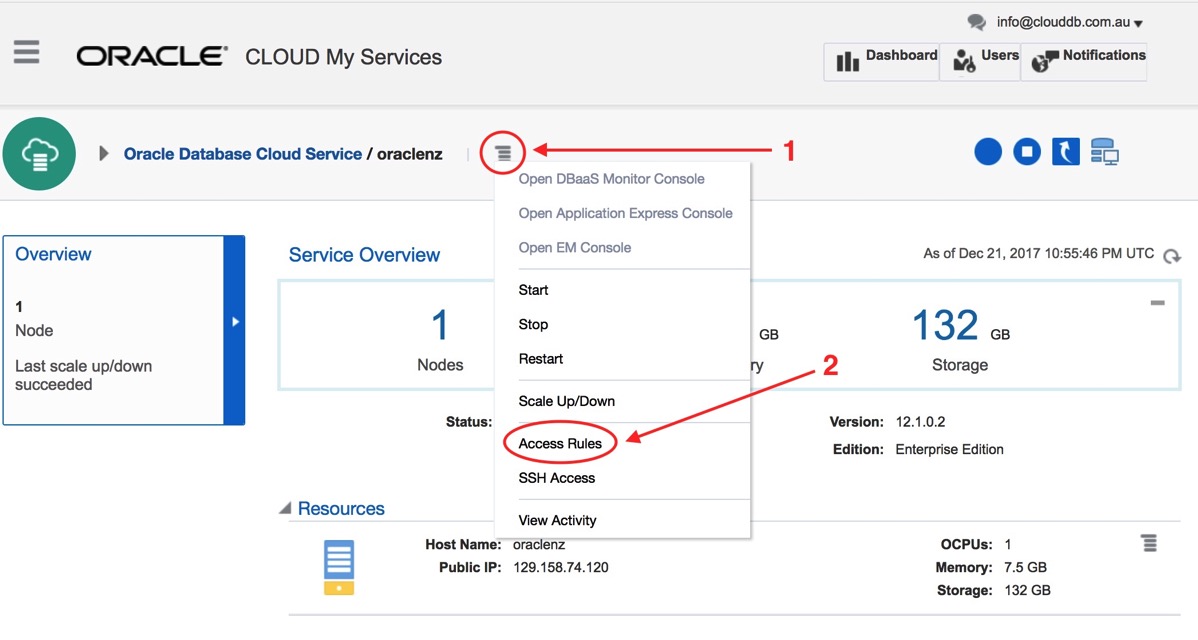
In your Service Overview page, please click on the Manage this Node Menu (Step 1 bellow) and then select Scale Up/Down (Step 2 bellow).
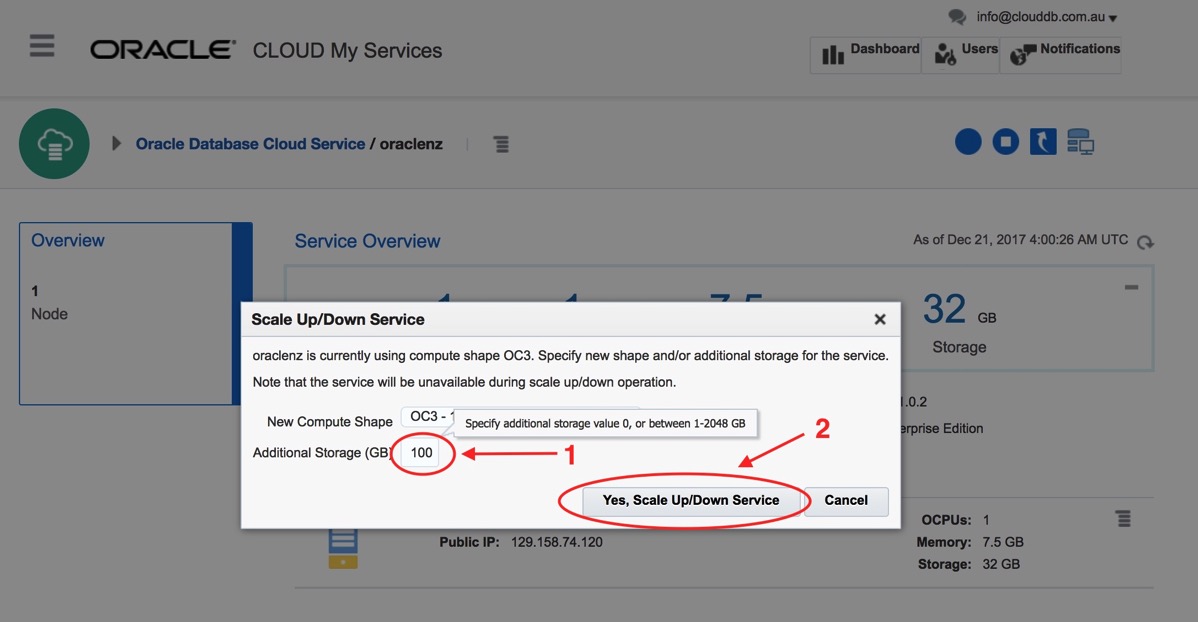
Then add the amount of additional Storage you will like to add to your service, in this case we will enter 100 GB (Step 1 Bellow) and Click on Yes, Scale Up/Down Service (Step 2 Bellow).
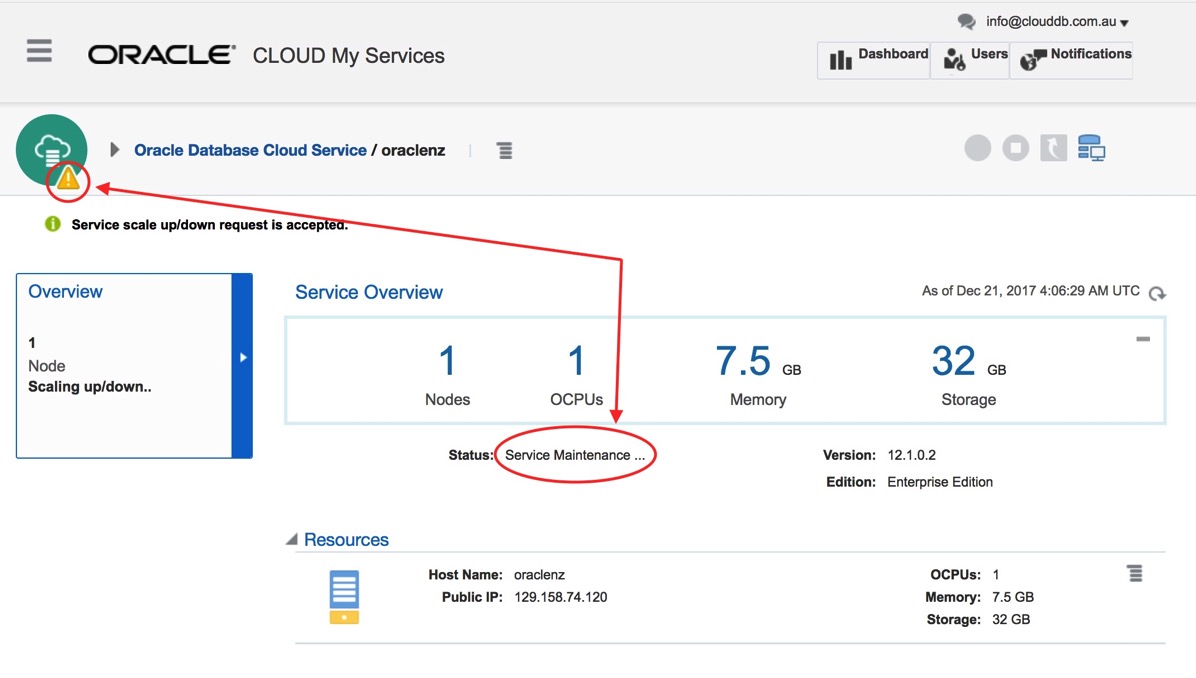
Now our Service is on Maintenance Mode as you can see bellow.
When the maintenance is completed, the next step will be to connect to the service via SSH (step 1 bellow) and configure our storage (as root – step 2 bellow).

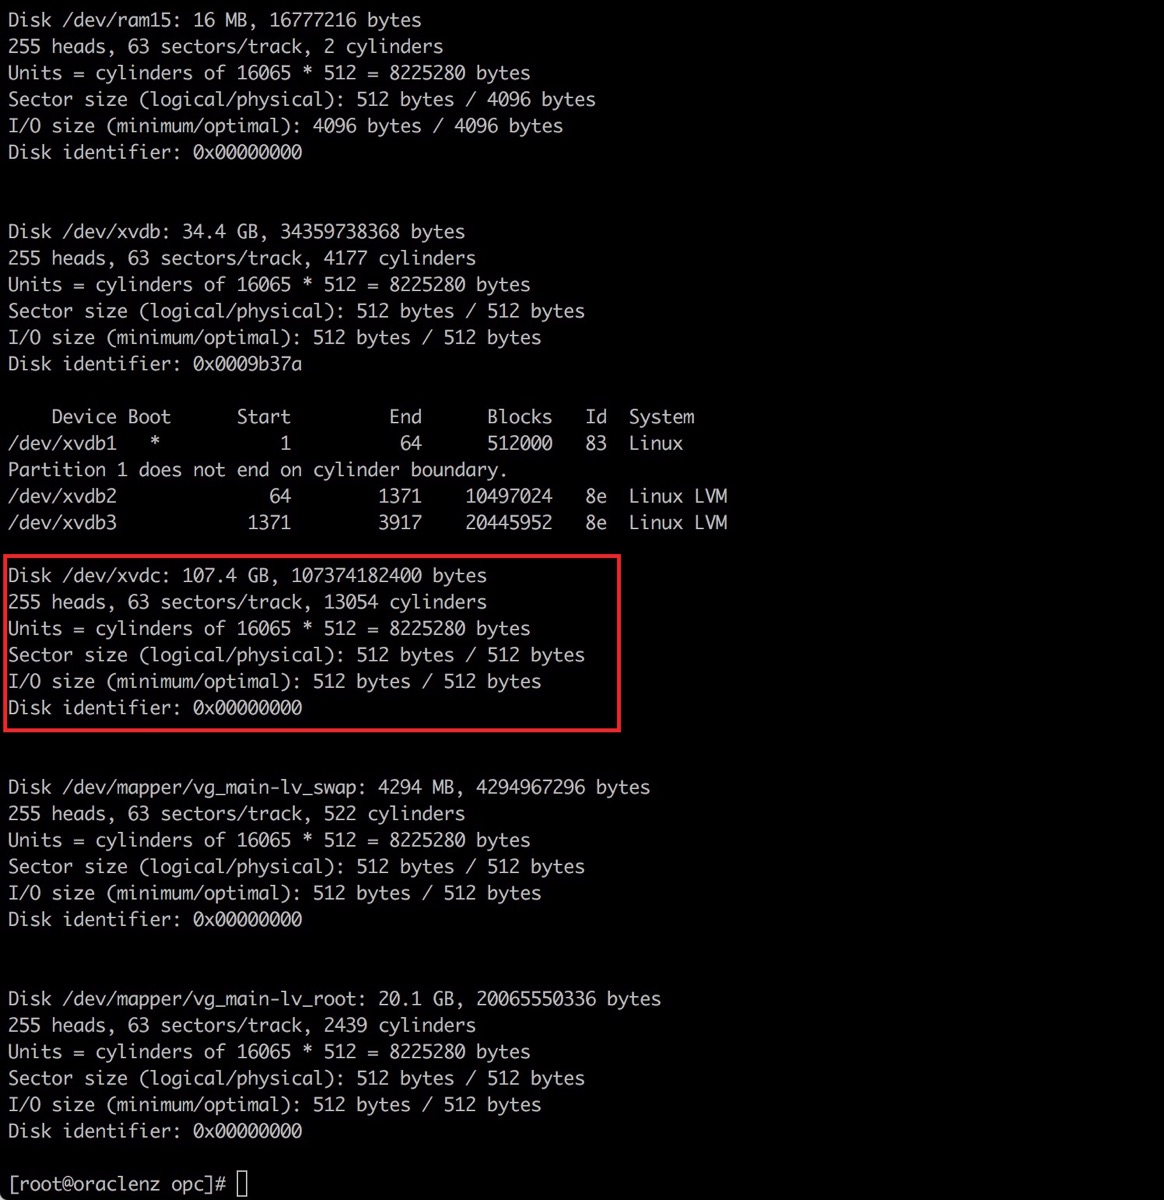
Run the “fdisk -l” command and find the details of your newly added disk.
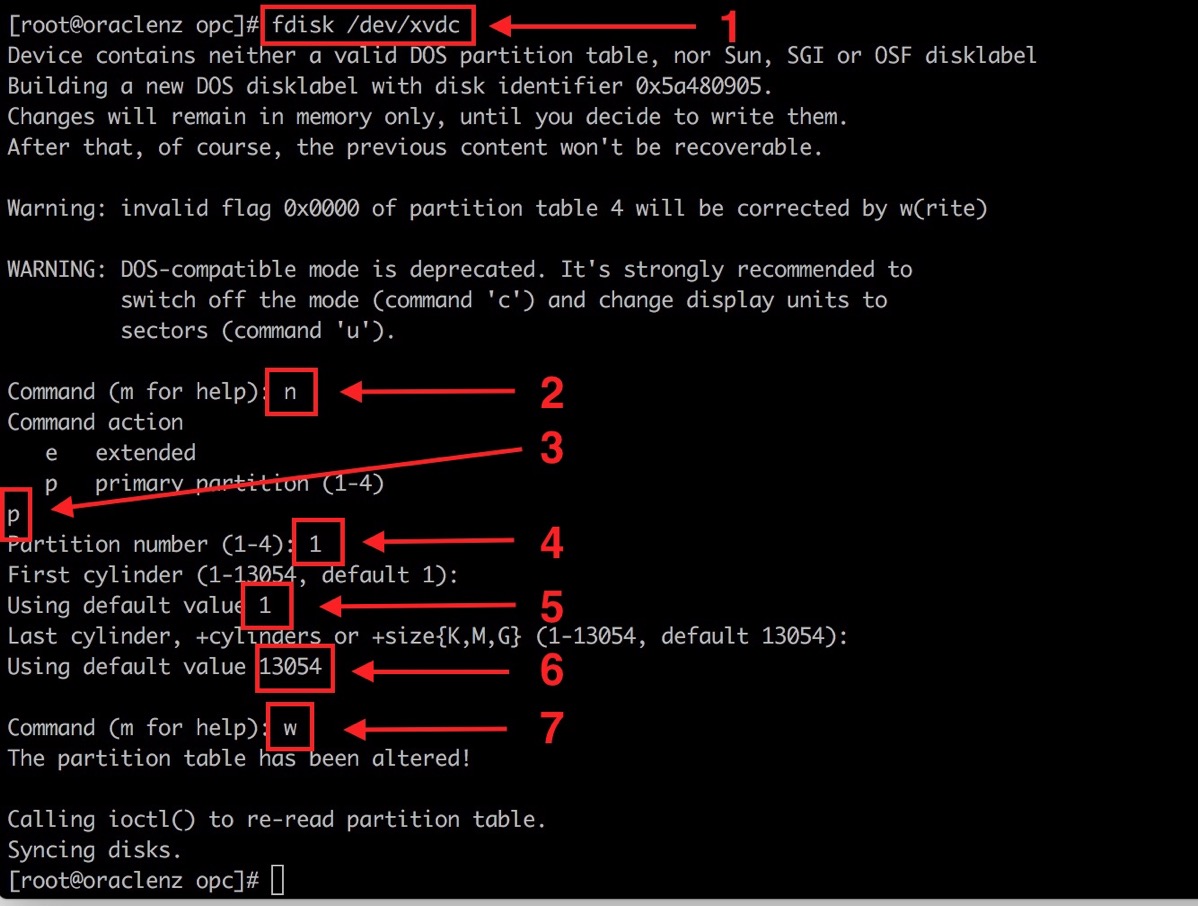
Then prepare the disk by using the command “fdisk” plus your device name as shown bellow.
The next step is to create the new file system on the new created volume using the command “mkfs” as shown bellow.
$ mkfs.ext4 -L db_home /dev/xvdc1
When the partition is ready, we can check if the folder /u01 exists (it should be created by default but empty), and then to enable this new mount point across reboots we will record it on the /etc/fstab , mount it and change the ownership to oracle:oinstall . As the final step of this section (6 bellow) we will copy the oracle software binaries from the staging area located at /scratch/db to the new /u01 location.

3. Stage the Oracle Database software on the mount point you created for it
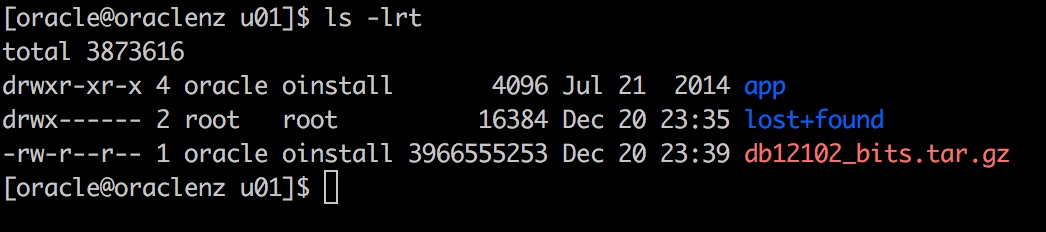
Now is time to start the database install. The first step will be to change the ownership of the tar file we copied to /u01 to oracle:oinstall.
$ chown oracle:oinstall /u01/db12102_bits.tar.gz
The next step is to connect as the user oracle and decompress the database file as shown bellow.
$ su – oracle
$ cd /u01
$ tar -xvzf db12102_bits.tar.gz
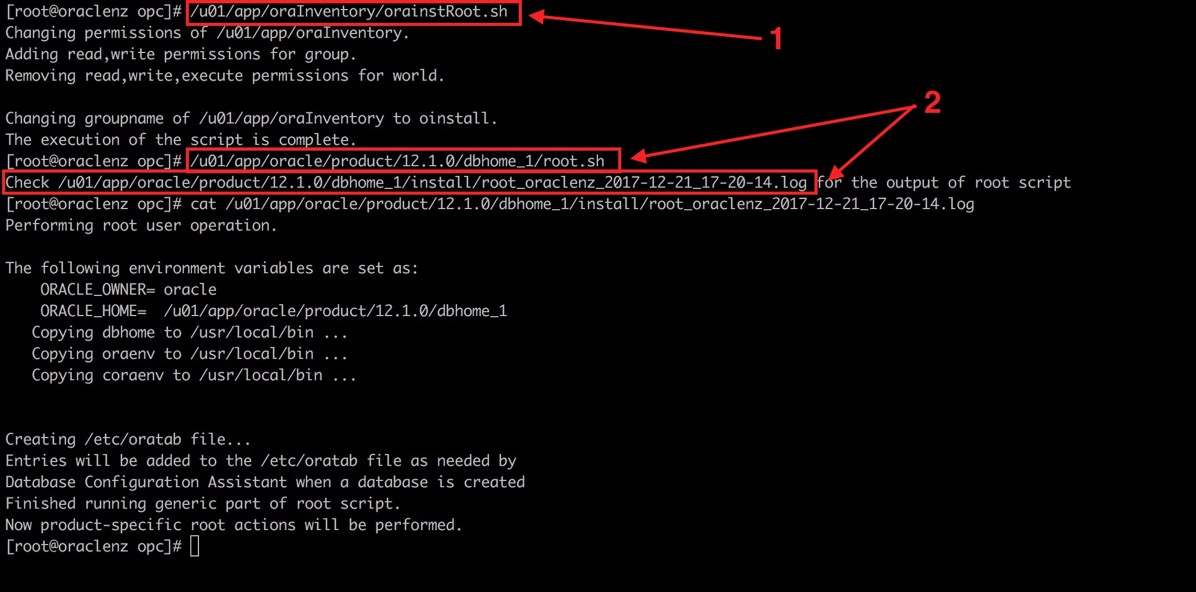
We now need to connect again as root and run the 2 scripts on steps 1 and 2 bellow.
4. Create a database and start the database instance.
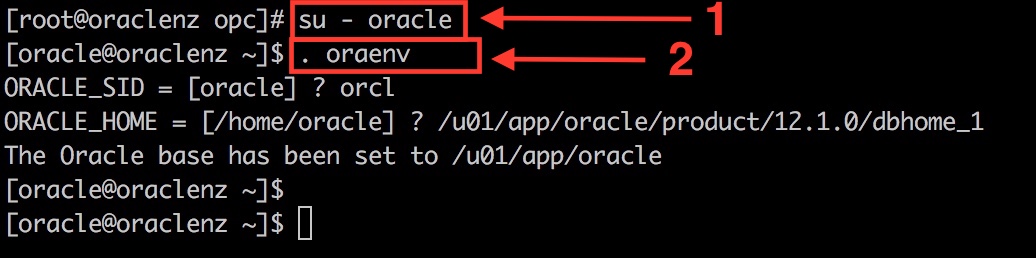
We are almost there 🙂 Let’s connect again to the user oracle and set the Oracle environmental variables for our installation.
Create the directories for the database data files and execute the silent installation of the database using the command bellow.
$ORACLE_HOME/bin/dbca -silent -createDatabase -templateName General_Purpose.dbc -gdbName orcl -sid orcl -createAsContainerDatabase false -SysPassword oracle123 -SystemPassword oracle123 -emConfiguration NONE -datafileDestination /u01/app/oracle/oradata/orcl -storageType FS -characterSet AL32UTF8 -memoryPercentage 50
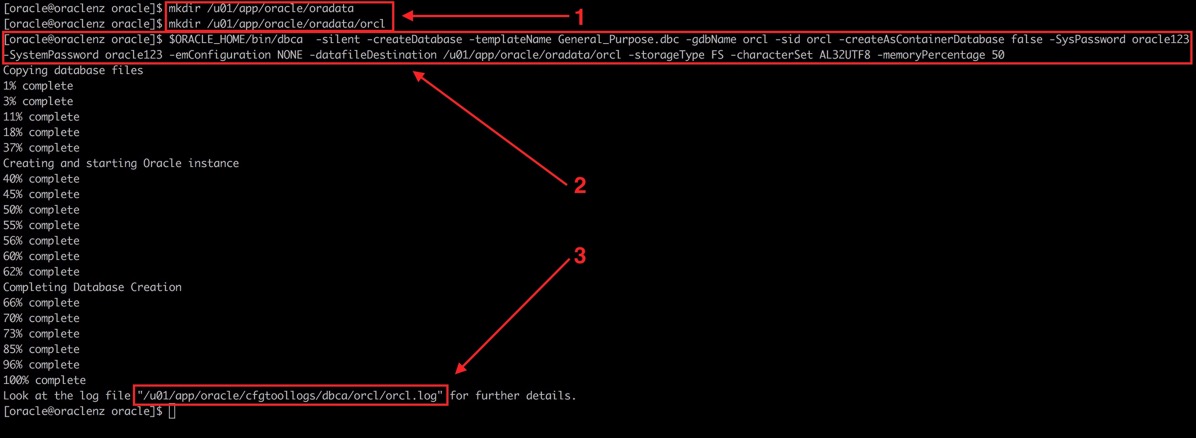
It will create your database on silent mode with the SID orcl, as a NON CDB database, passwords for SYS and SYSTEM as oracle123, using the destination directory created earlier and using 50% of available memory.
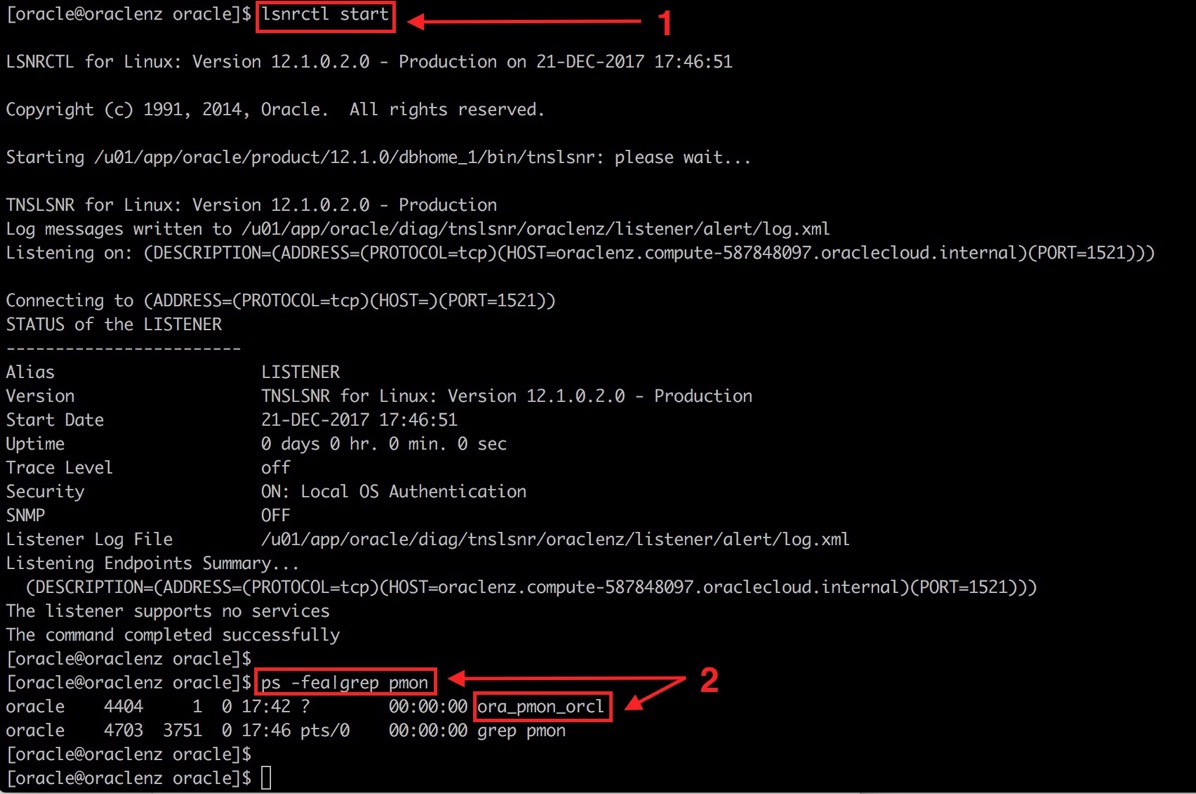
5. Start the listener for the database instance.
Start the listener service with the command lsnrctl.
6. Change one parameter to allow table spaces to be created without encryption
All new tablespaces that you create in a Database Cloud Service database are encrypted by default.
However, not all of the tablespaces created when you create a database deployment are encrypted:
- In an Oracle Database 11g database, none of the tablespaces created when you create a database deployment are encrypted.
- In an Oracle Database 12c Release 1 database, none of the tablespaces created when you create a database deployment are encrypted. This includes the tablespaces in the root (CDB$ROOT), the seed (PDB$SEED), and the PDB created when you create a database deployment.
- In an Oracle Database 12c Release 2 database, only the USERS tablespaces created when you create a database deployment are encrypted. None of the other tablespaces are encrypted. This includes the tablespaces in the root (CDB$ROOT), the seed (PDB$SEED), and the PDB created when you create a database deployment.
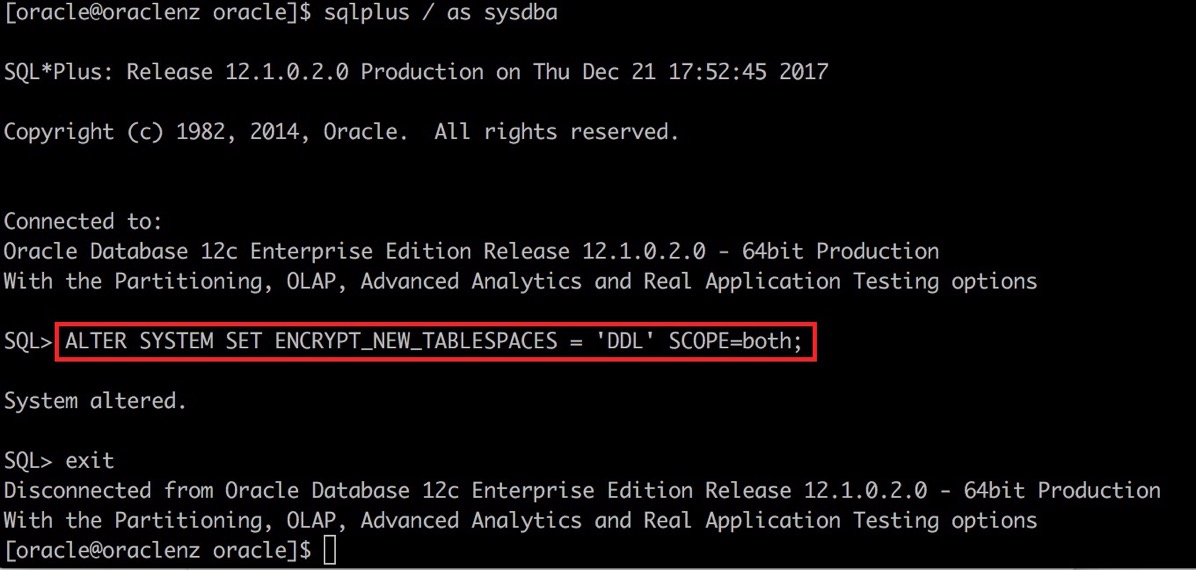
So, when trying to create a new tablespace on our newly created Cloud Instance we will fail and see an encryption error. The solution to this situation is easy, just change the instance parameter ENCRYPT_NEW_TABLESPACES to DDL as shown bellow and we are ready to go.
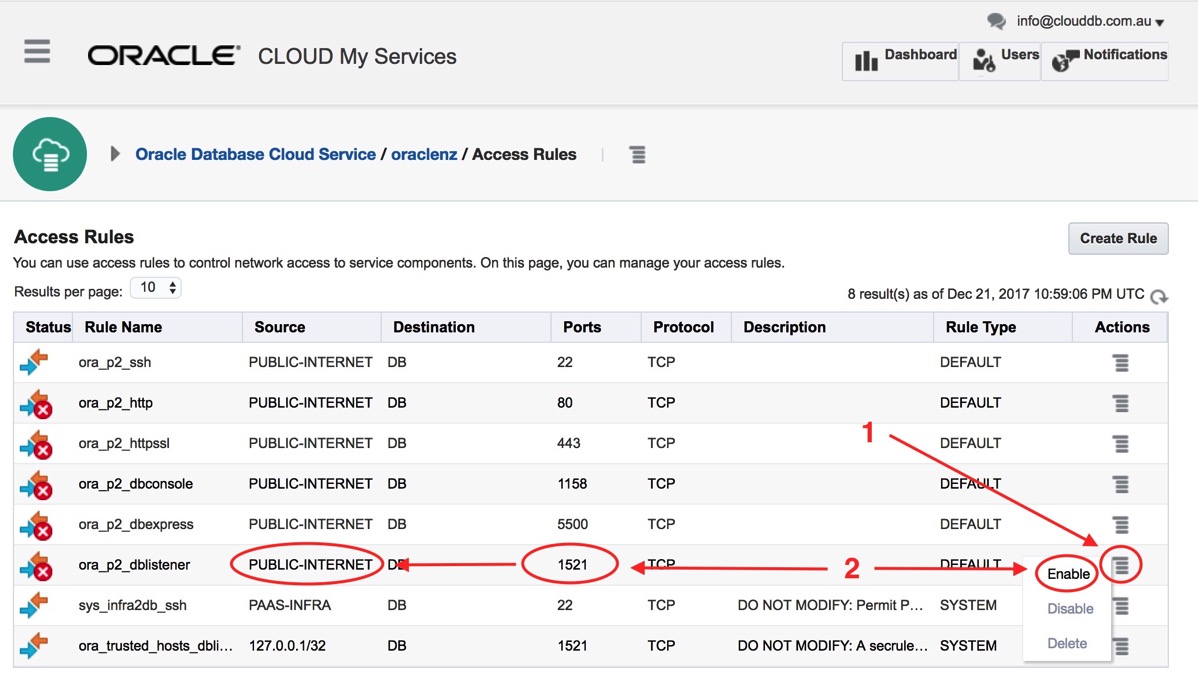
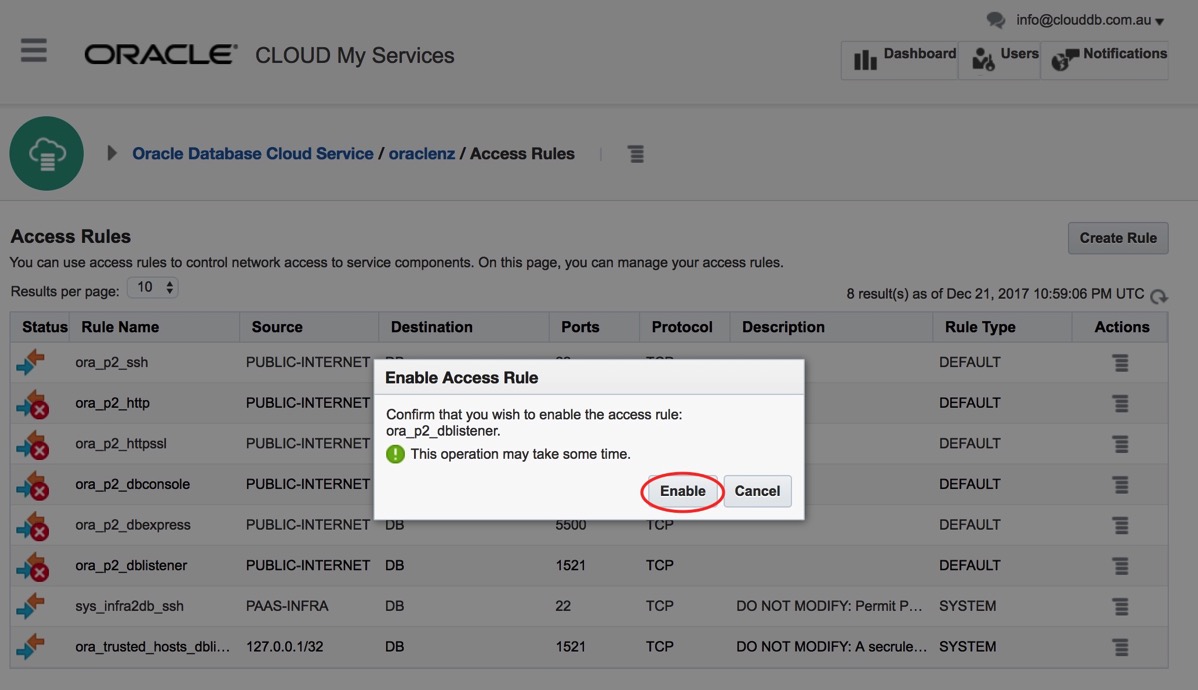
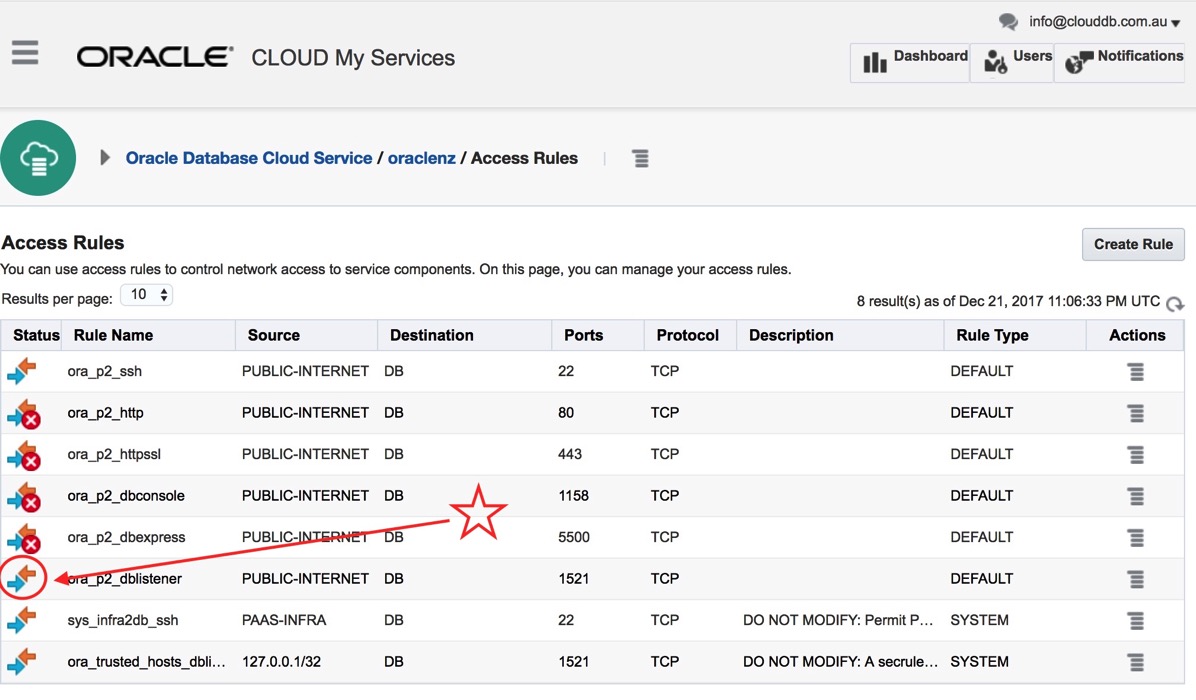
7. Create Oracle Compute Cloud Service security rules to permit access to services of the database from outside the Oracle Cloud.
To finalize our demonstration, all what is left is to open the port 1521 to public access as shown bellow, and we are done!
Reference Material:
- About Database Cloud Service Database Deployments https://docs.oracle.com/en/cloud/paas/database-dbaas-cloud/csdbi/db-deployments.html#GUID-660363B8-0E2F-4A4F-A9BD-70A43F332A16
- About Tablespace Encryption https://docs.oracle.com/en/cloud/paas/database-dbaas-cloud/csdbi/use-tablespace-encryption-this-service.html