Oracle has launched Oracle 18c and the Autonomous Data Warehouse Cloud Service (ADWC). Many people call the Oracle 18c as the Autonomous database, and this is a huge mistake! Oracle 18c (that is in reality Oracle 12.2.0.2) is not an autonomous database, this version includes many improvements and some automation options, but is not autonomous at all. You would be able to use it on-premises and in the Cloud like you were able to use any previous version of Oracle Database and would never be autonomous. By the other side, the Autonomous Data Warehouse Cloud Service (ADWC) is the first autonomous effort by part of Oracle and comes with all features automatically implemented, and all we would need to do is to load our data and tell the database our goals and that’s it! This new offering is based on Exadata technology that is fully-managed, pre-configured, optimized for Data Warehouse (DW) workloads and only available at Oracle Cloud. Another great benefit of this technology is that it can instantly scale compute or storage resources with zero downtime.
Today we will learn how to provision a new ADWC database, learn to connect your tools (SQL Developer) to it and play with different database services to see how he workload management capabilities affects the service performance . So I recommend you to get your free trial today at https://cloud.oracle.com/datawarehouse and start playing with it asap!
Prerequisites
- Oracle Cloud account, step-by-step trial sign up process would be explained when provisioning ADWC
- Download and install SQL Developer 17.4 or higher http://www.oracle.com/technetwork/developer-tools/sql-developer/downloads/index.html
- Non Windows users please install JDK 8u161 or higher http://www.oracle.com/technetwork/java/javase/downloads/jdk8-downloads-2133151.html
Provisioning an ADWC Instance
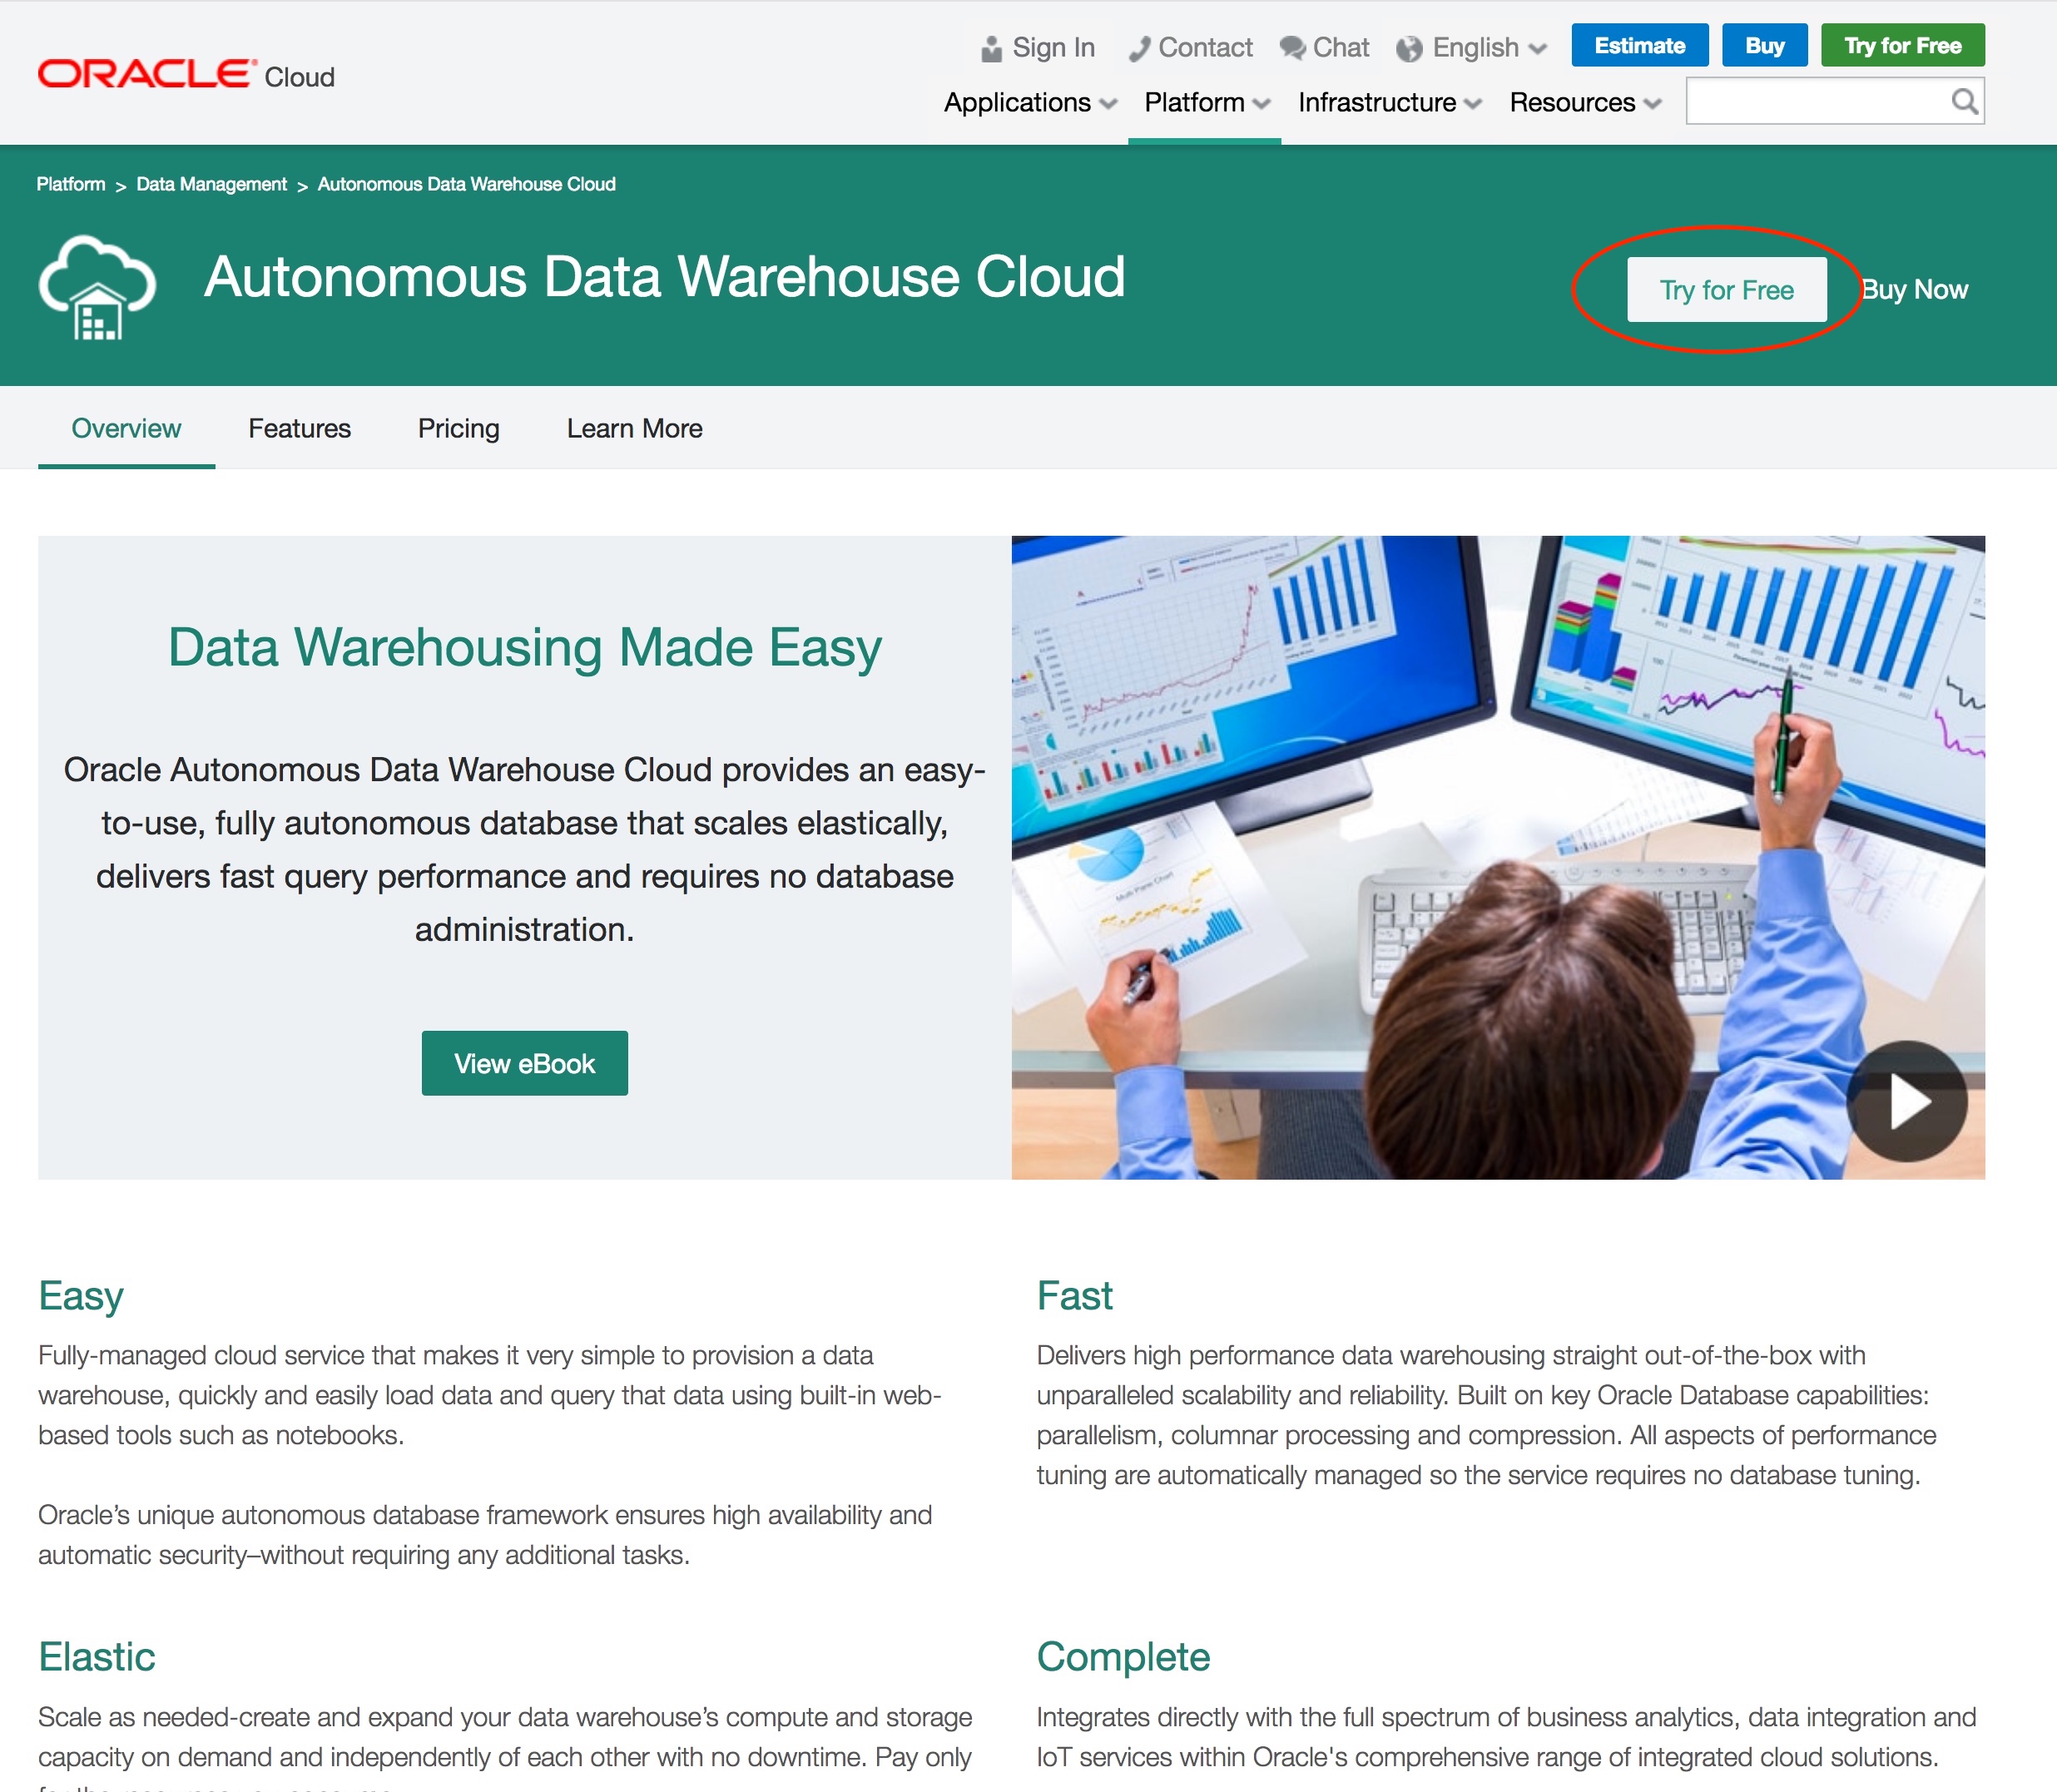
To provision an ADWC Instance please go to https://cloud.oracle.com/datawarehouse and click at “Try for Free” on the top right section.
The next step would be to fill the sign-up form for the Free Oracle Cloud Promotion. When filling it is very important to select “North America” or “EMEA” for Default Data Region. This is required because ADWC is only currently available at U.S and Frankfurt (EMEA) Data Centers.

During the sign-up process, you would be required to enter a credit card information. Do not worry because Oracle will not charge this credit card unless you explicitly confirm after the end of the trial that you want to become a paid subscription.

When the sign-up process is completed, you will receive an email from Oracle Cloud with your service details (Username, temporary password, Cloud Account, and link to the service).

When connecting for the first time you will be required to change your temporary password. You will then land at the Dashboard page with the ADWC subscription box, click on the menu icon (bottom right corner of the ADWC Subscription box) and select “Open Service Console”.

Another way to get to the ADWC Service Console is by clicking on the menu icon at the left top corner of the page then select “Services” and then “ADWC”.

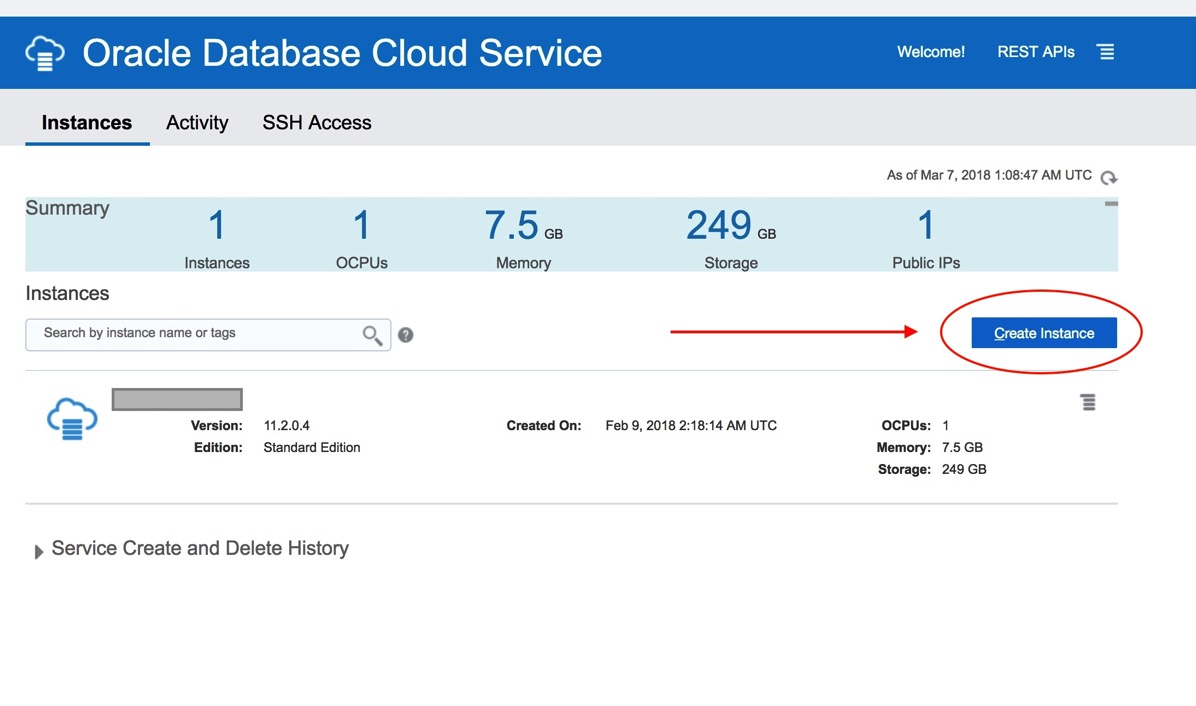
Now that you are at the Service Console main page please click on “Create Instance” .
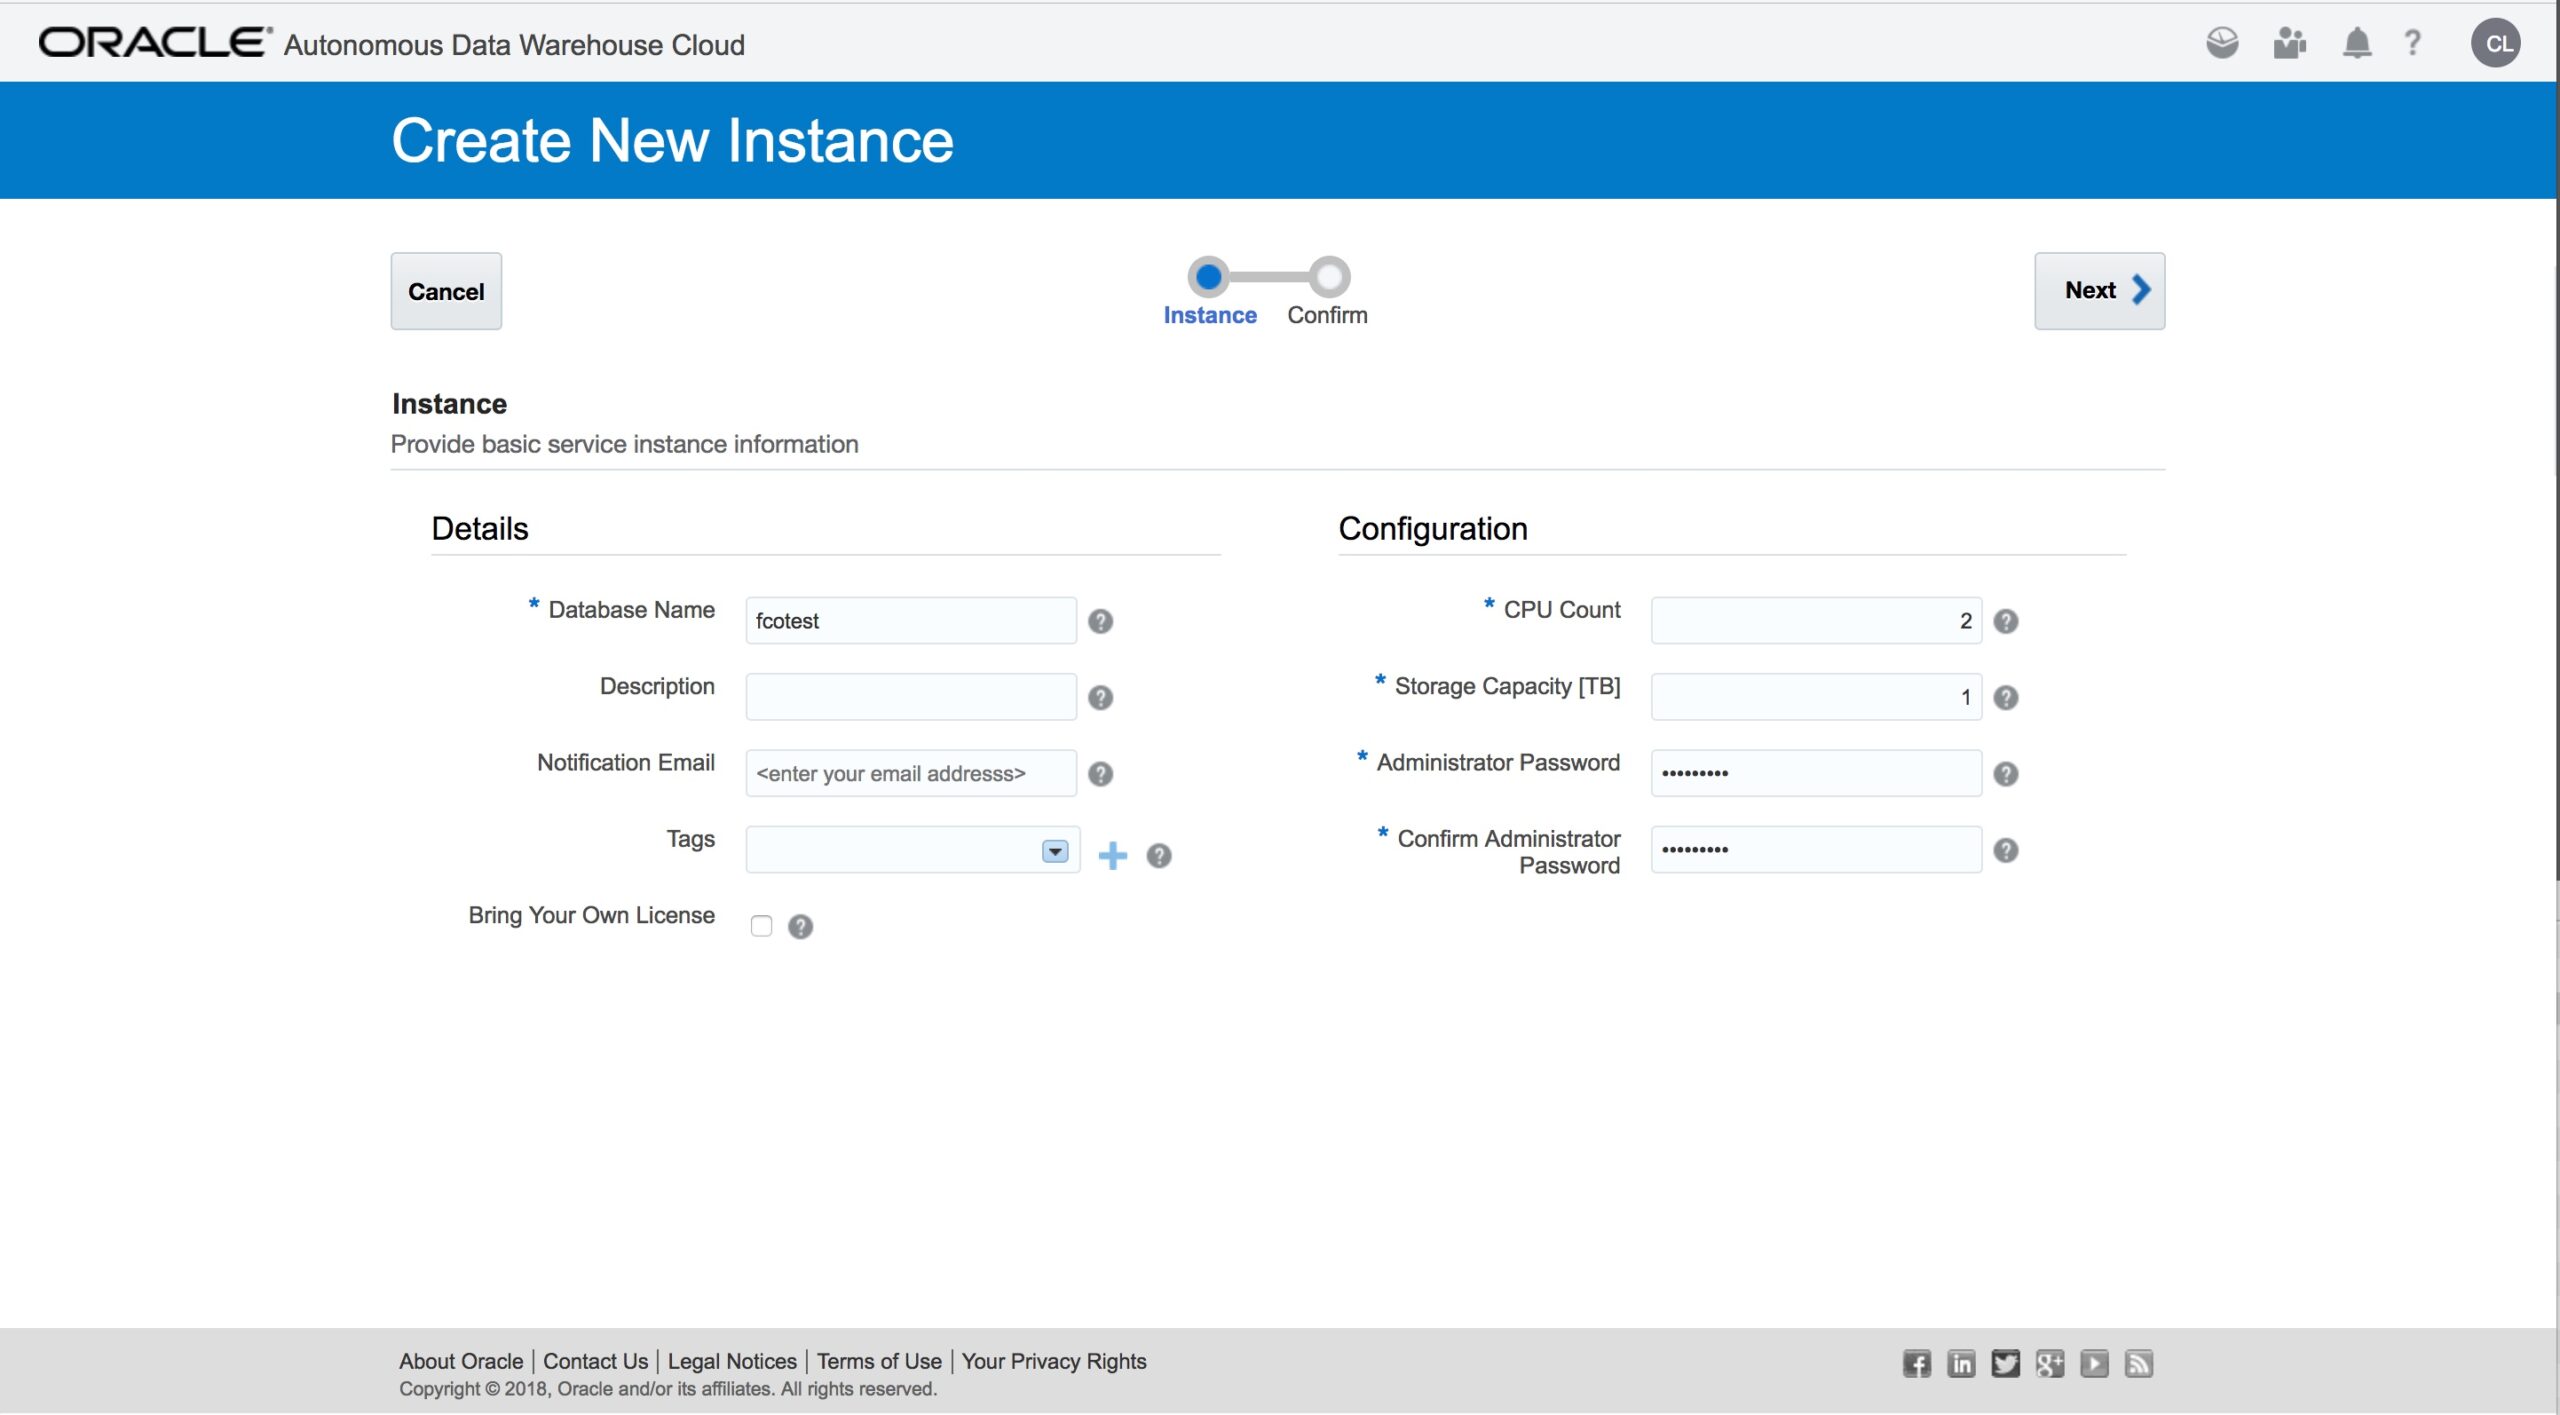
The ADWC creation process is very simple (to be honest, one of the simplest one I have ever seen). Just enter:
- Database Name
- CPU Count (Number of Oracle CPUs required)
- Storage Capacity required (in TB)
- Administrator Password
Note: If you are bringing your own database licenses, please check the Bring your own License box.
After entering the above details (the only four fields required) please click “Next”.
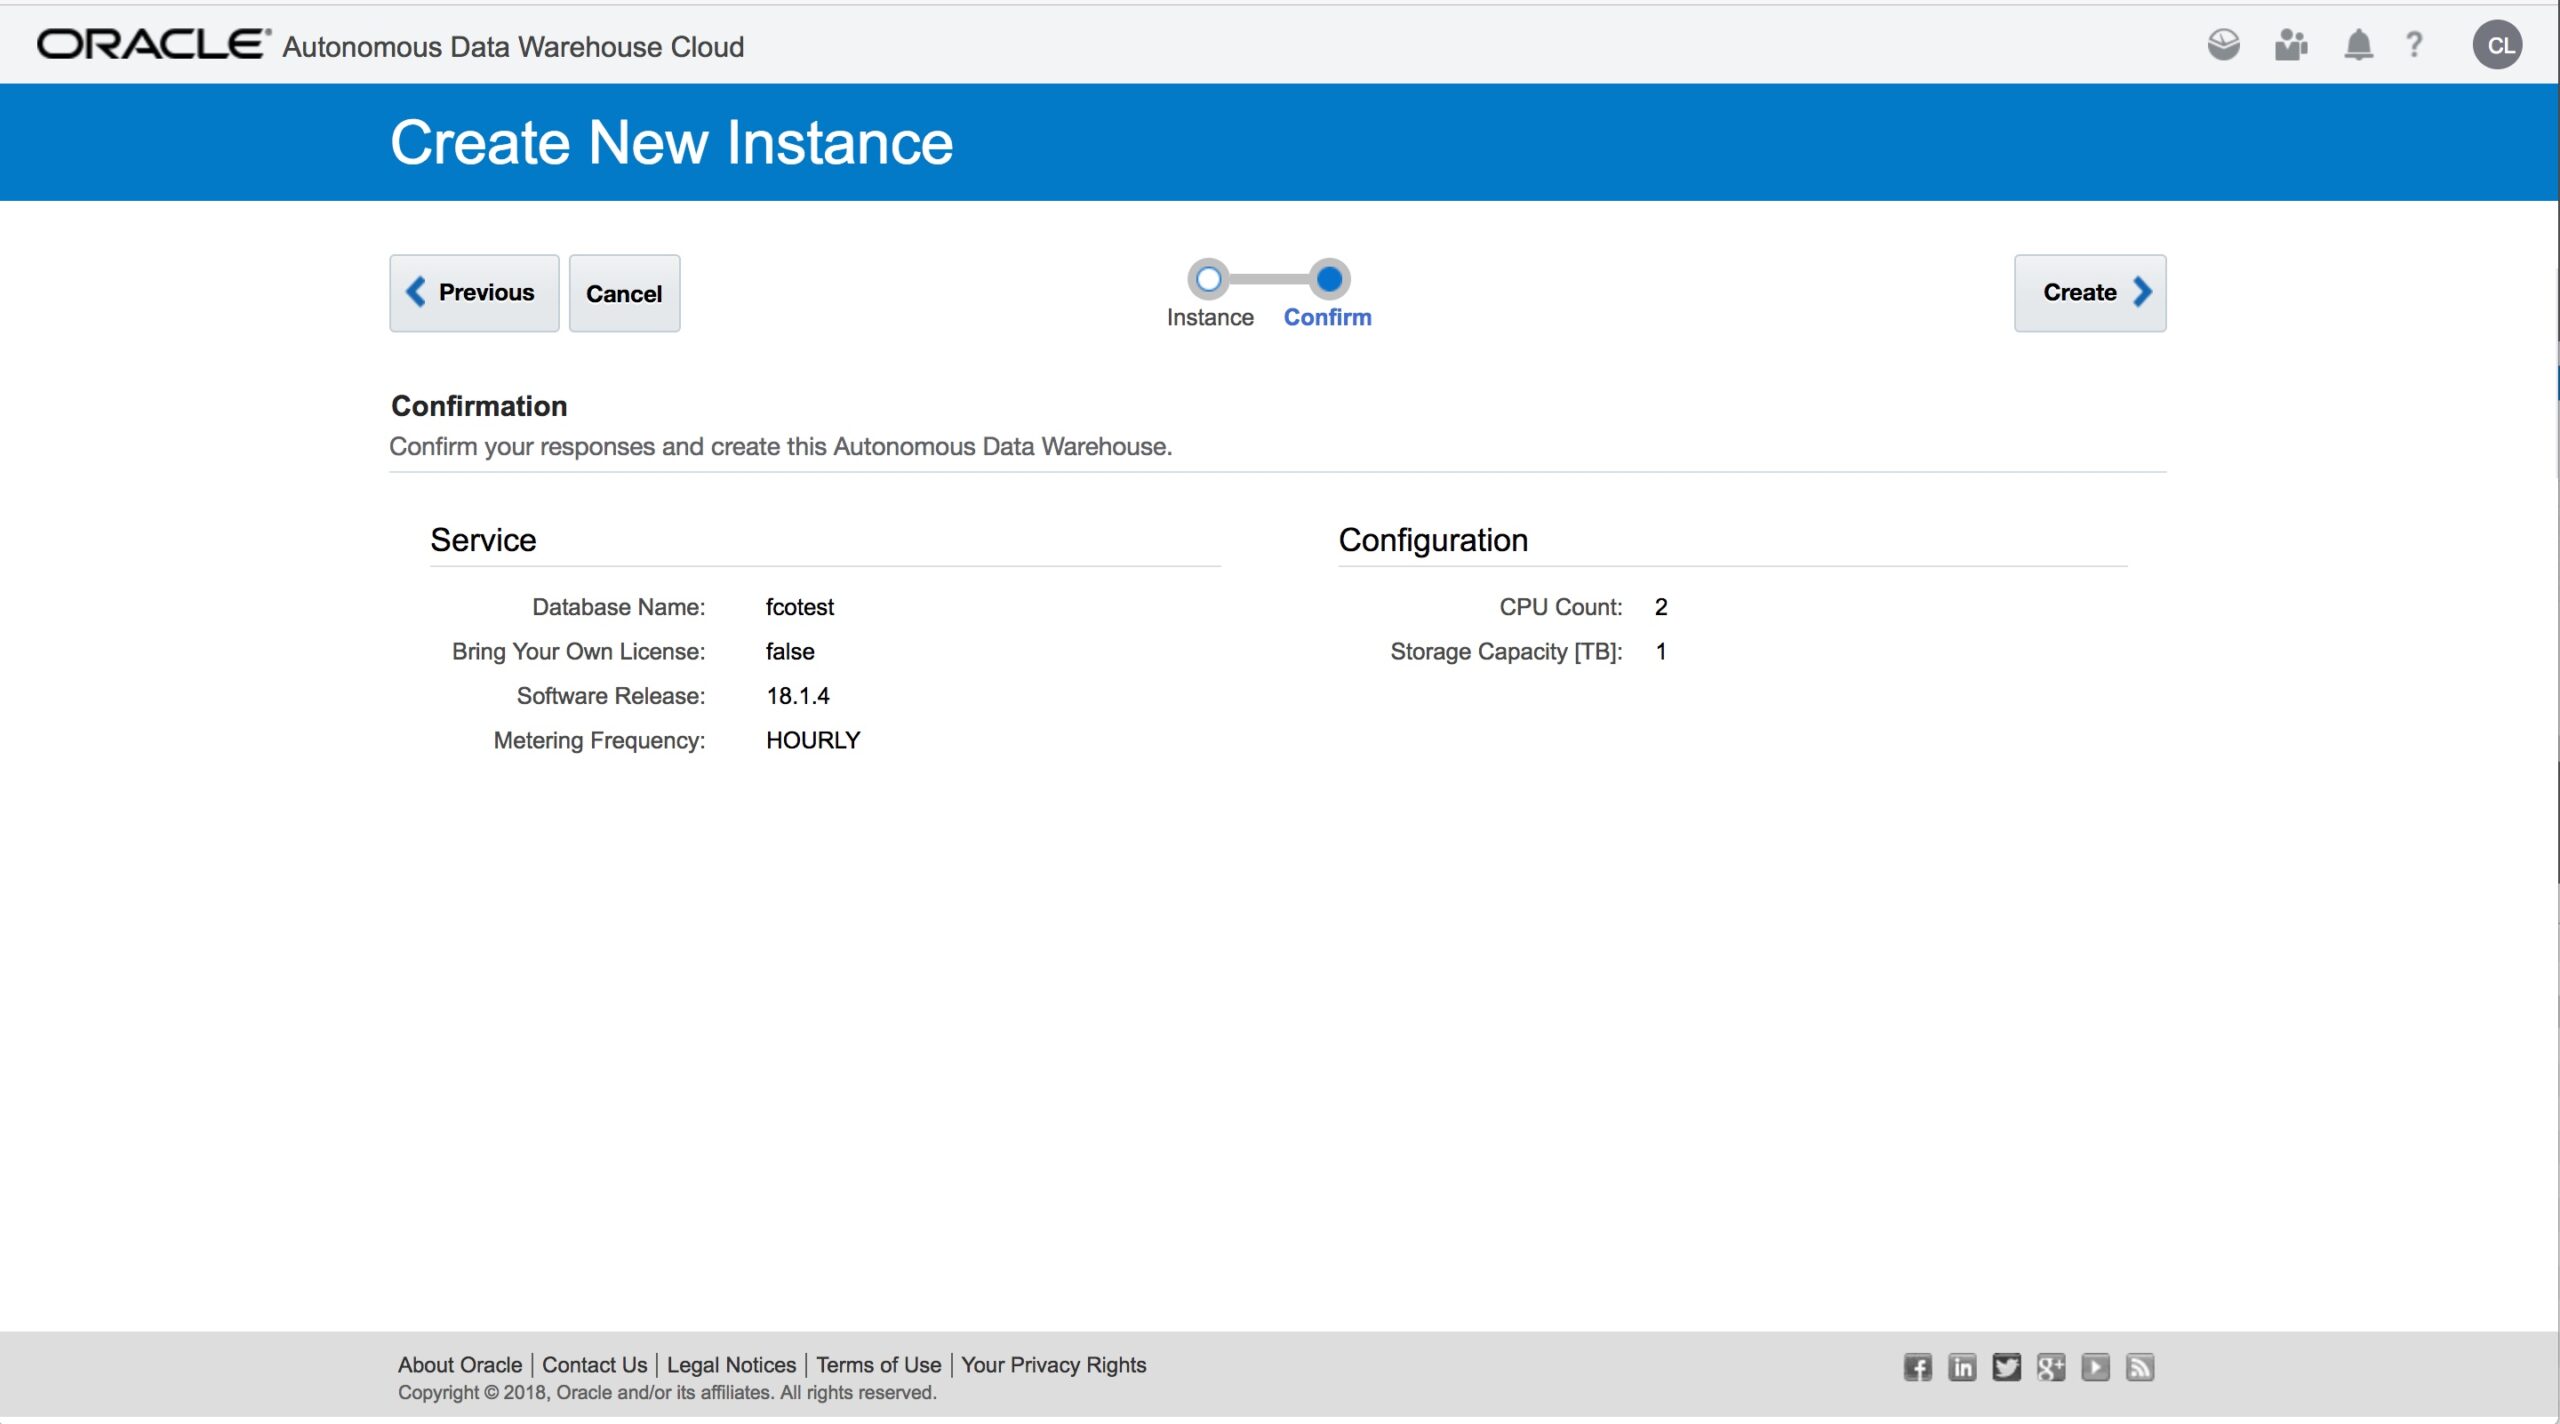
The following step is to review all information entered and click “Create”.
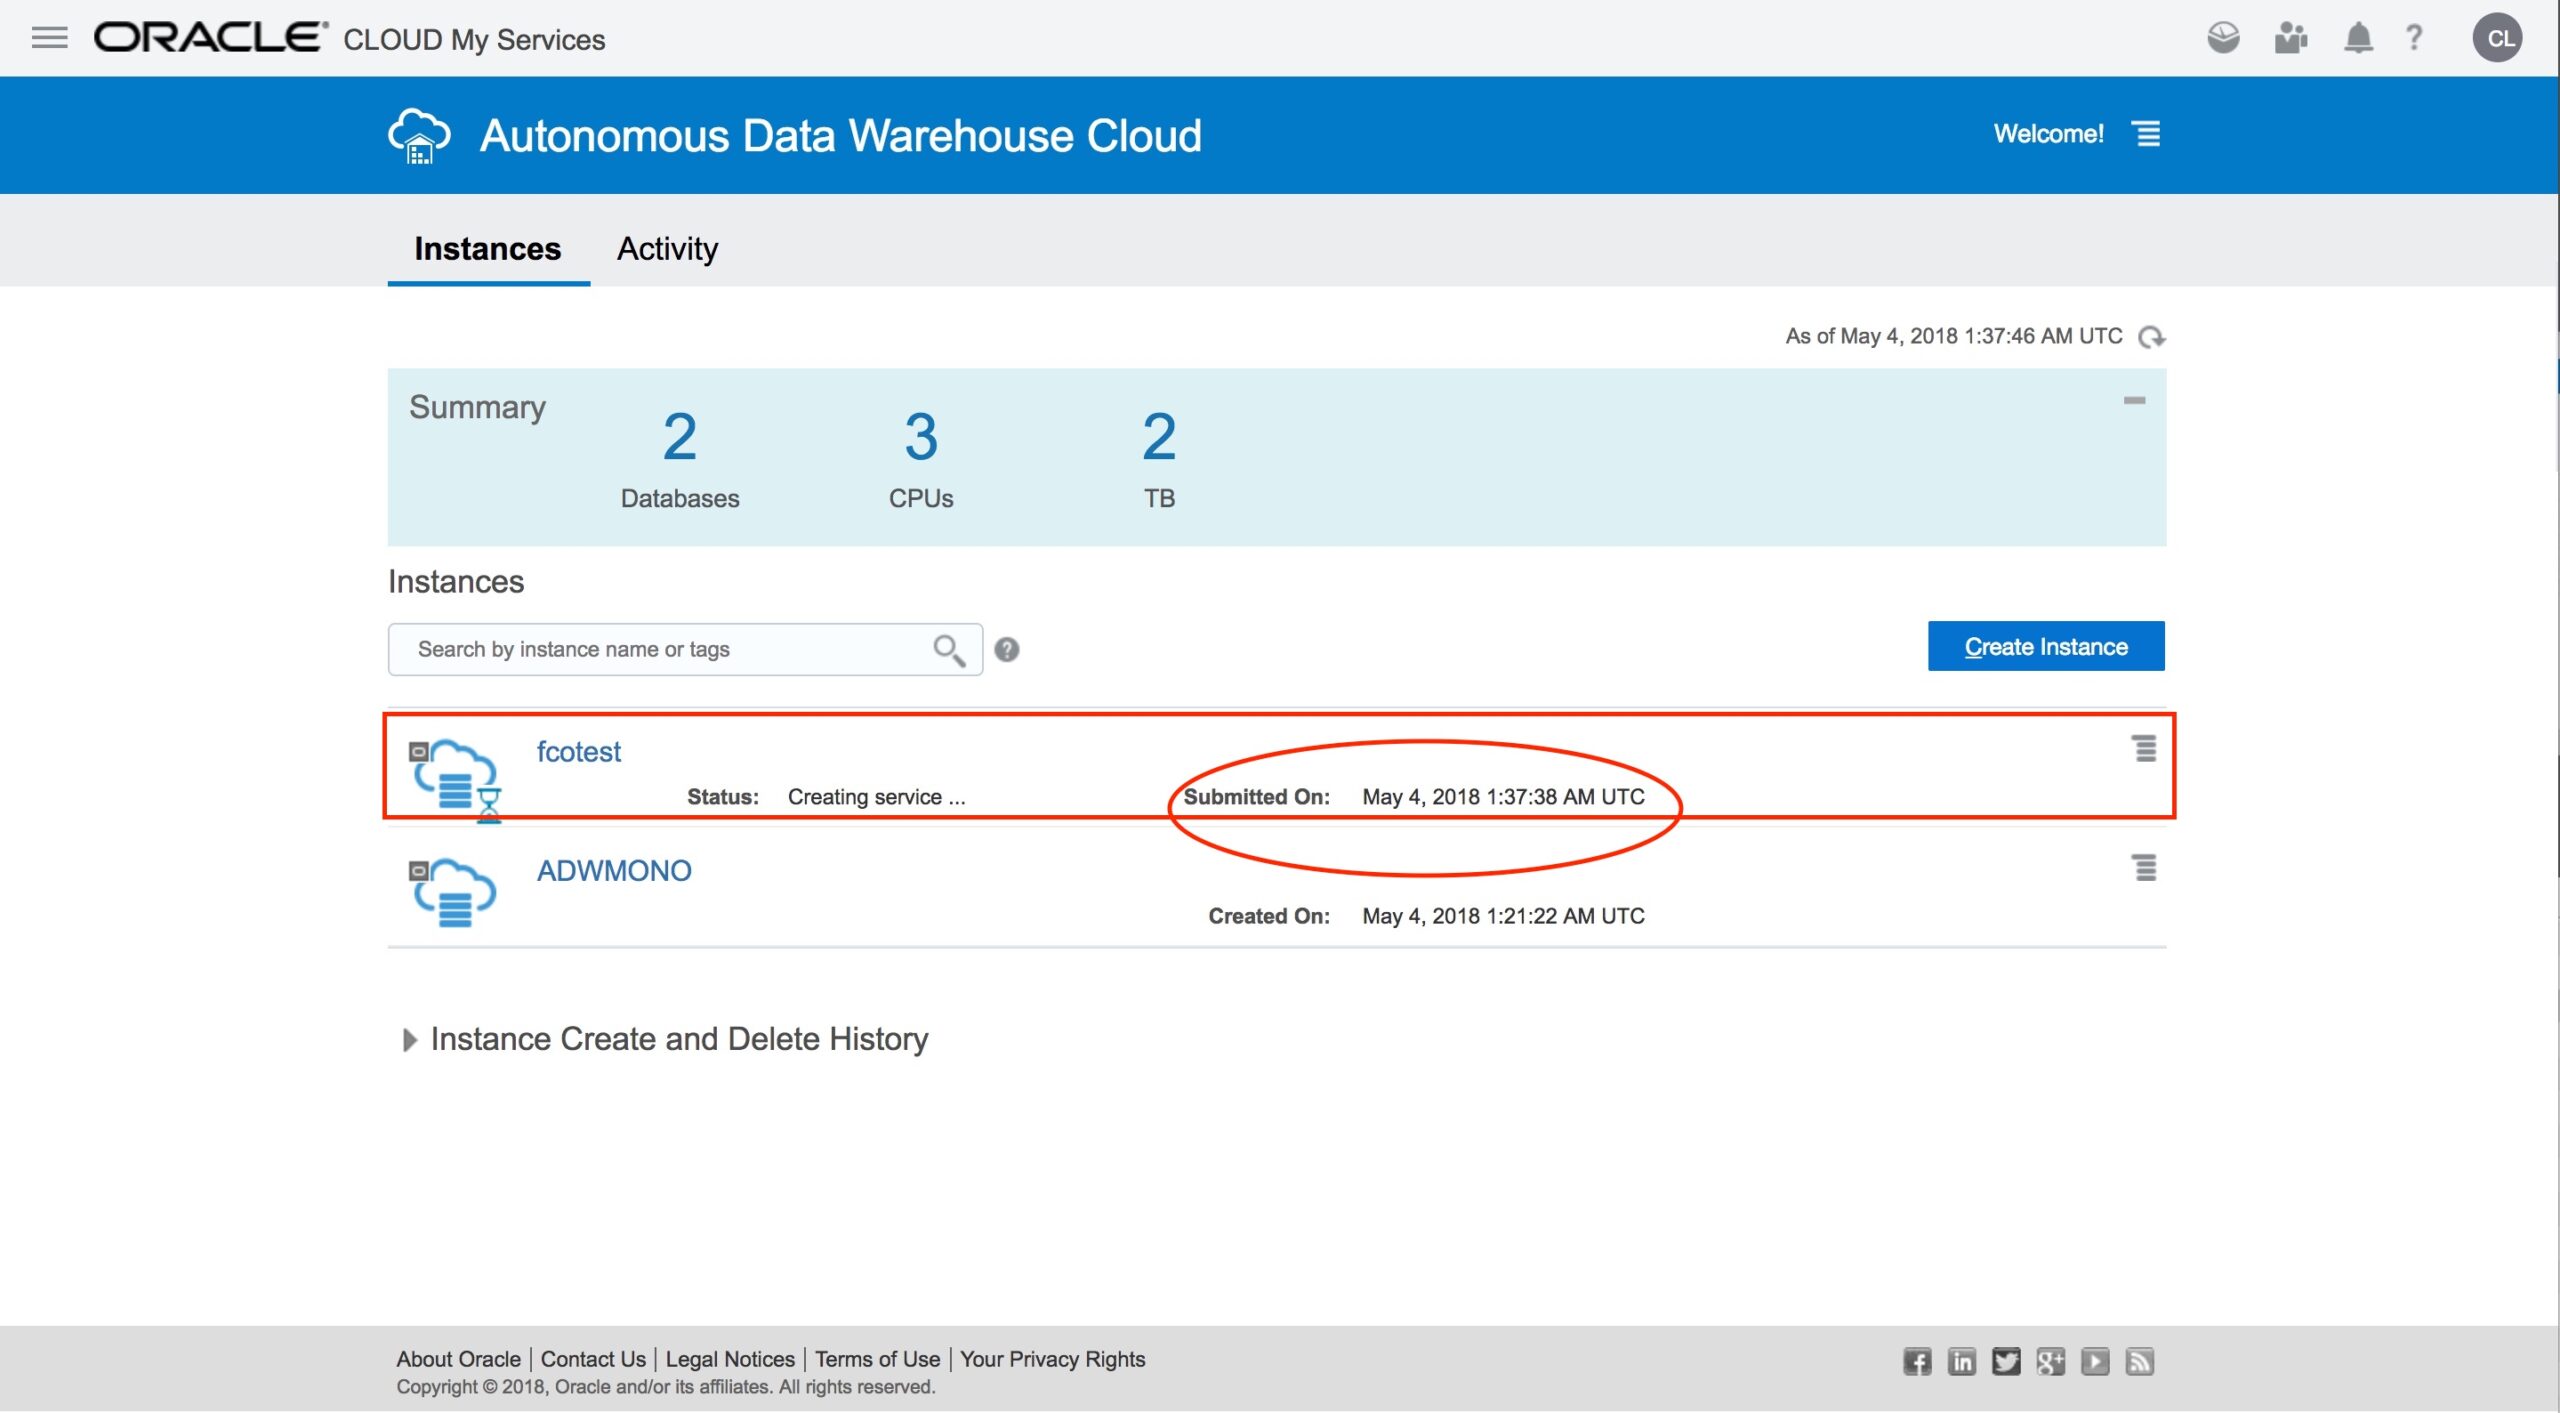
You will then see that the new instance status is now “Creating Service” and it was submitted at 1:37:38 AM UTC.
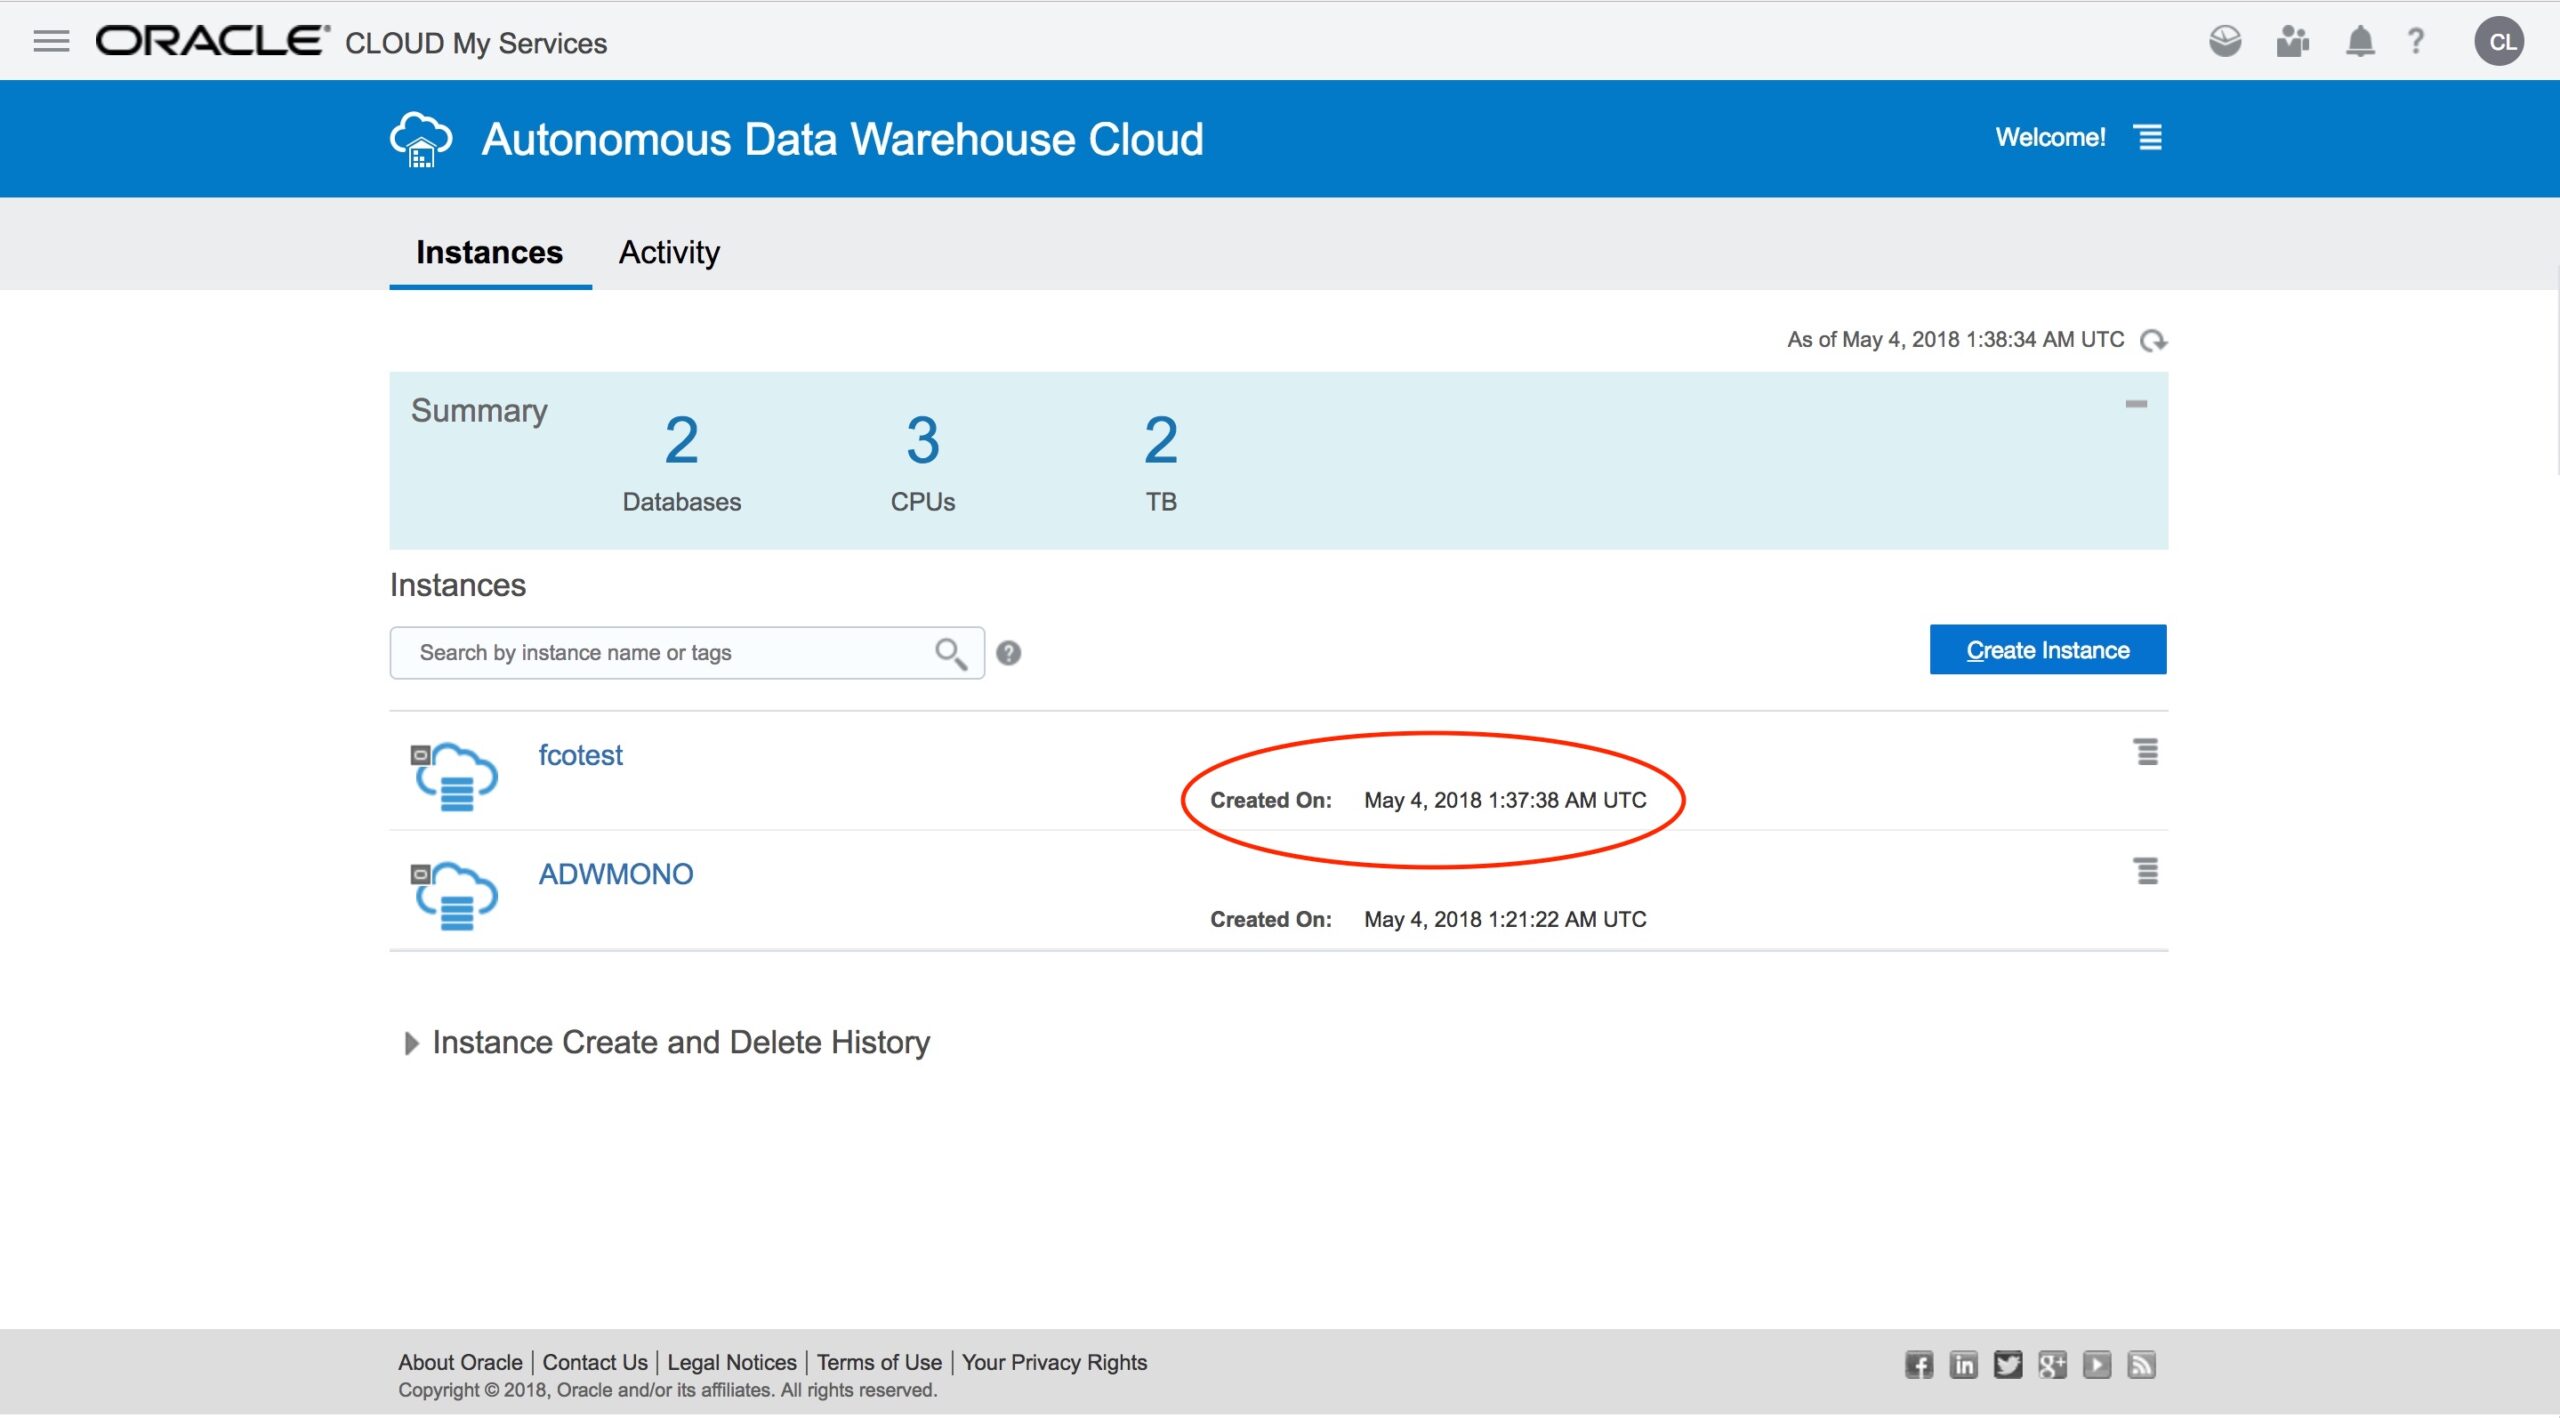
If we do a refresh of the page we will then see that the status of the newly created instance will now show as “Created”, so in average this process now takes around 3 minutes (remember that when creating an Instance at PaaS it takes in general 15 to 20 minutes in average).
Connecting to ADWC
Now that the instance is created and available, let’s learn how to connect to it. Please connect on the menu icon of the newly created instance (as shown below) and select “Service Console”.

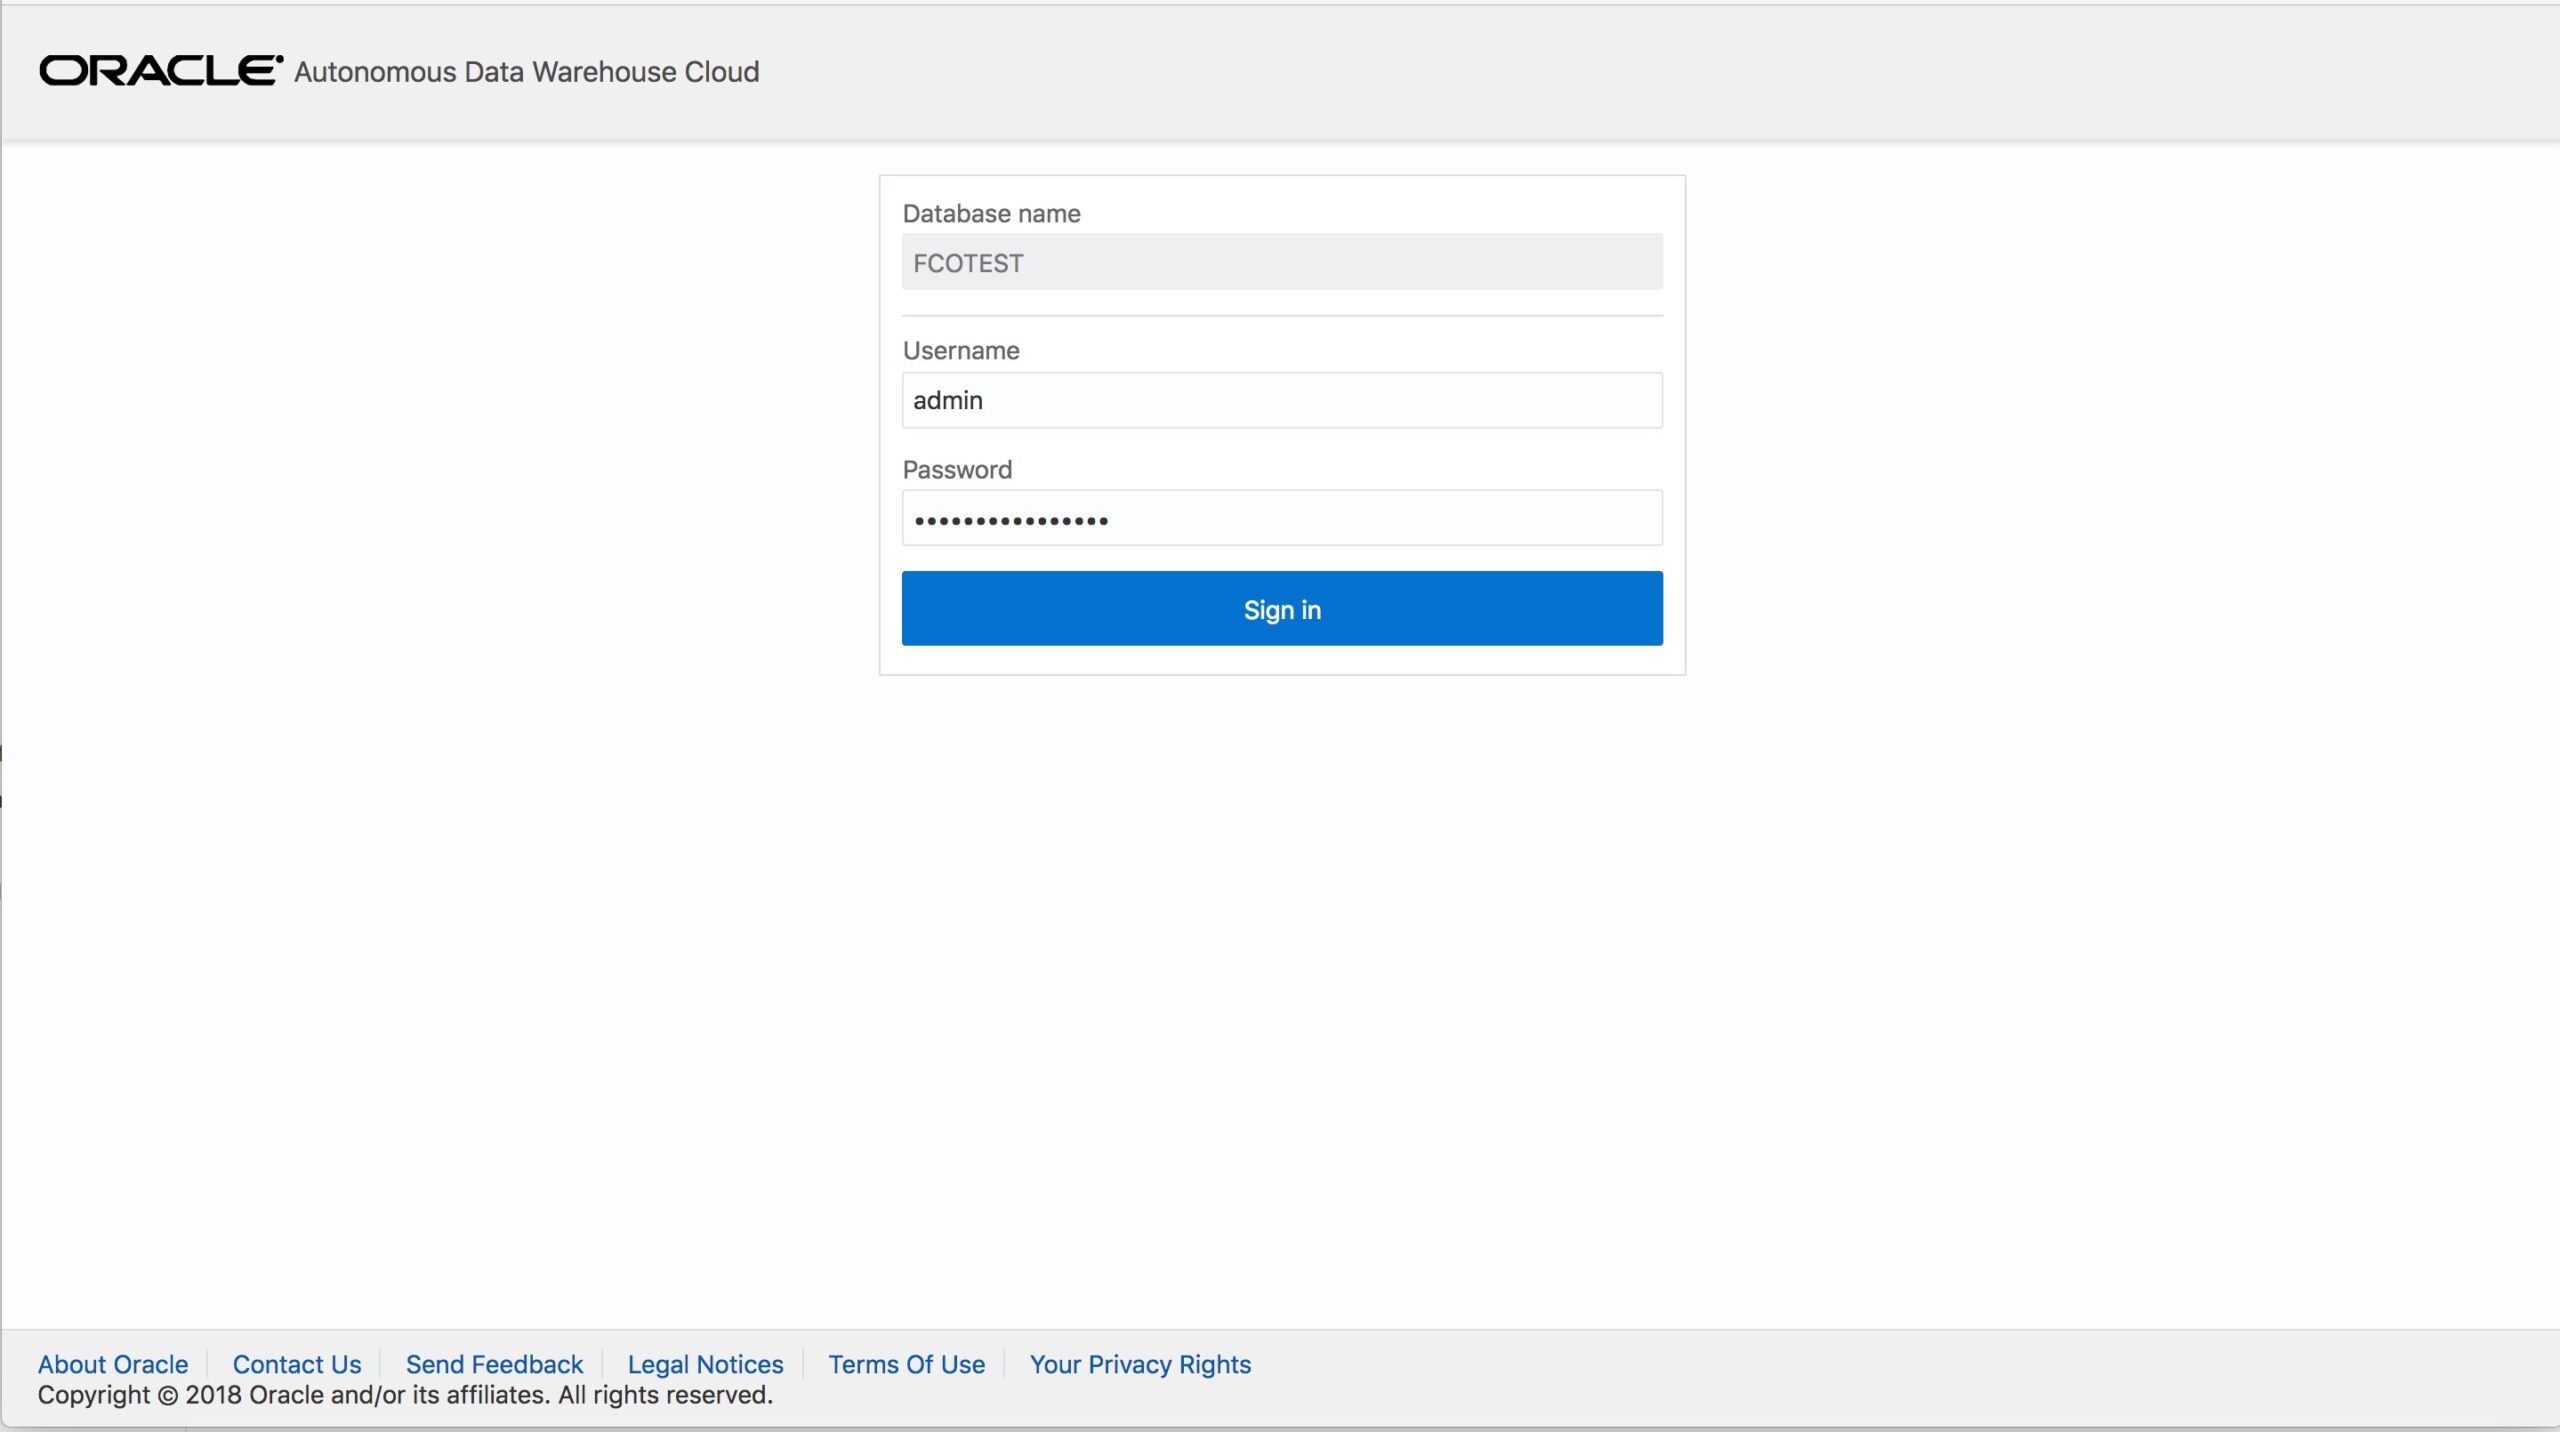
Then enter “admin” as the username and the given password ]when creating the Instance and click “Sign In”.
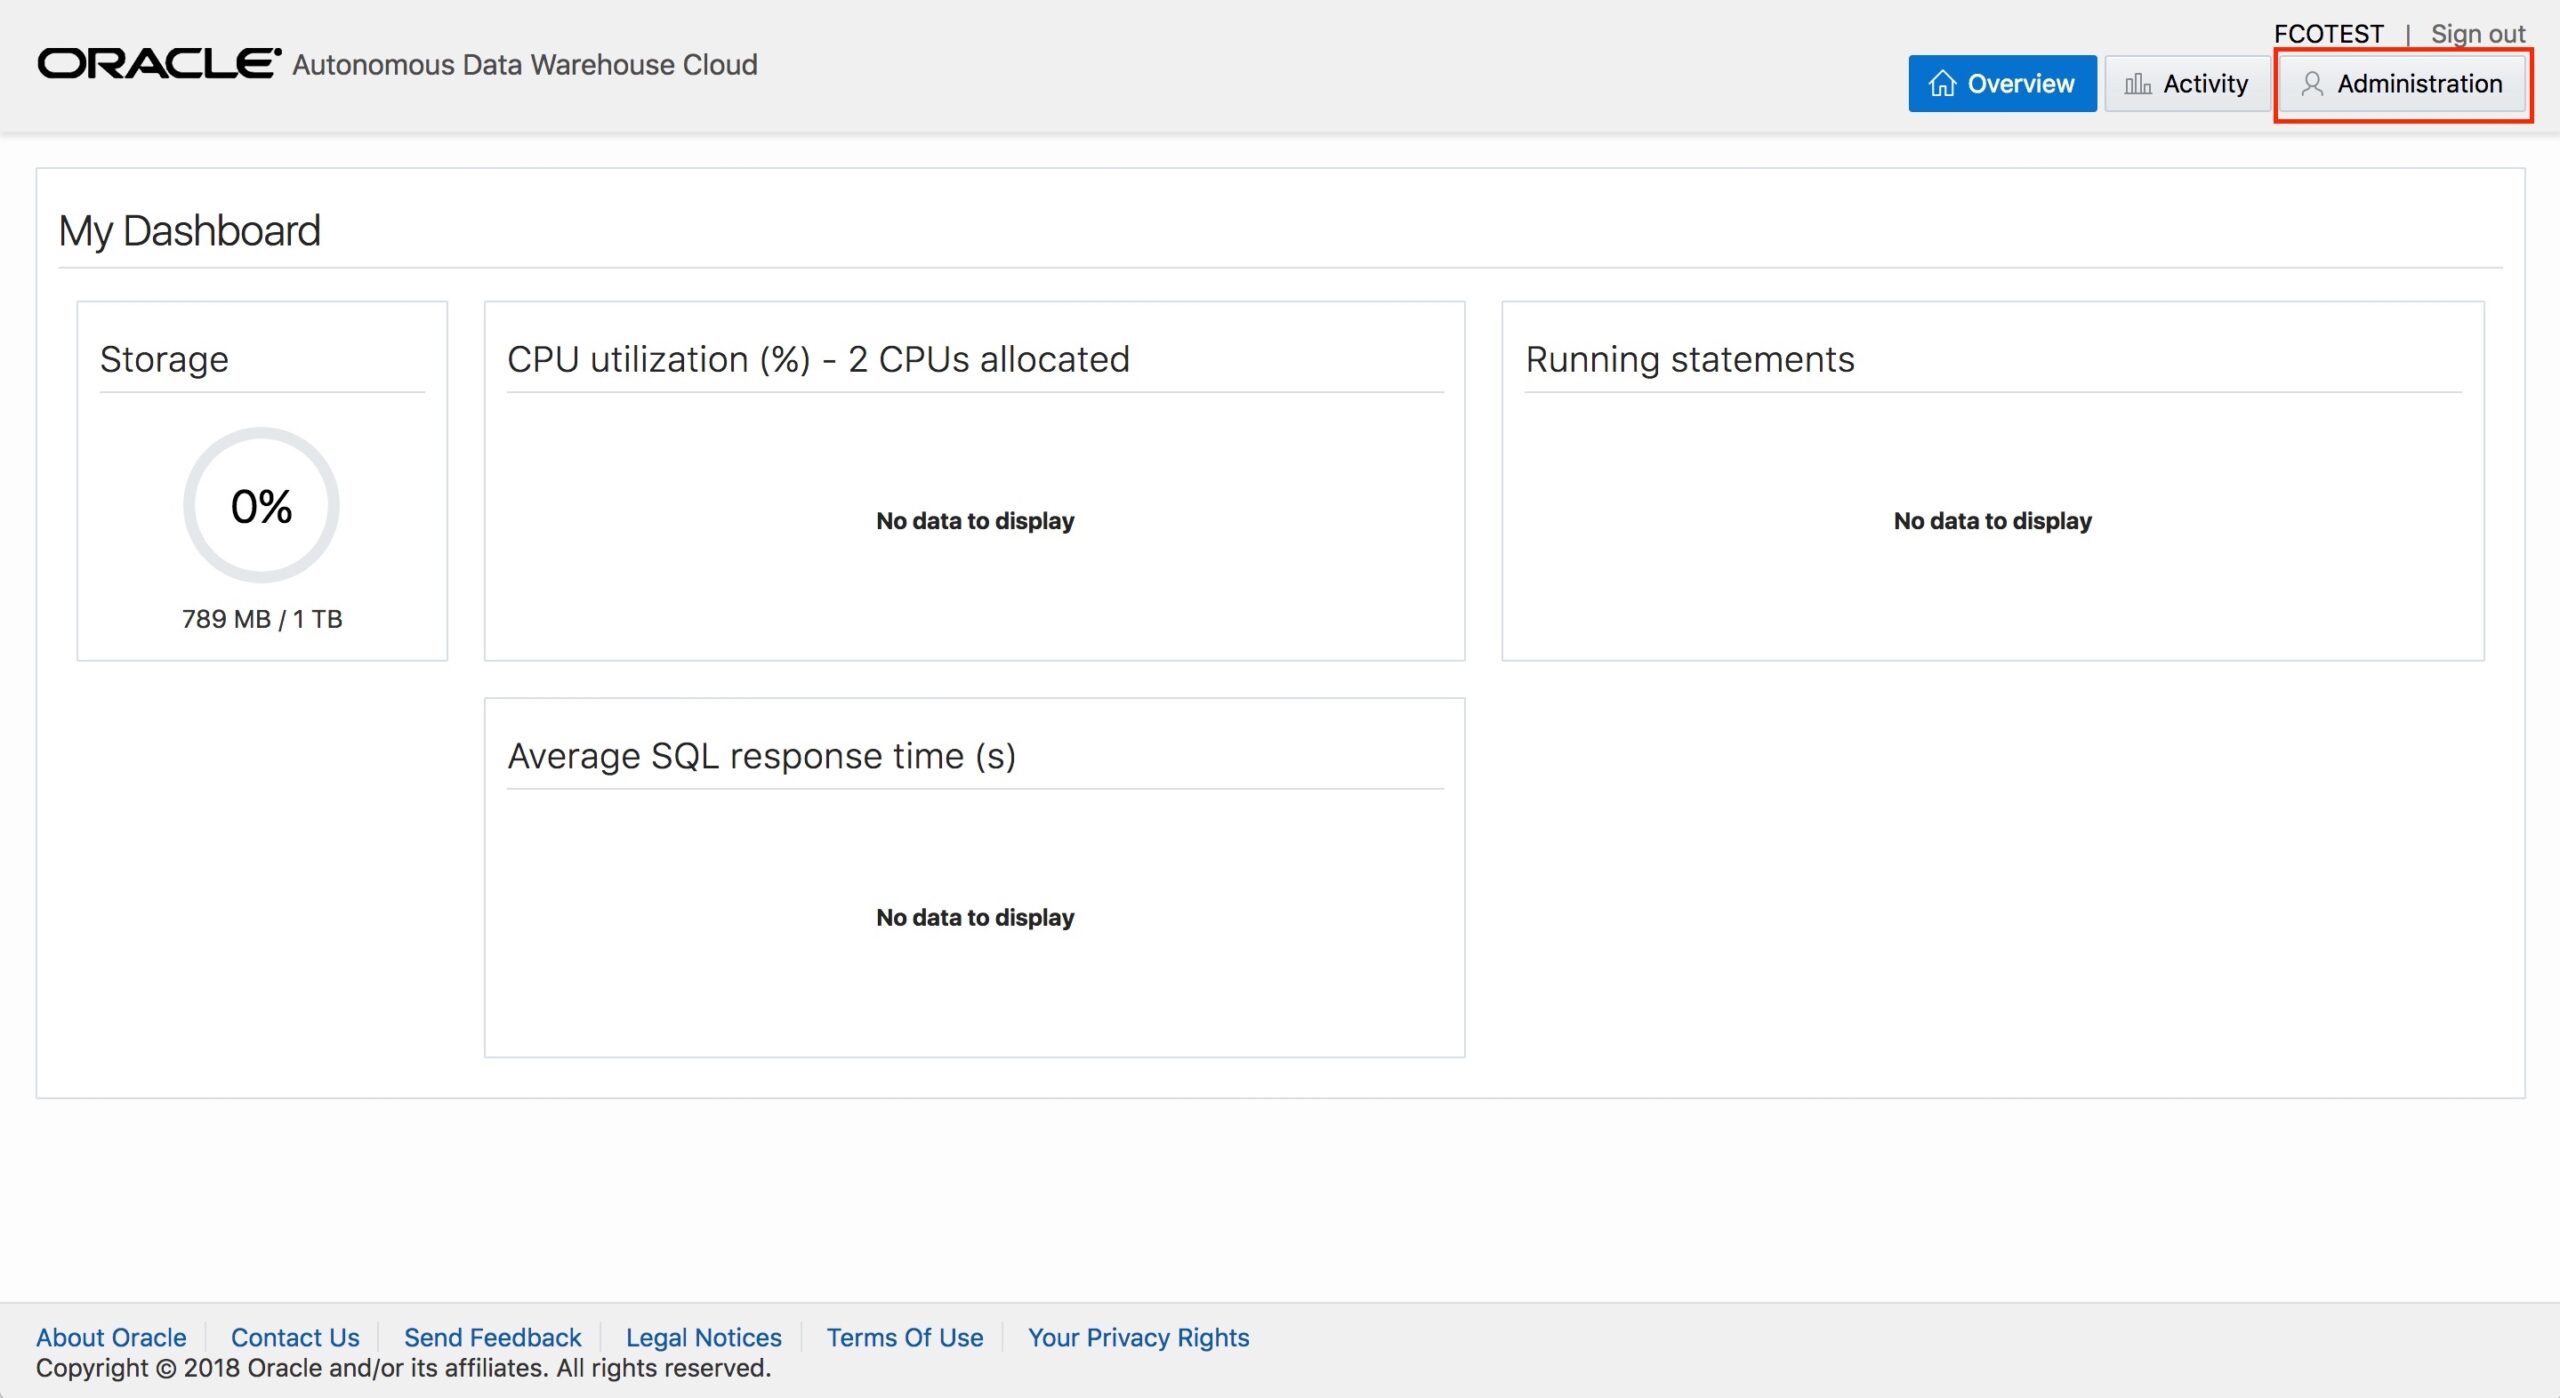
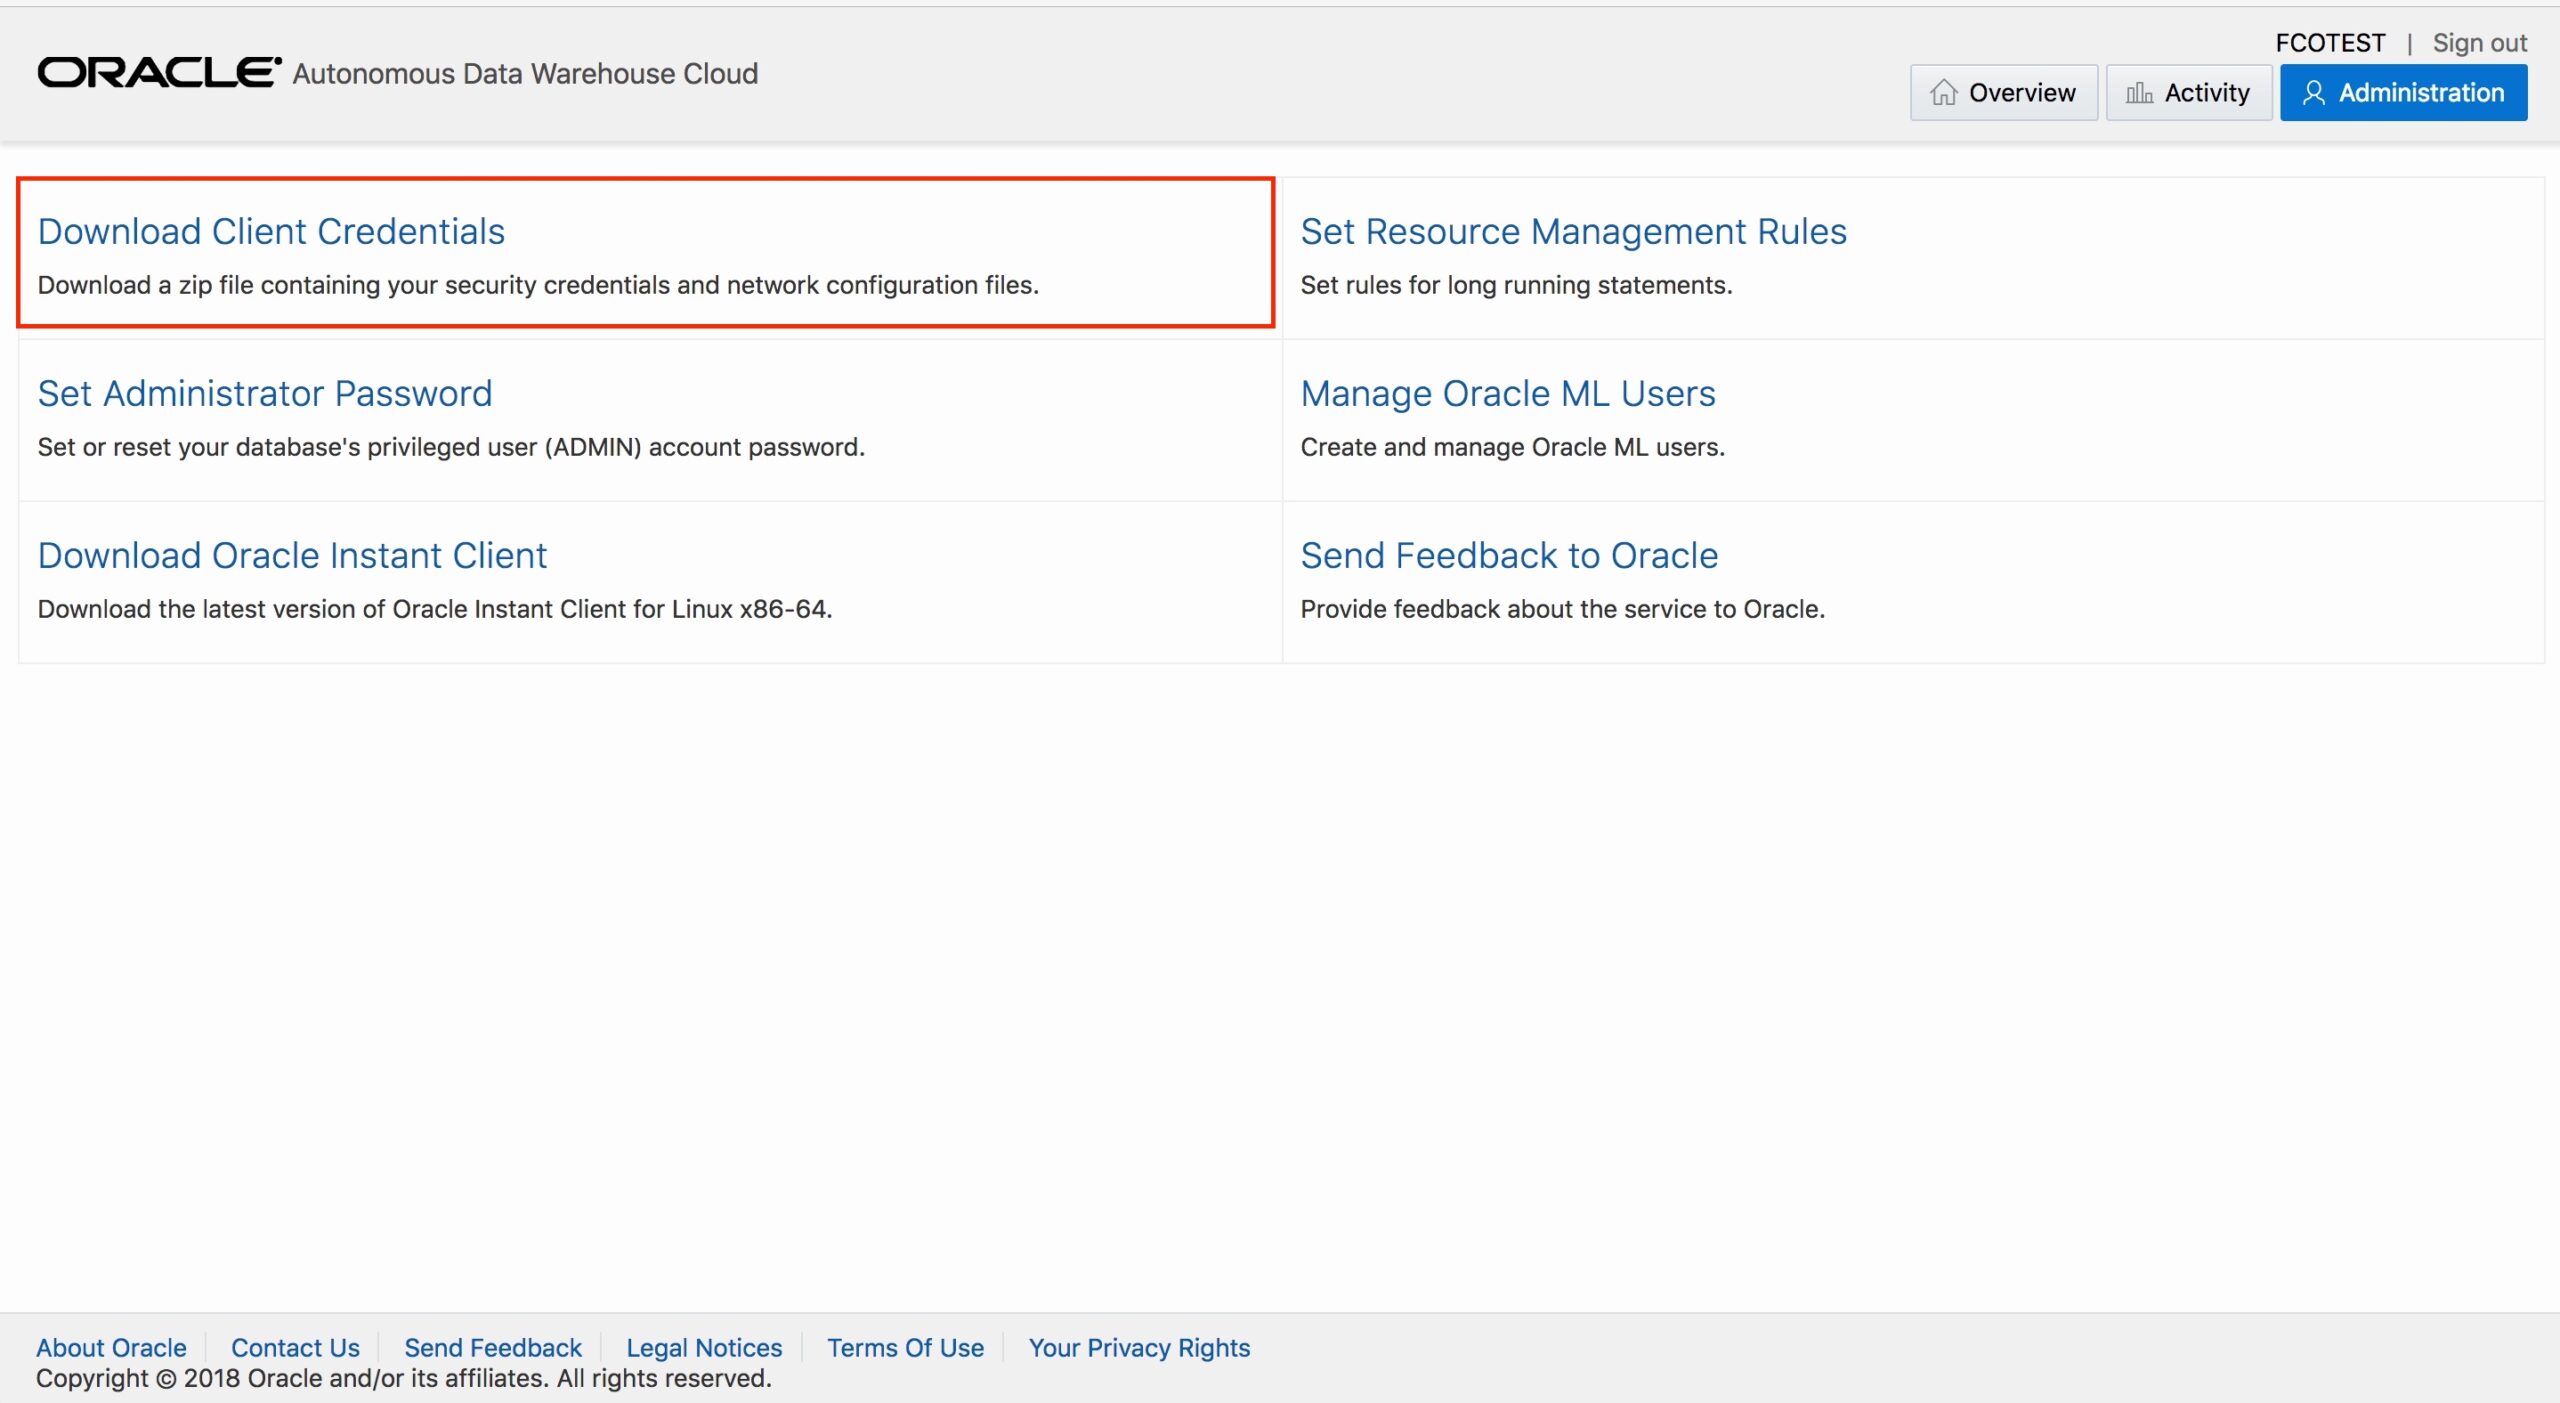
You will then land at the Autonomous Data Warehouse Cloud Dashboard. Please click on “Administration” on the top right corner of the screen.
On the Administration page please click on “Download Client Credentials”.
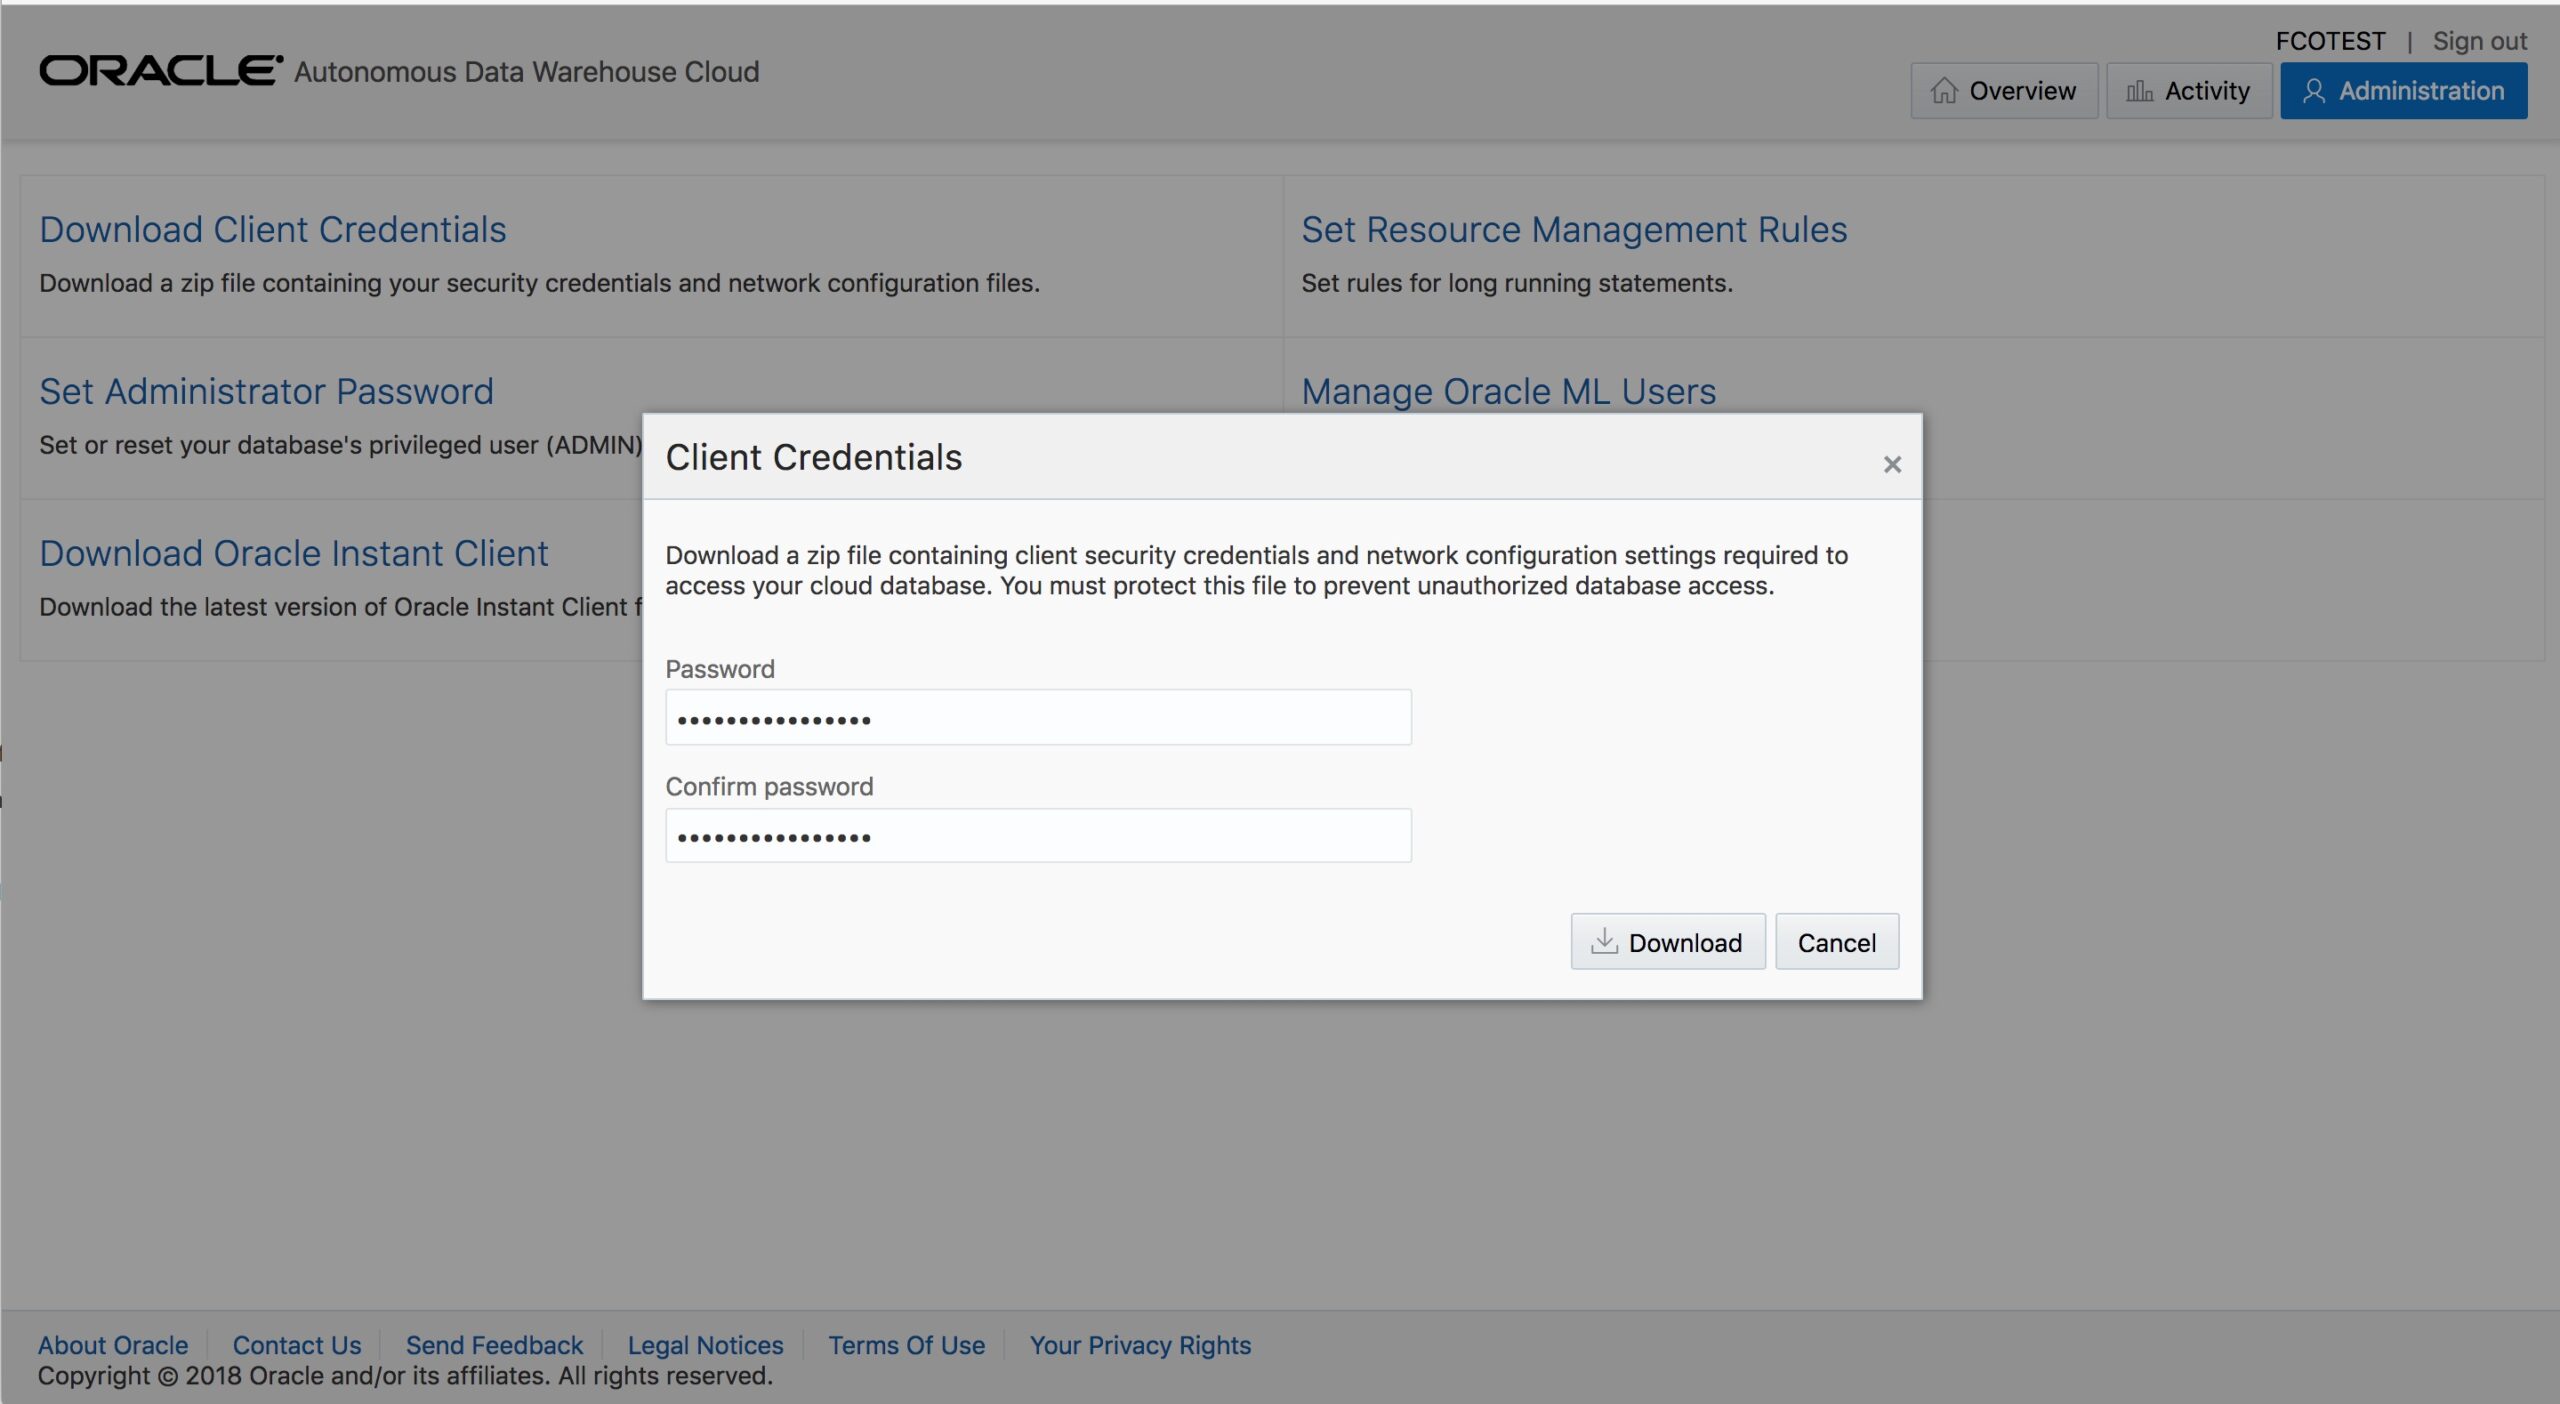
The Client Credentials popup will show and enter an encryption password for this file and click on “Download”.
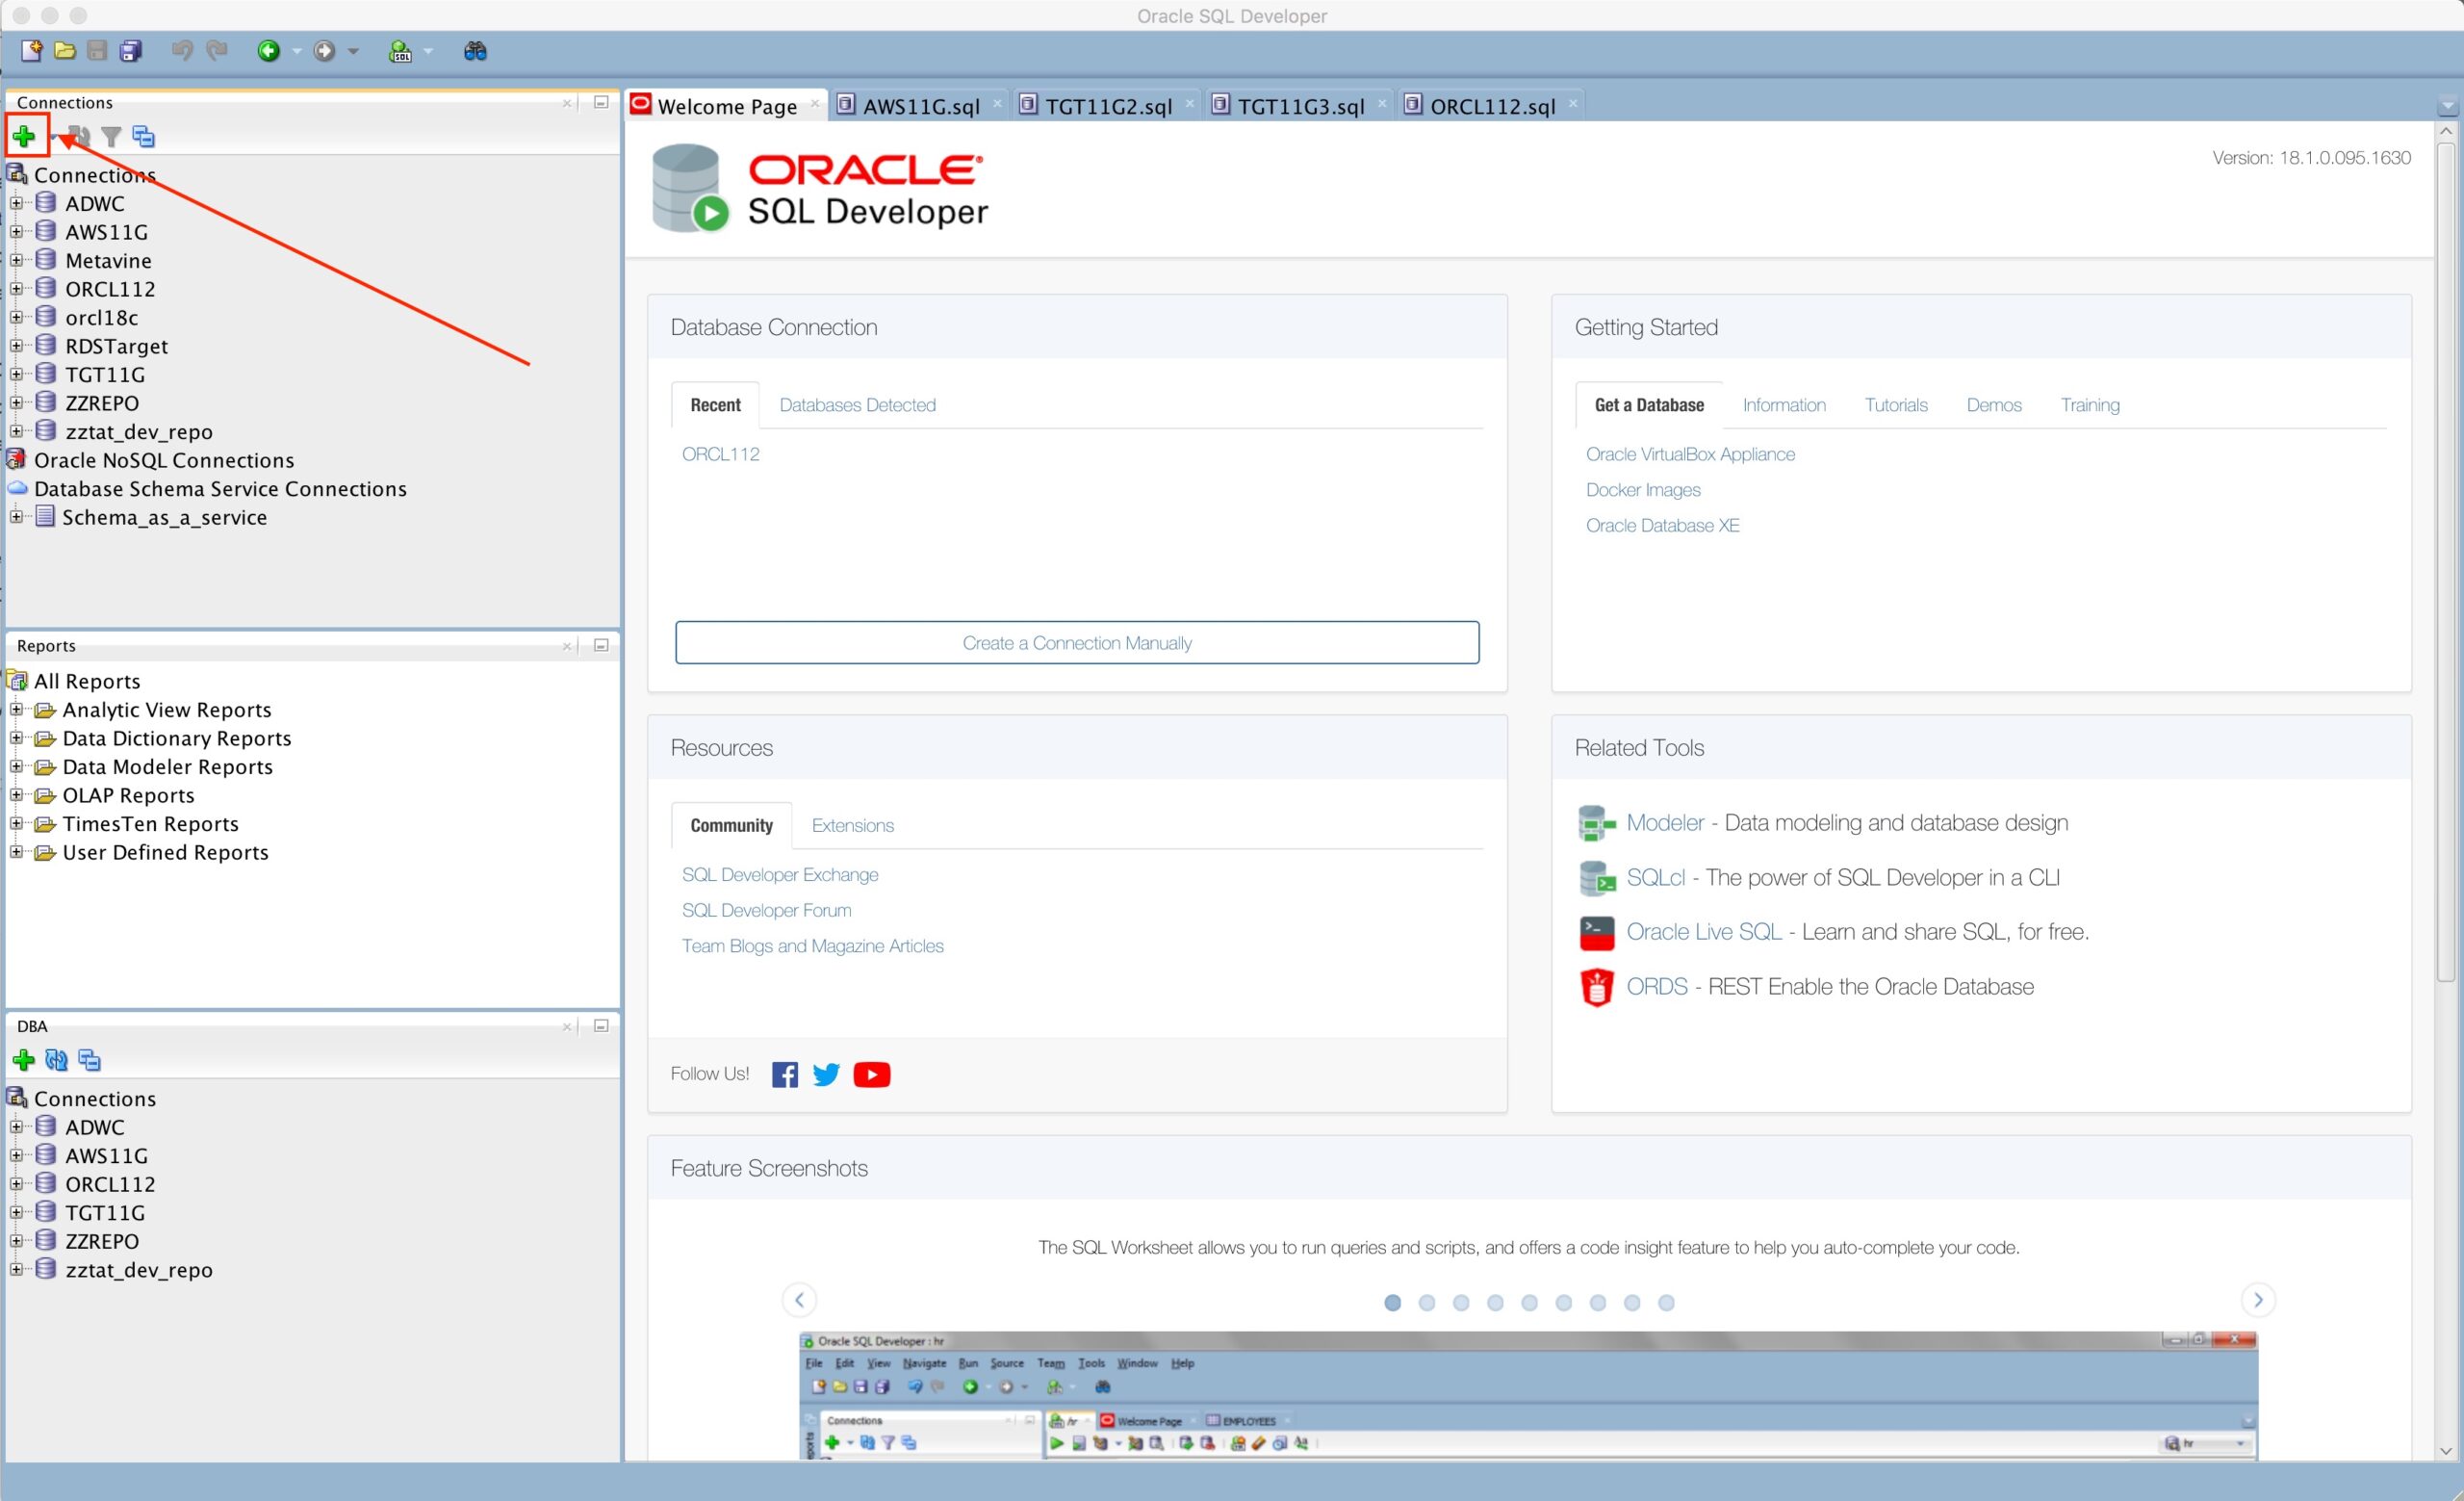
Now that you downloaded the Client Credentials, please start SQL Developer and Create a connection for your ADWC Instance by clicking on the green plus icon near the left top corner of your SQL Developer screen.
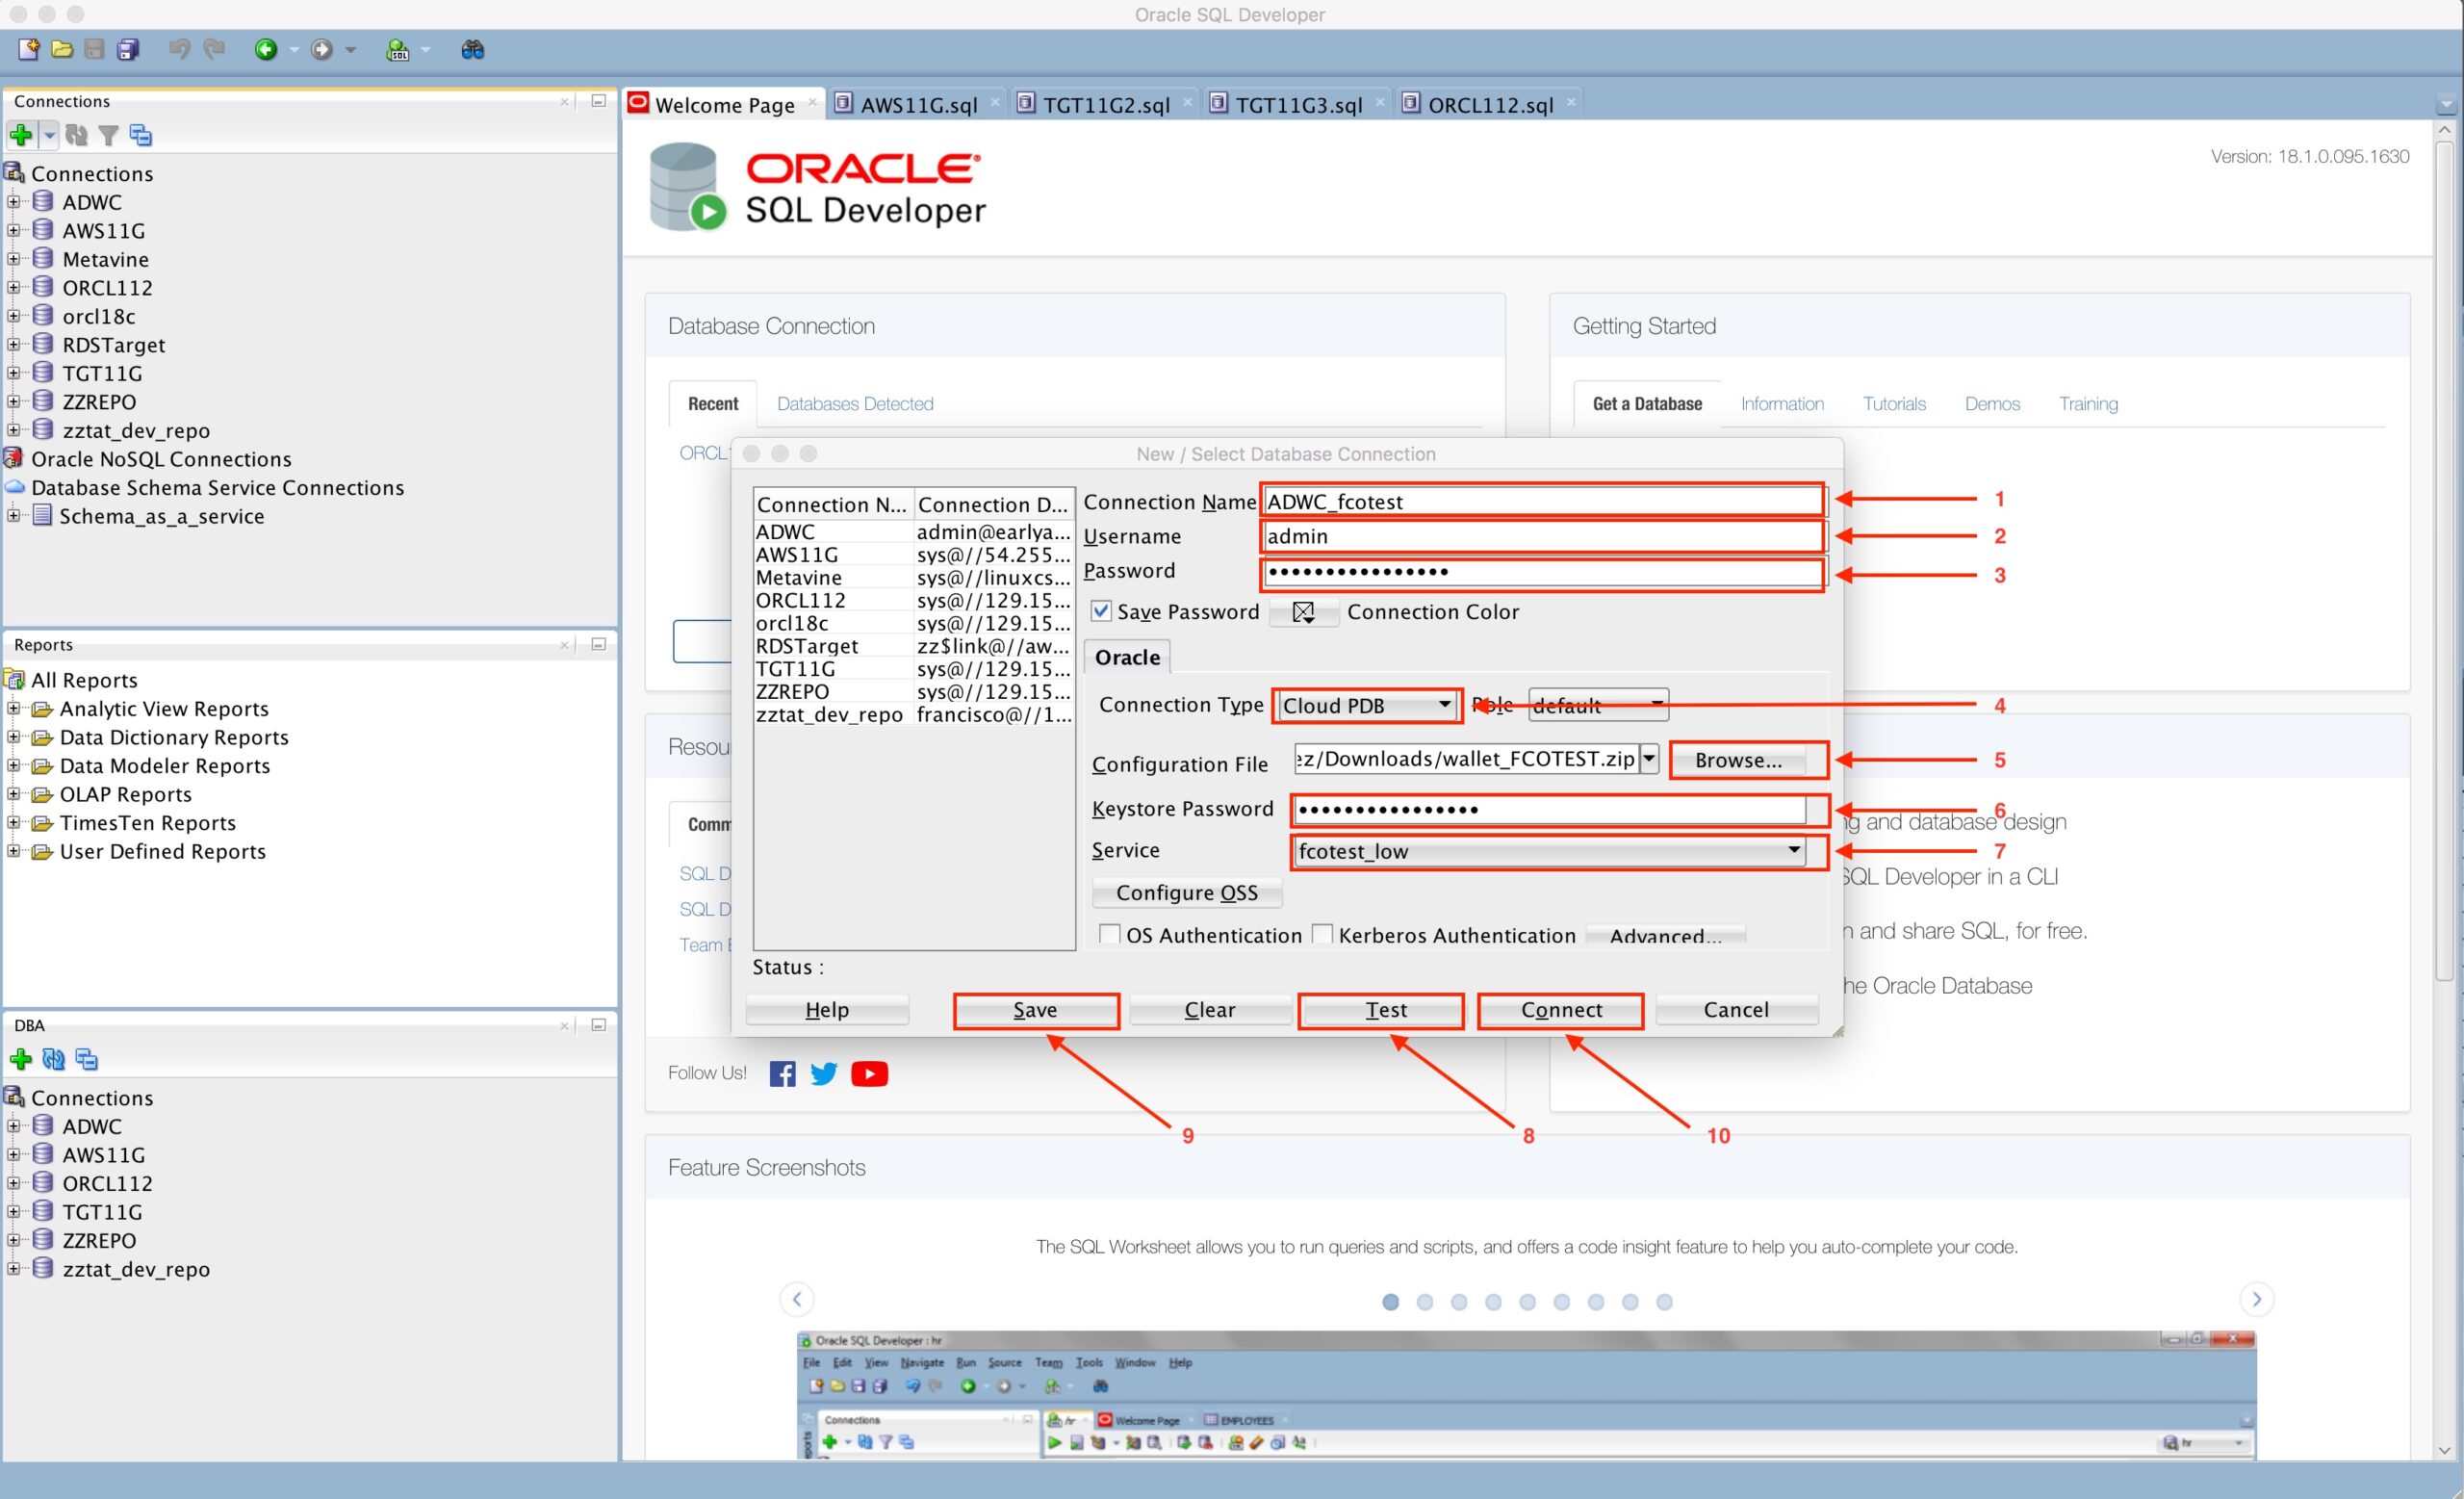
The Database Connection popup will show up and you will need to enter the following information:
- Connection Name: The name you will like to use to easily identify this connection. For this example, we will use ADWC_fcotest
- Username: Enter “admin”
- Password: Enter the password used when creating the instance
- Connection Type: Select “Cloud PDB”
- Configuration File: Click on “Browse” and select the zip Client Credentials previously downloaded
- Keystore Password: Enter the Encryption Password you entered when downloading the Client Credentials
- Service: For the first example please select “fcotest_low” – by default ADWC creates 3 pre-configured service levels that can be used (<databasename_low, _medium, _high). These service levels map to the LOW, MEDIUM, and HIGH consumer groups, which provide different levels of performance and concurrency.
Then click on “Test” to test the connectivity (8), if the connection test is successful please click on “Save” (9) and finally click on “Connect” (10).
You can see as shown below that you are now successfully connected to your ADWC instance and ready to go.

Working with Database Services and Sample Data Sets
When creating the ADWC_fcotest connection, we selected the <databasename>_low service. The idea of selecting this service was to allow us to run a query using this service as a start and then compare agains a different service level (high) to see how it affects our query performace.
As mention before, ADWC provides three database services that you can choose when connecting to the database. These are named as HIGH, MEDIUM, and LOW services and provide different levels of performance and concurrency. The HIGH database service provides the maximum amount of resources for a query, this also means that the number of concurrent queries you can run in this service will not be as much as the other services.The MEDIUM database service provides multiple compute and IO resources for a query. This service also provides more concurrency compared to the HIGH database service. The LOW database service provides the least amount of resources for a query, this also means the number of concurrent queries you can run in this service will be higher than the other services. As a user you need to pick the database service based on your performance and concurrency requirements.
To test the above database services we will use the LOW and HIGH database services to understand the performance differences between them. For this exercise we will run a query against a sample data set that is provided out of the box within ADWC. ADWC provides the Oracle Sales History sample schema and the Star Schema Benchmark (SSB) data set for us to play with it, these data sets are in the SH and SSB schemas respectively. Our test would be against the SSB data set which uses a dataset of around 1TB in size with one fact table containing close to 6 billion rows, and several dimension tables.
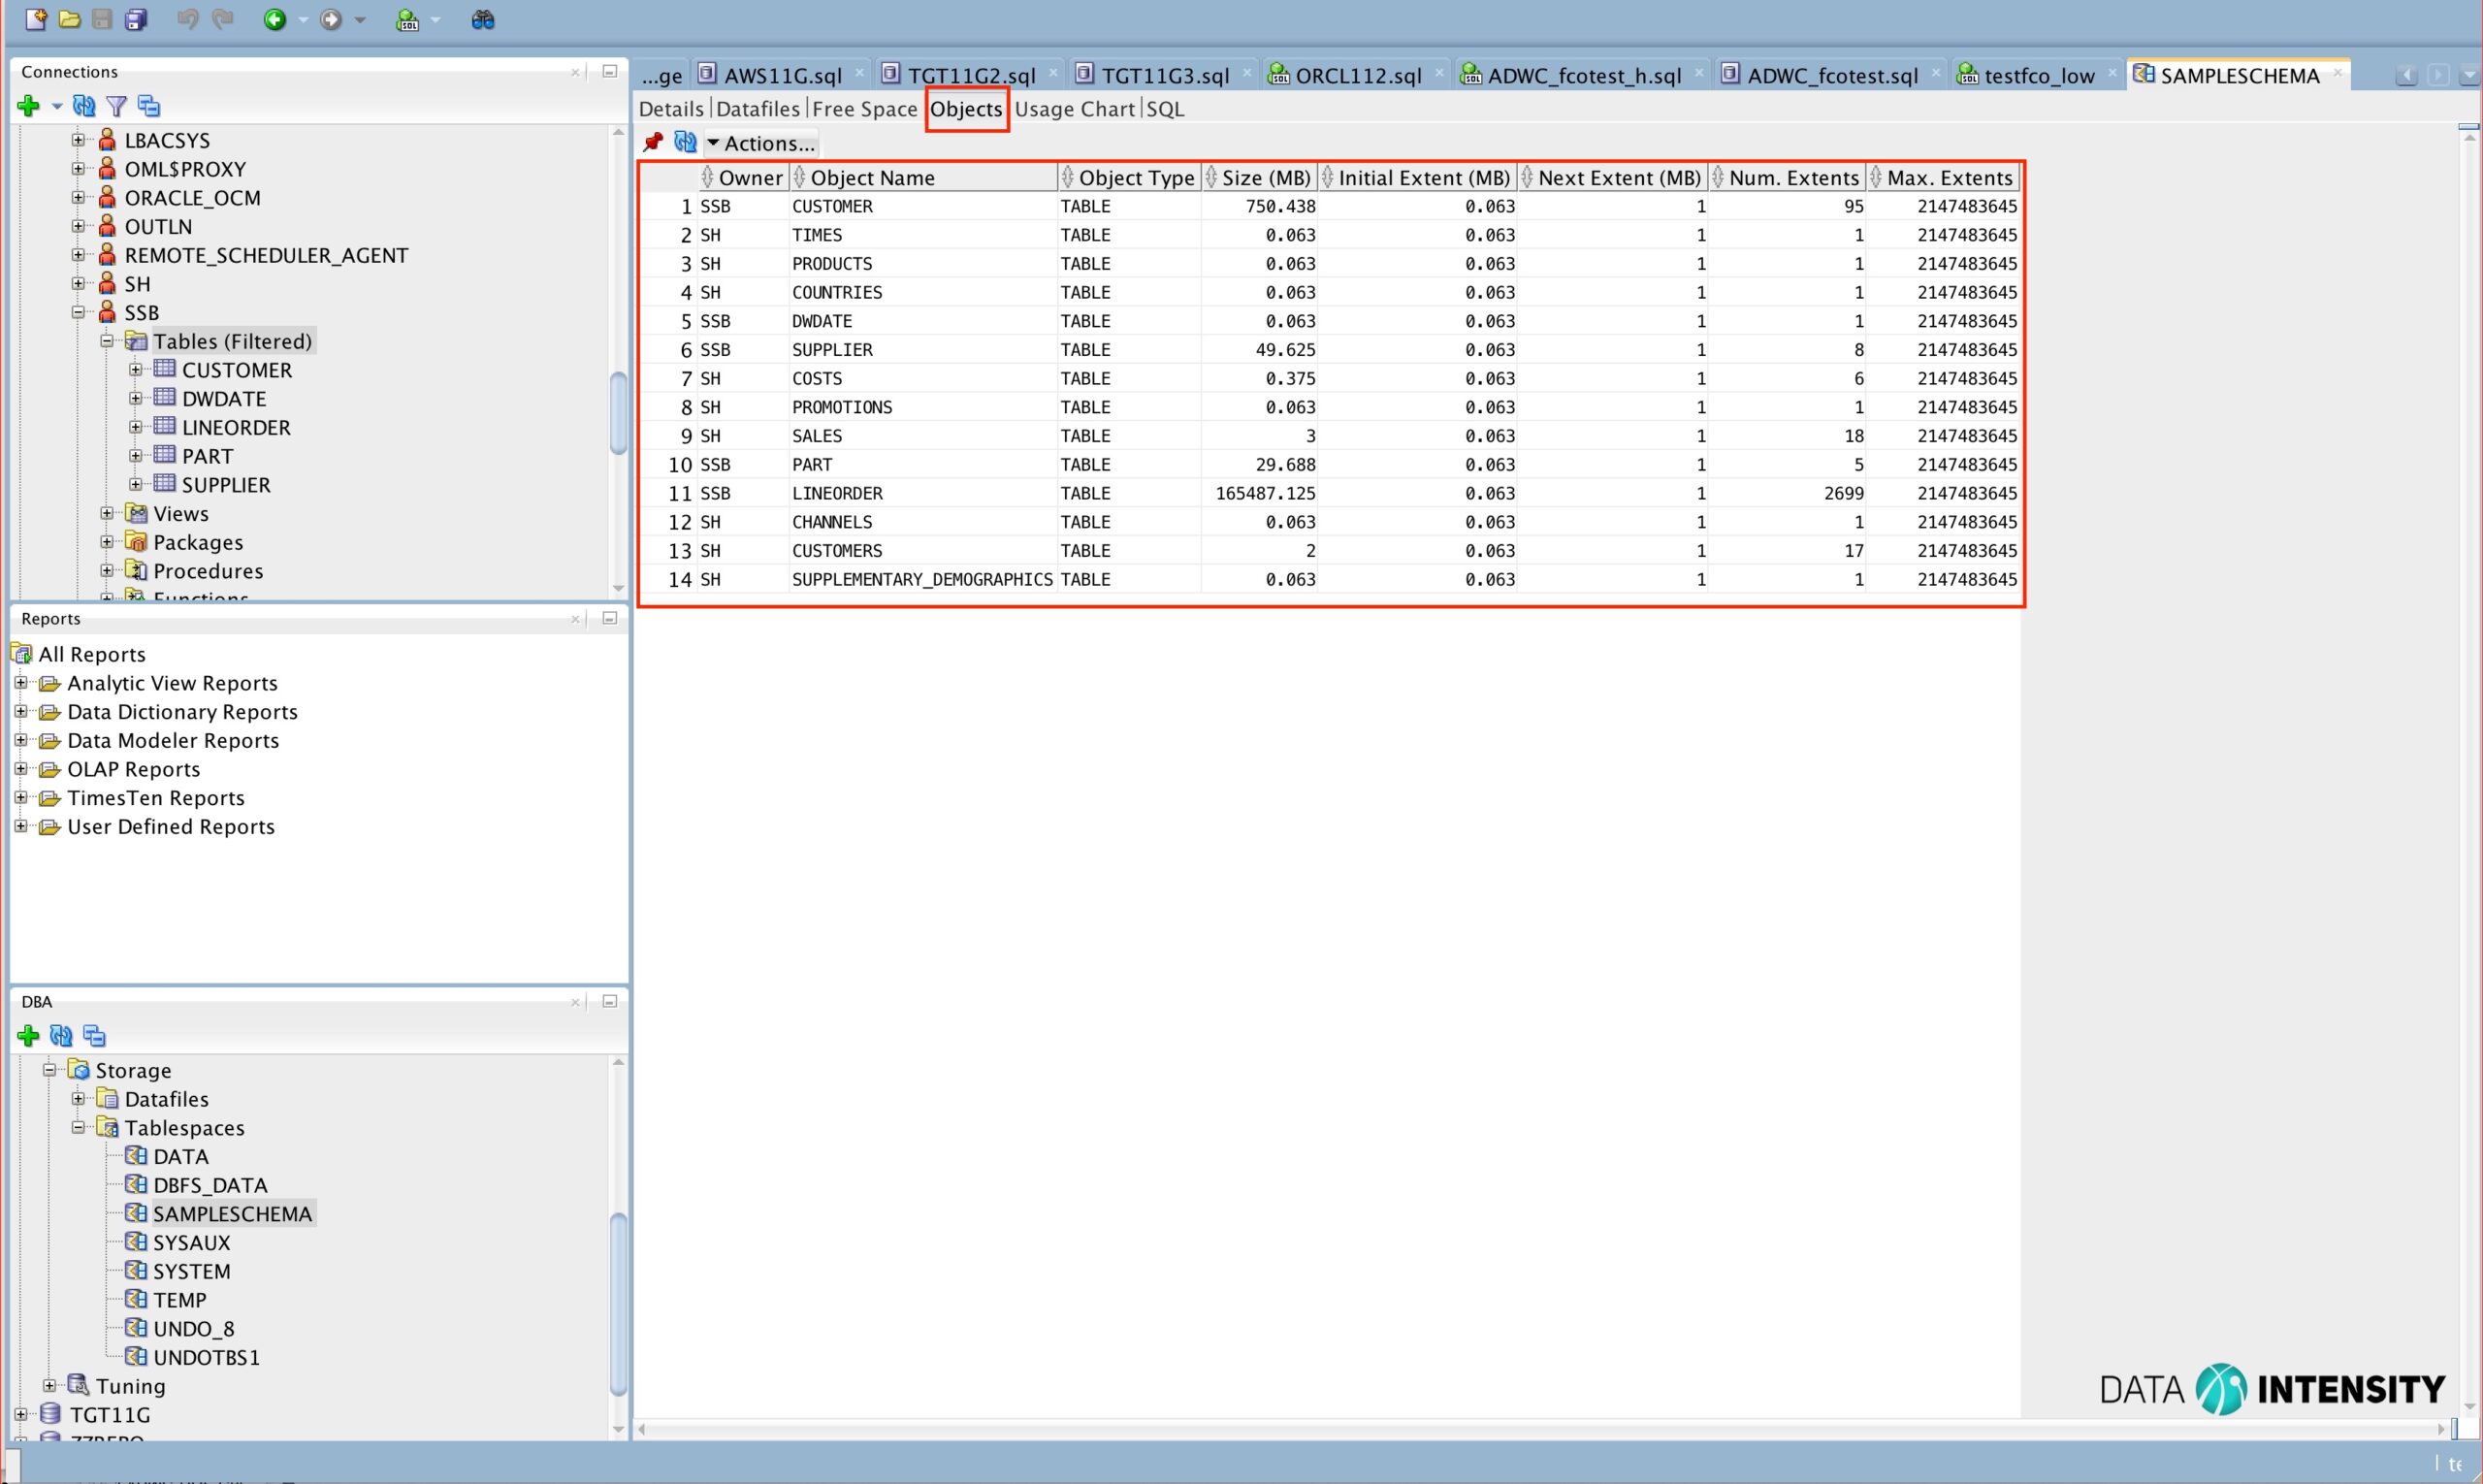
Bellow we can see all available tables in the SSB schema (1):
- CUSTOMER with 30,000,000 rows
- DWDATE with 2,556 rows
- LINEORDER with 5,999,989,709 rows
- PART with 2,000,000 rows
- SUPPLIER with 2,000,000 rows
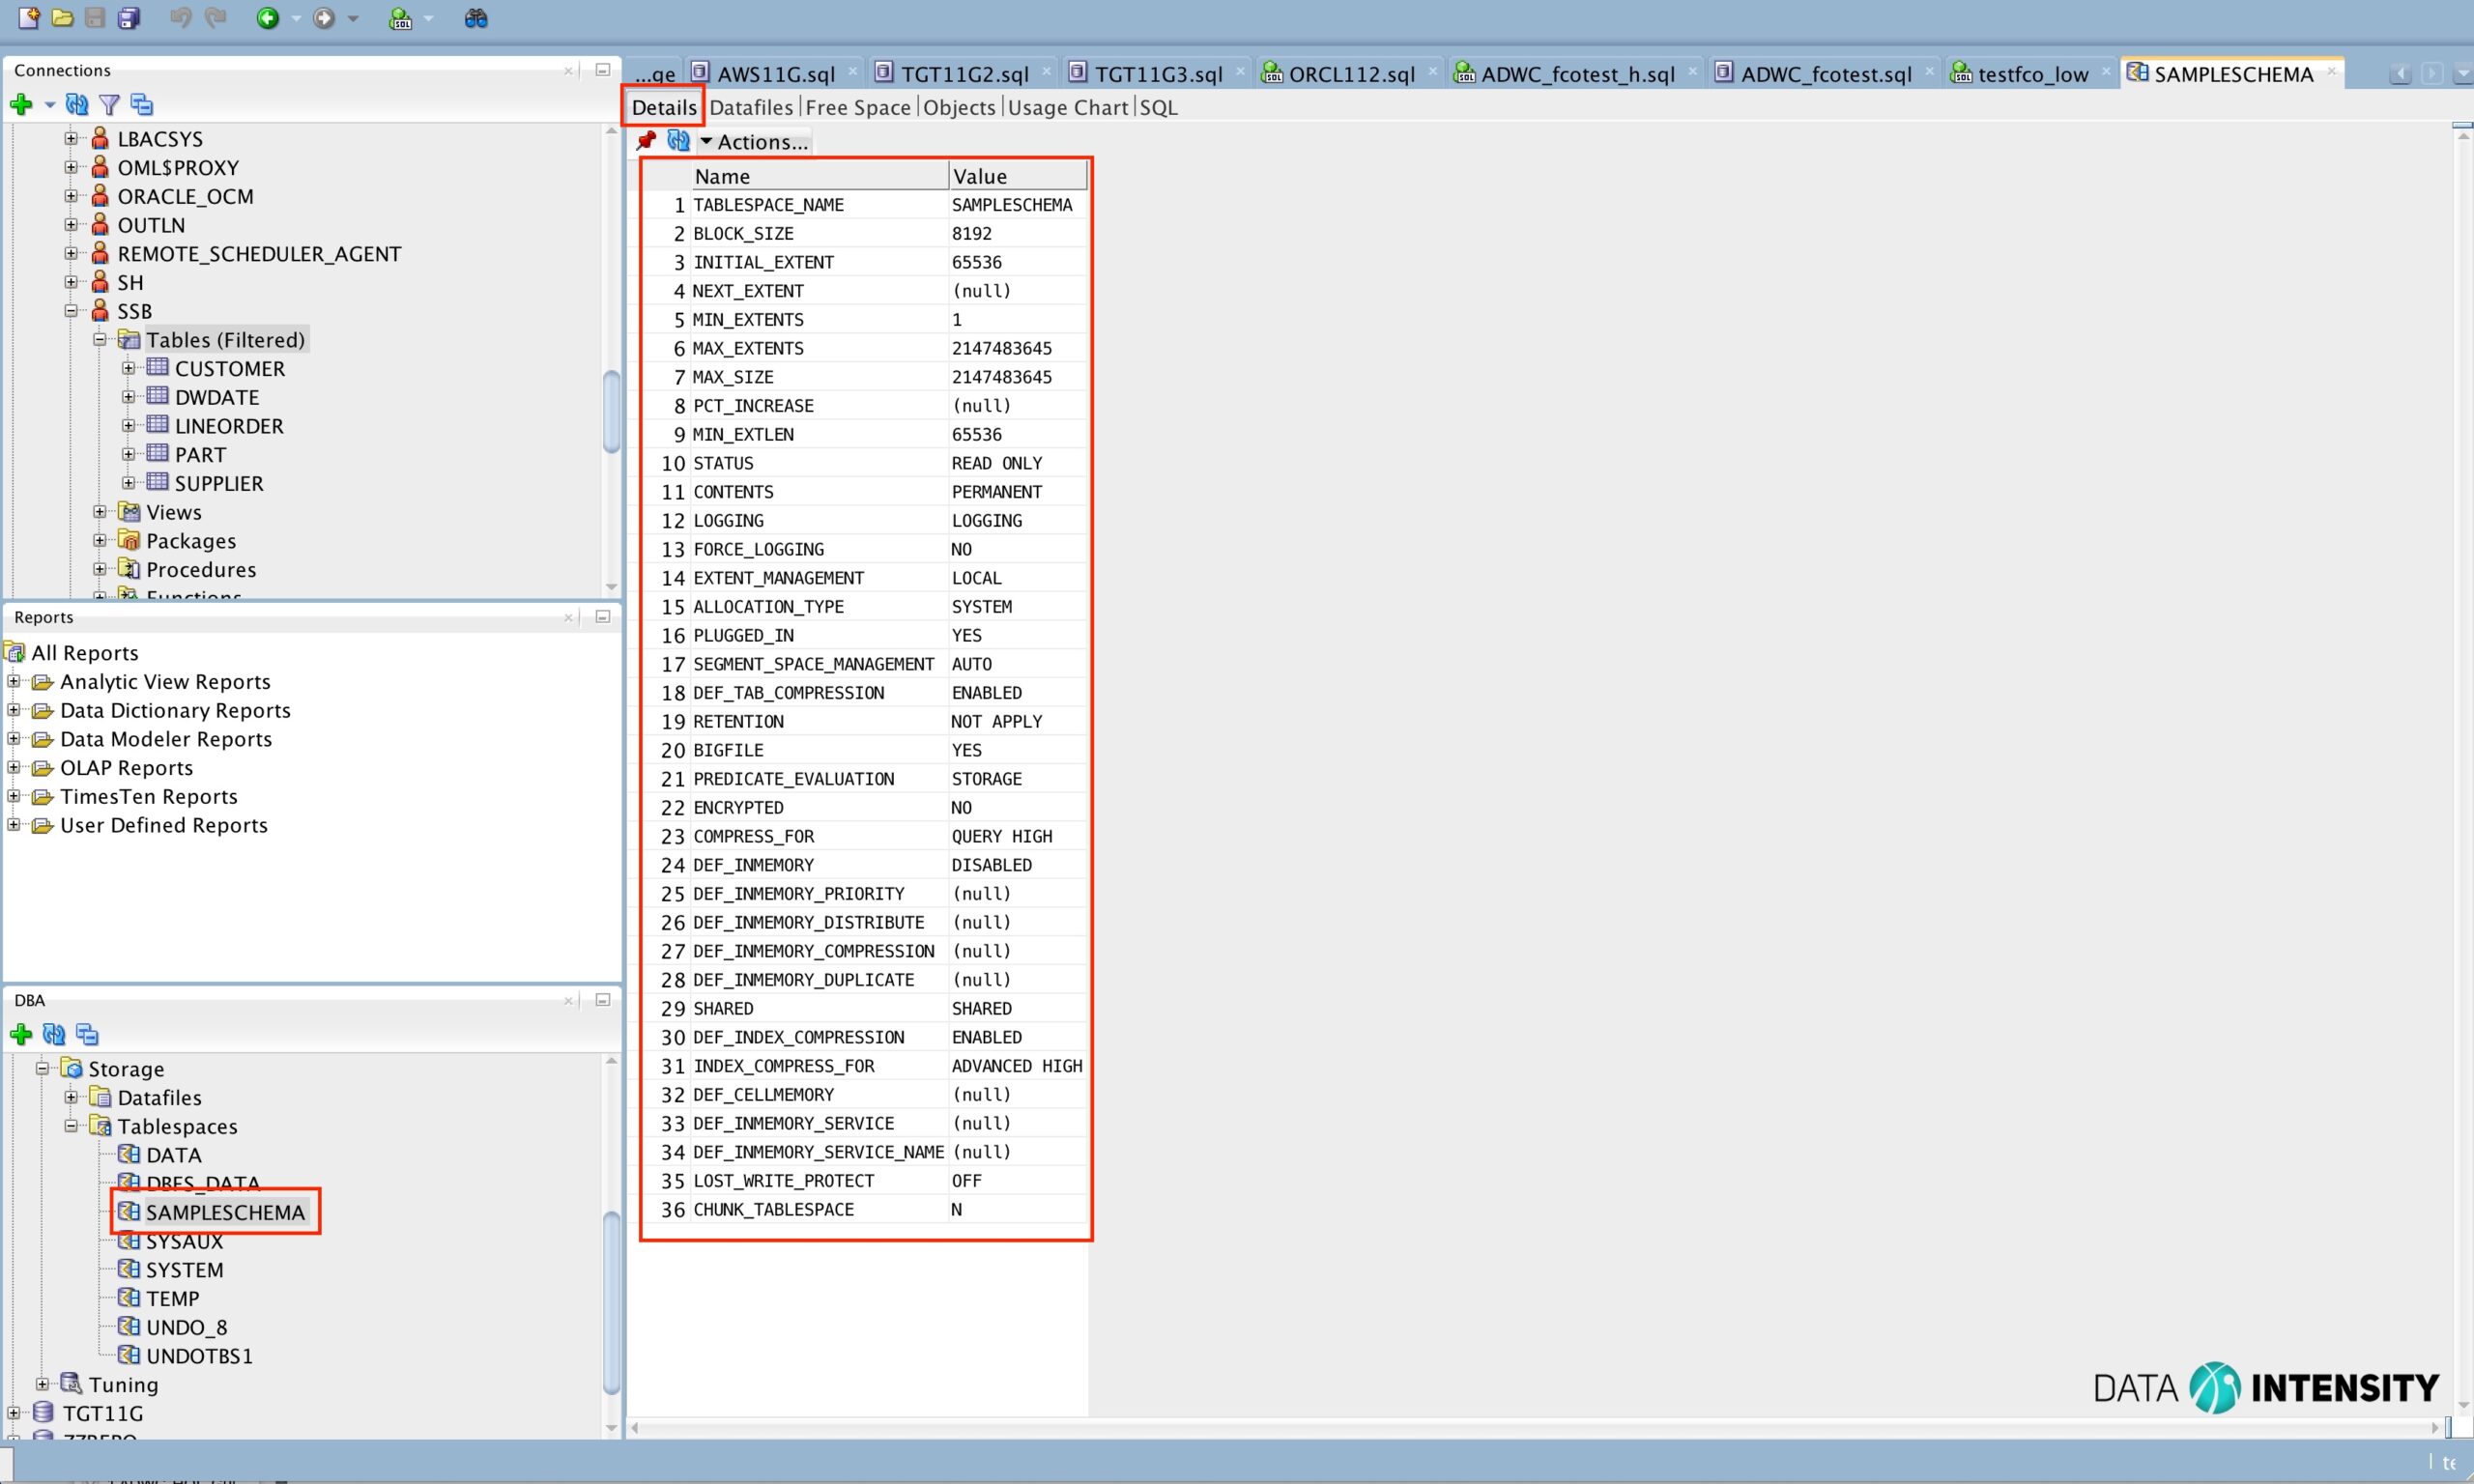
We will then go to DBA tab (2) and take a closer look at the pre loaded SAMPLESCHEMA tablespace contents.

We can then easily see the details of the tablespace.
And also take a closer look at the objects within the Tablespace.
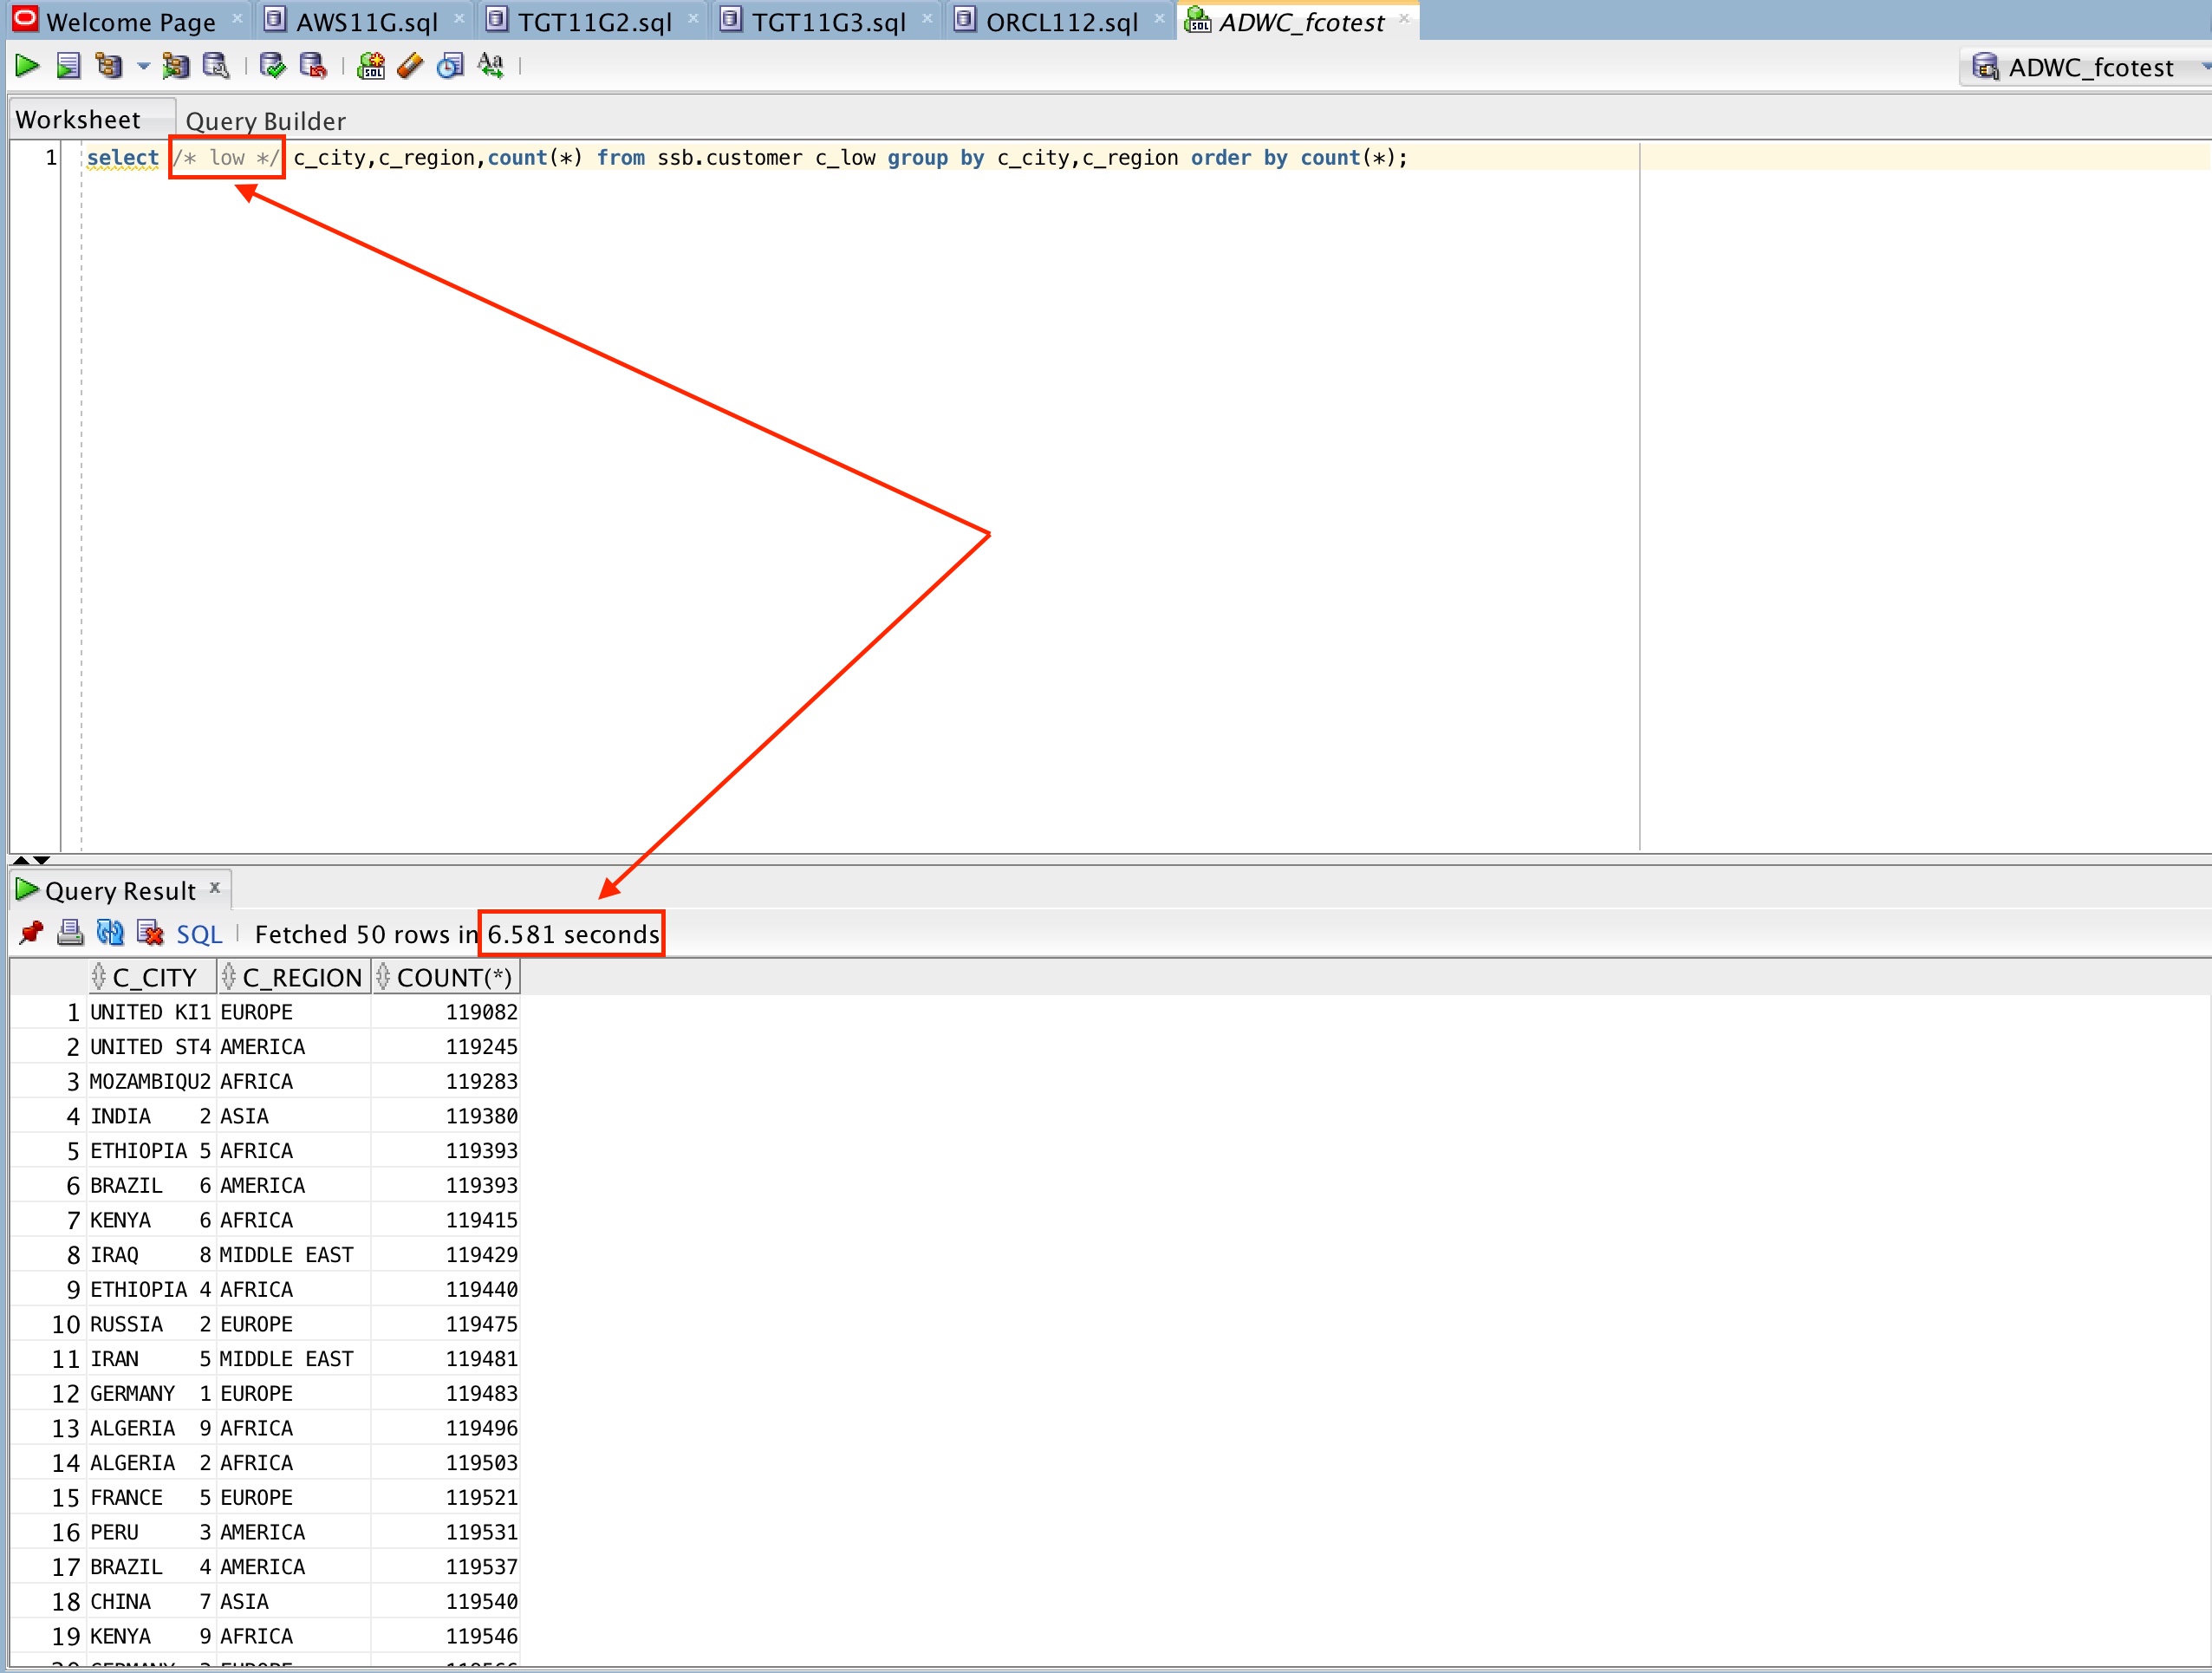
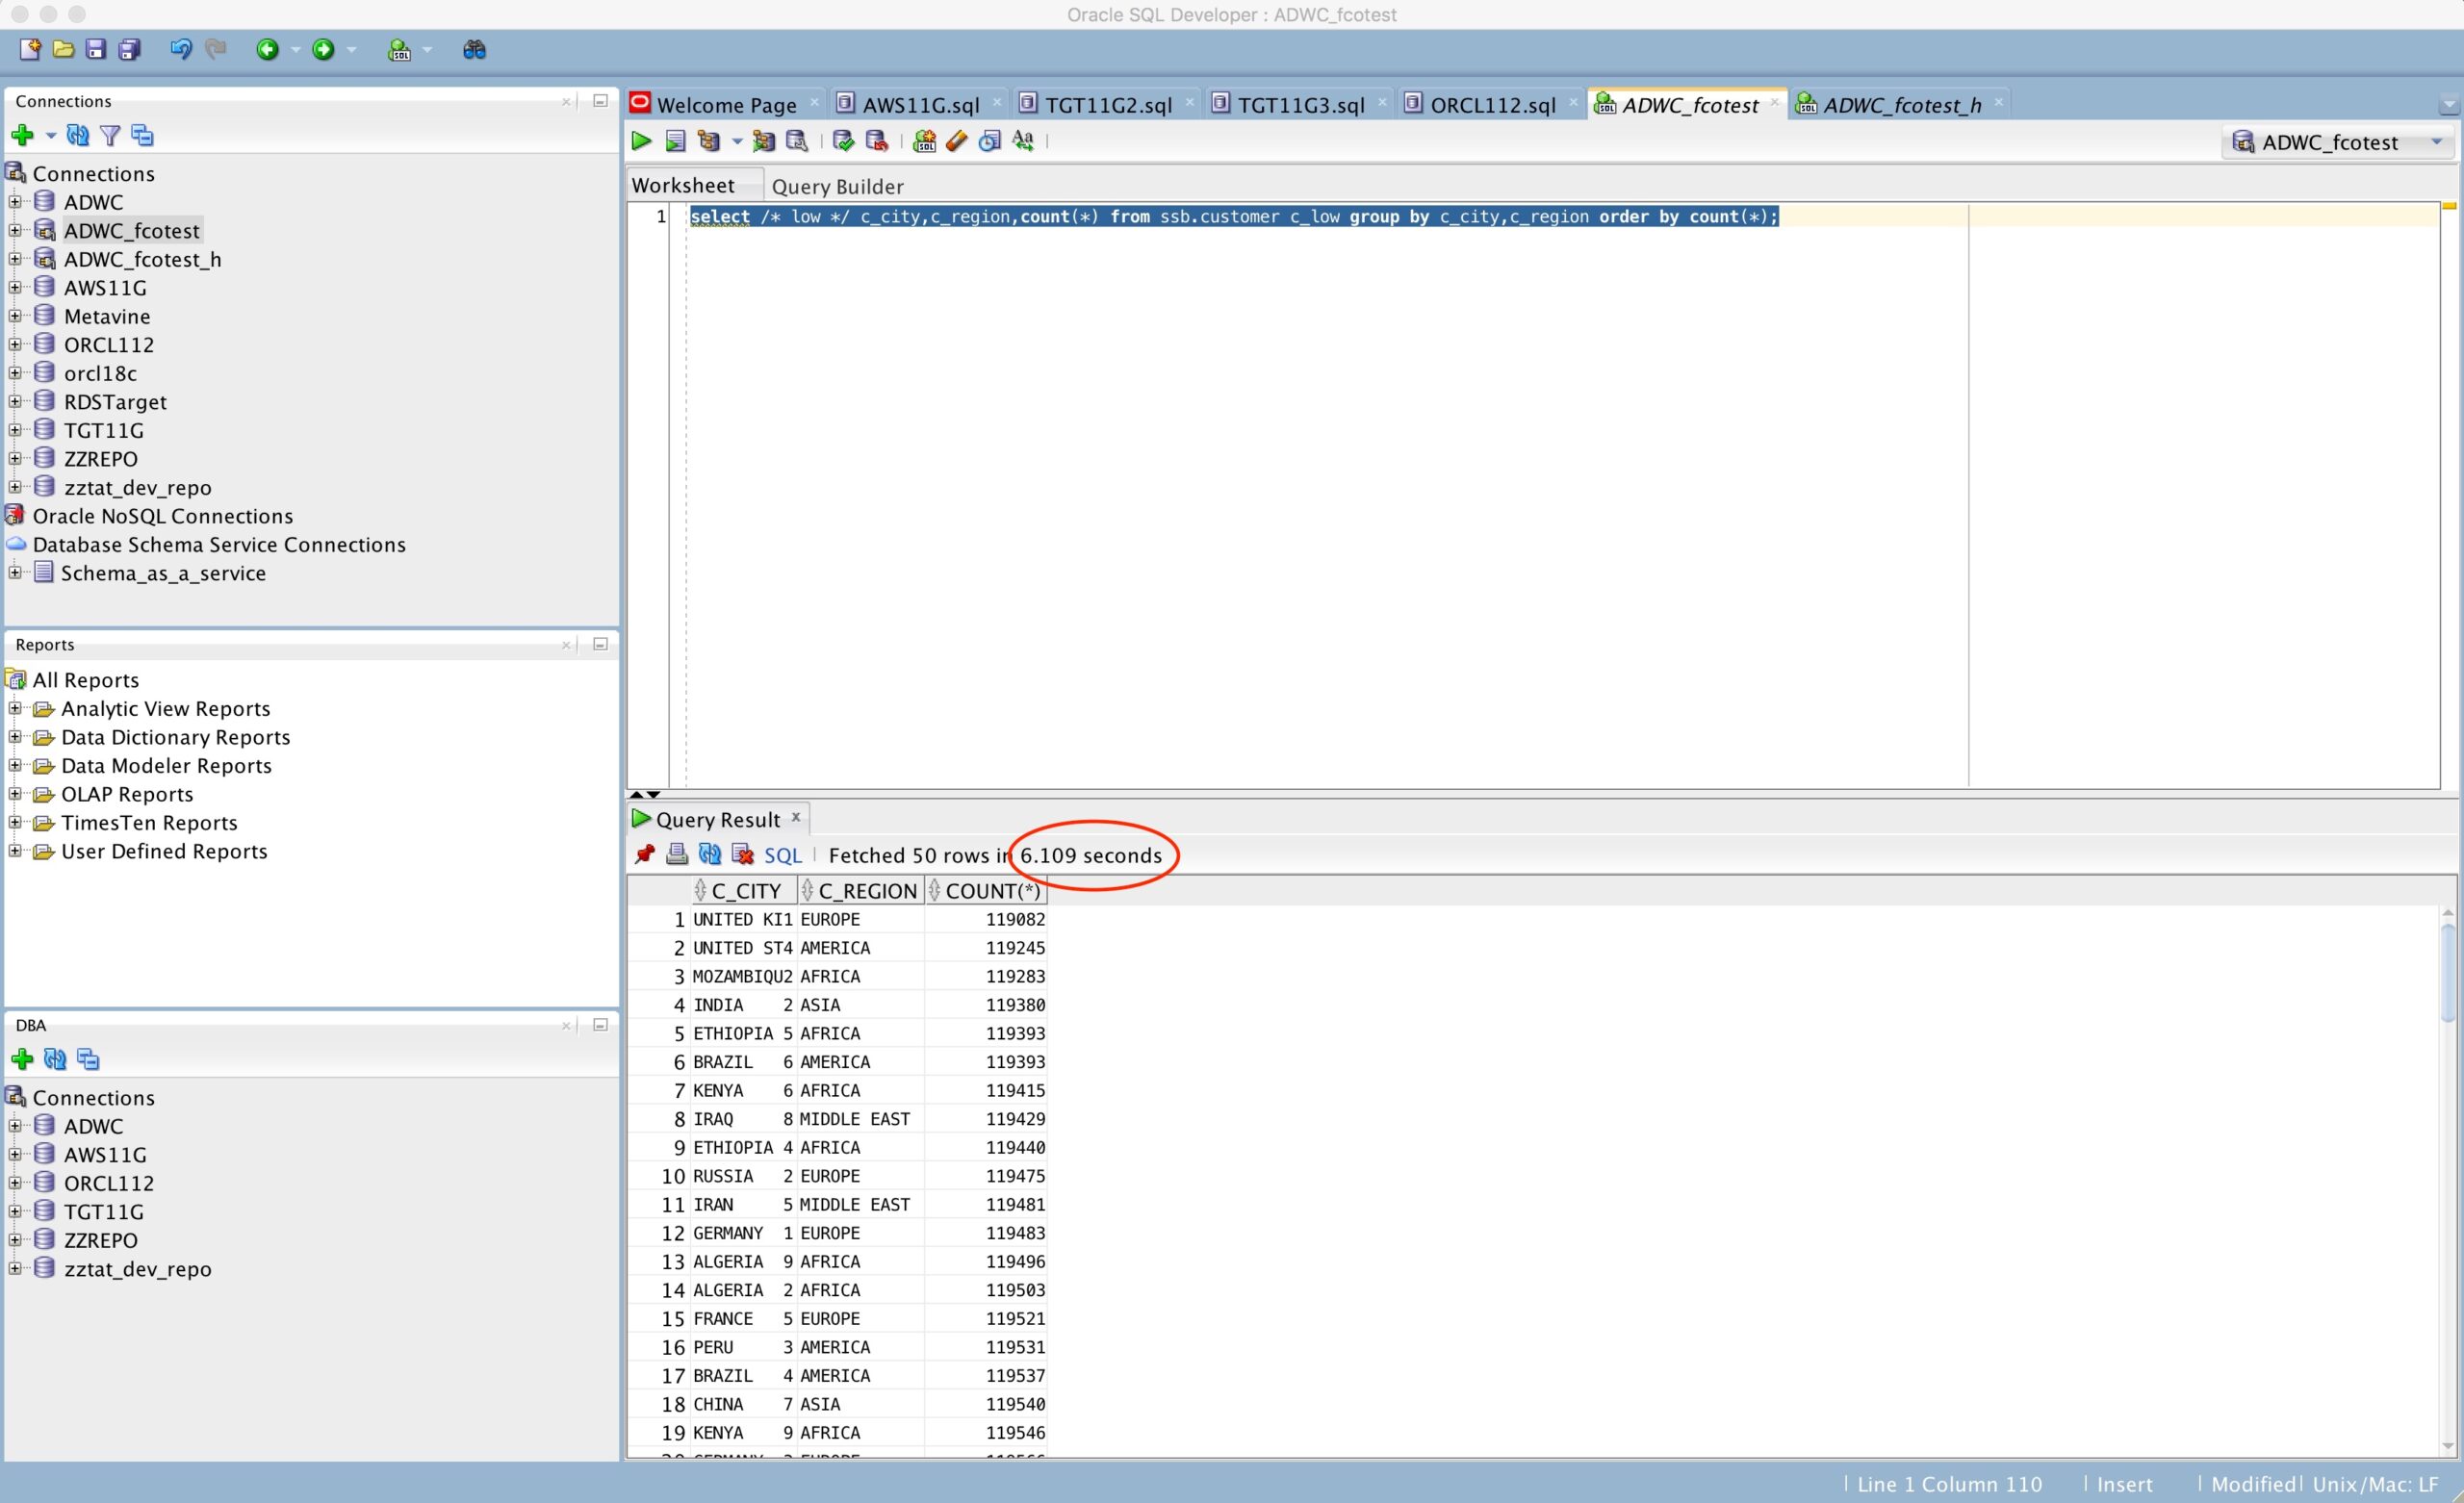
Now at SQL Developer using our initial created connection (with the fcotest_low connection) we will run the following query:
select /* low */ c_city,c_region,count(*)
from ssb.customer c_low
group by c_city,c_region
order by count(*);
As you can see as per the image bellow, when runing the above query (using the _low service) it finished in around 6.581 seconds.
Now, to allow us to compare services performance let’s create a new connection to our ADWC instance (called ADWC_fcotest_h) following the same steps as before with the exception of selecting fcotest_high as service this time.

Now lets run the same query as before (with just a small change, changing the initial comment /* low */ to /* high*/).
select /* high */ c_city,c_region,count(*)
from ssb.customer c_low
group by c_city,c_region
order by count(*);

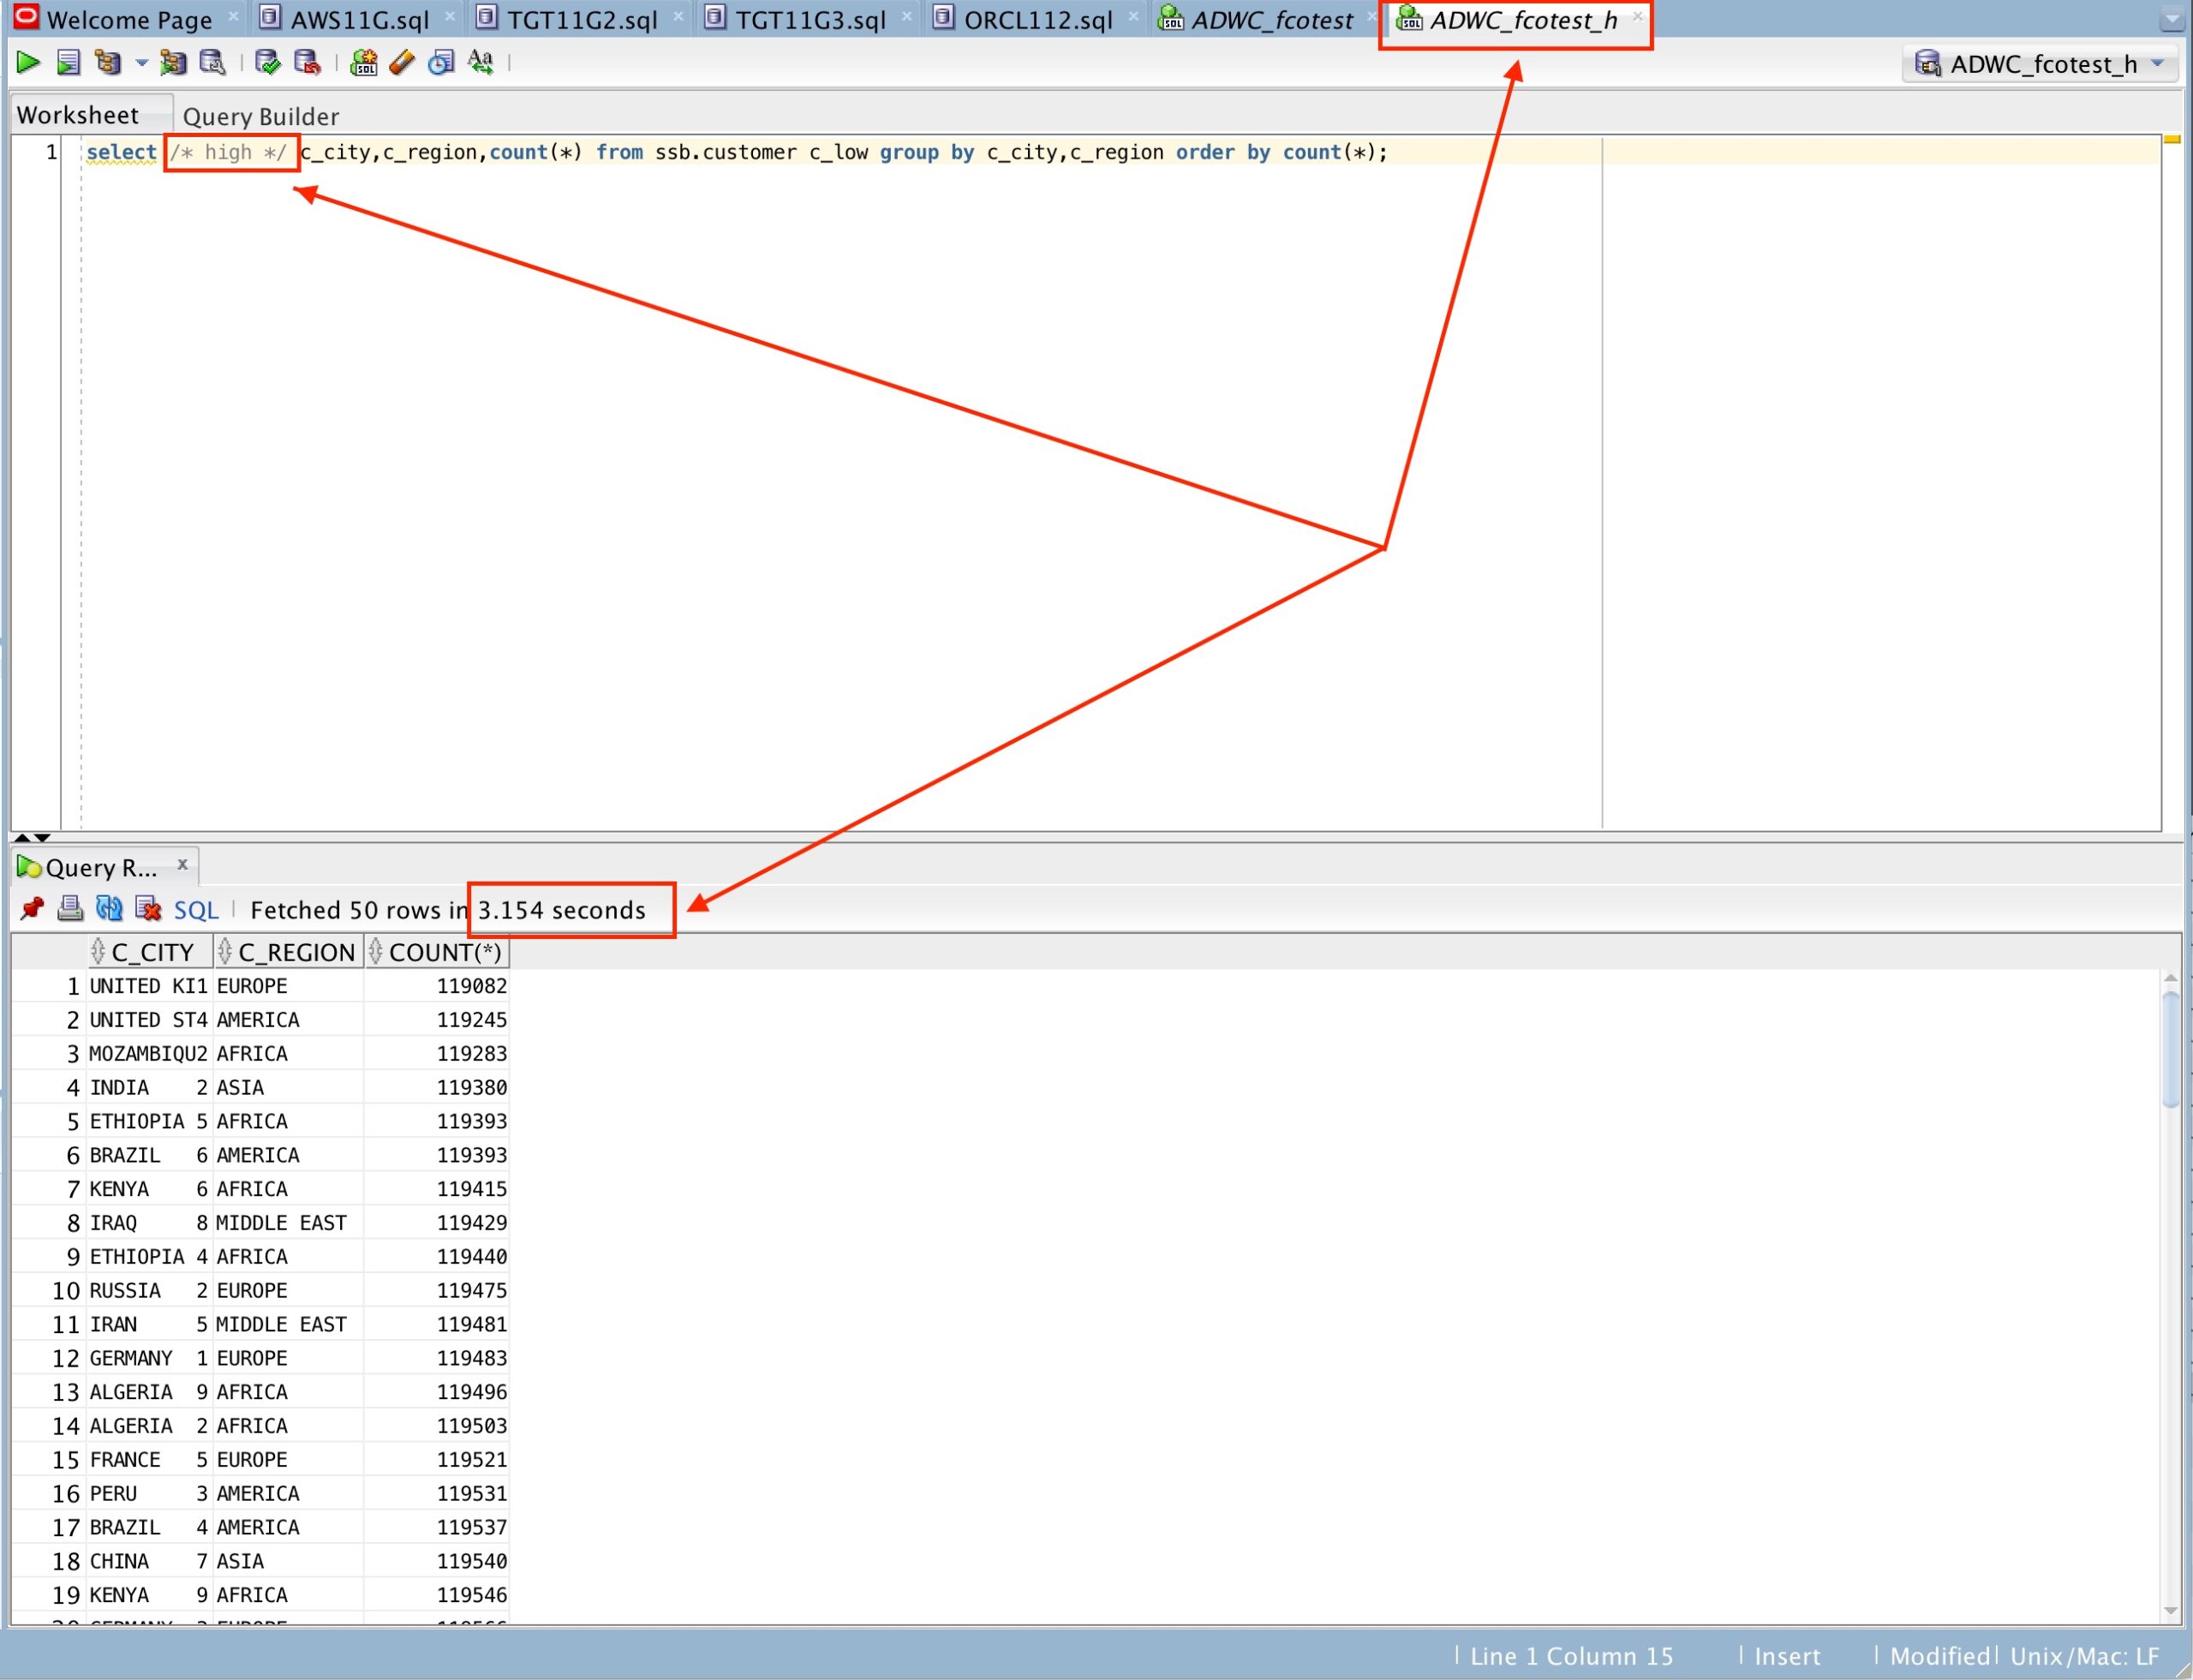
You can now see that the query using the HIGH service was executed in around 3.154 seconds, less than a half of the time required to run the same query when using the LOW service. This simple exercise showed us how the type of service used can seriously affect the performance of a query being executed against an ADWC instance.
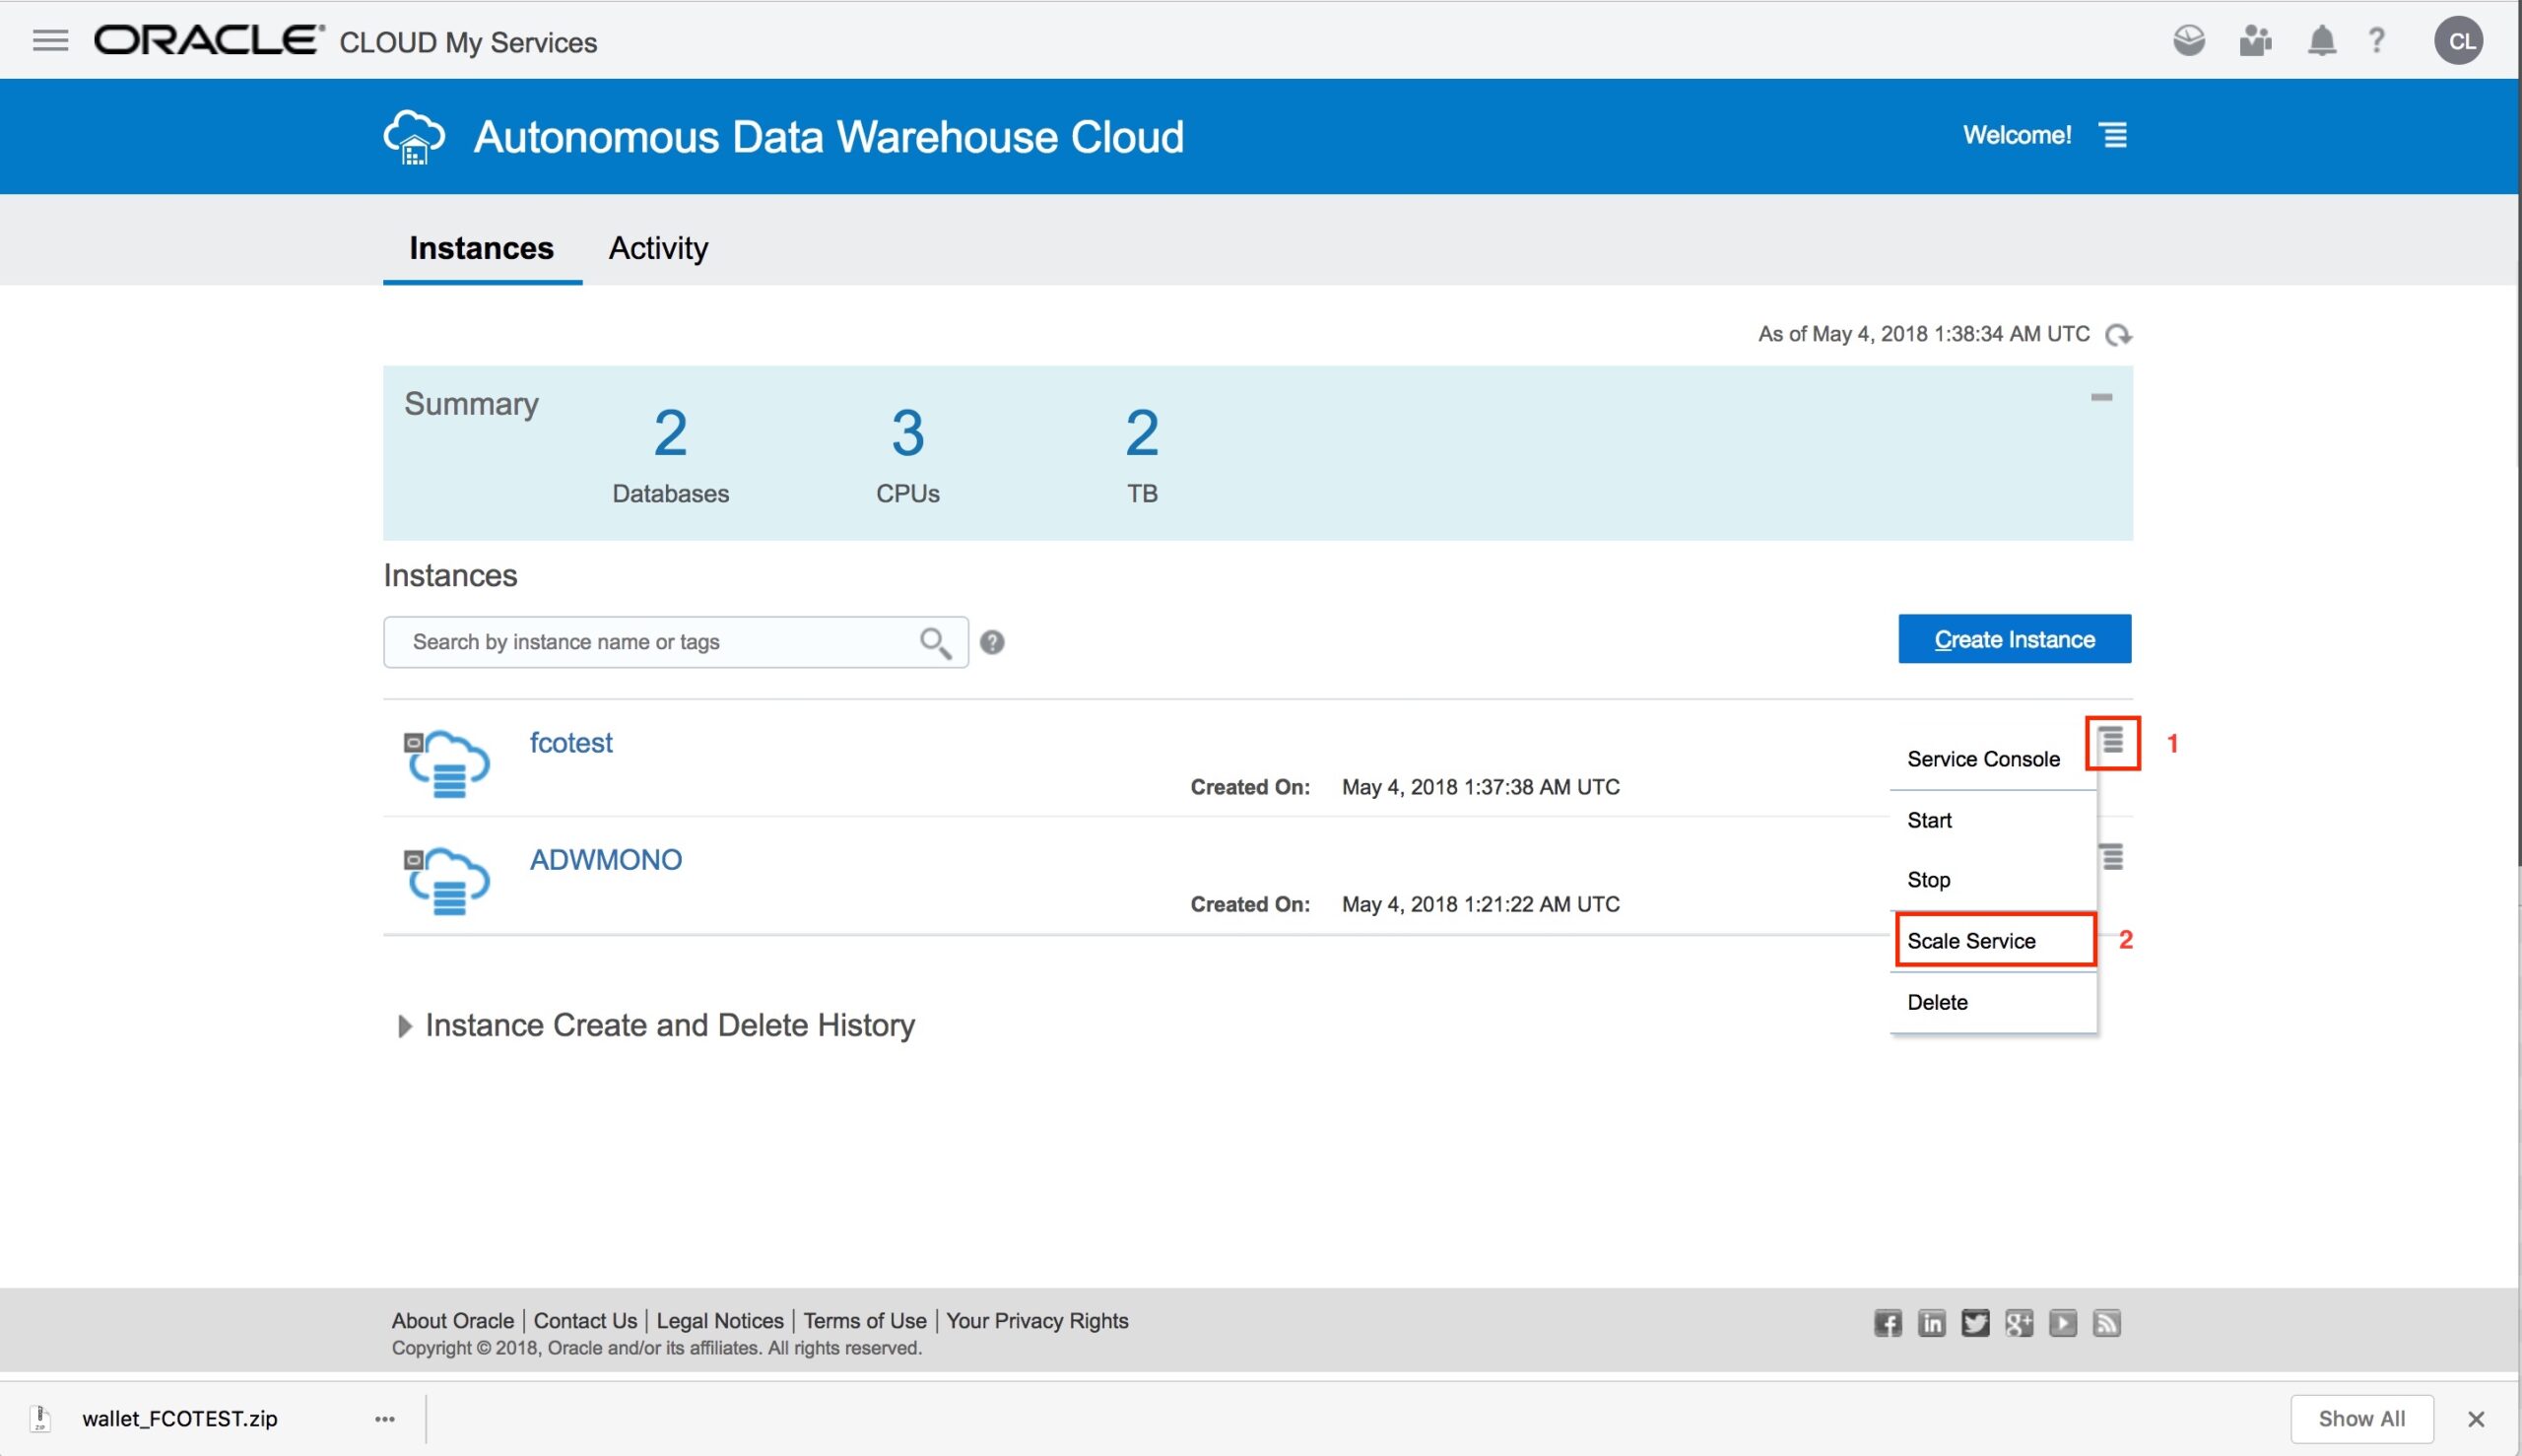
Now it is time to test another interesting feature within ADWC, the ability of scale resources (CPU and Storage) when required without any expected downtime – to bust performance when the business requires it (on demand). On the ADWC Service console click at the “fcotest” instance menu icon (as shown bellow) and select “Scale Service”
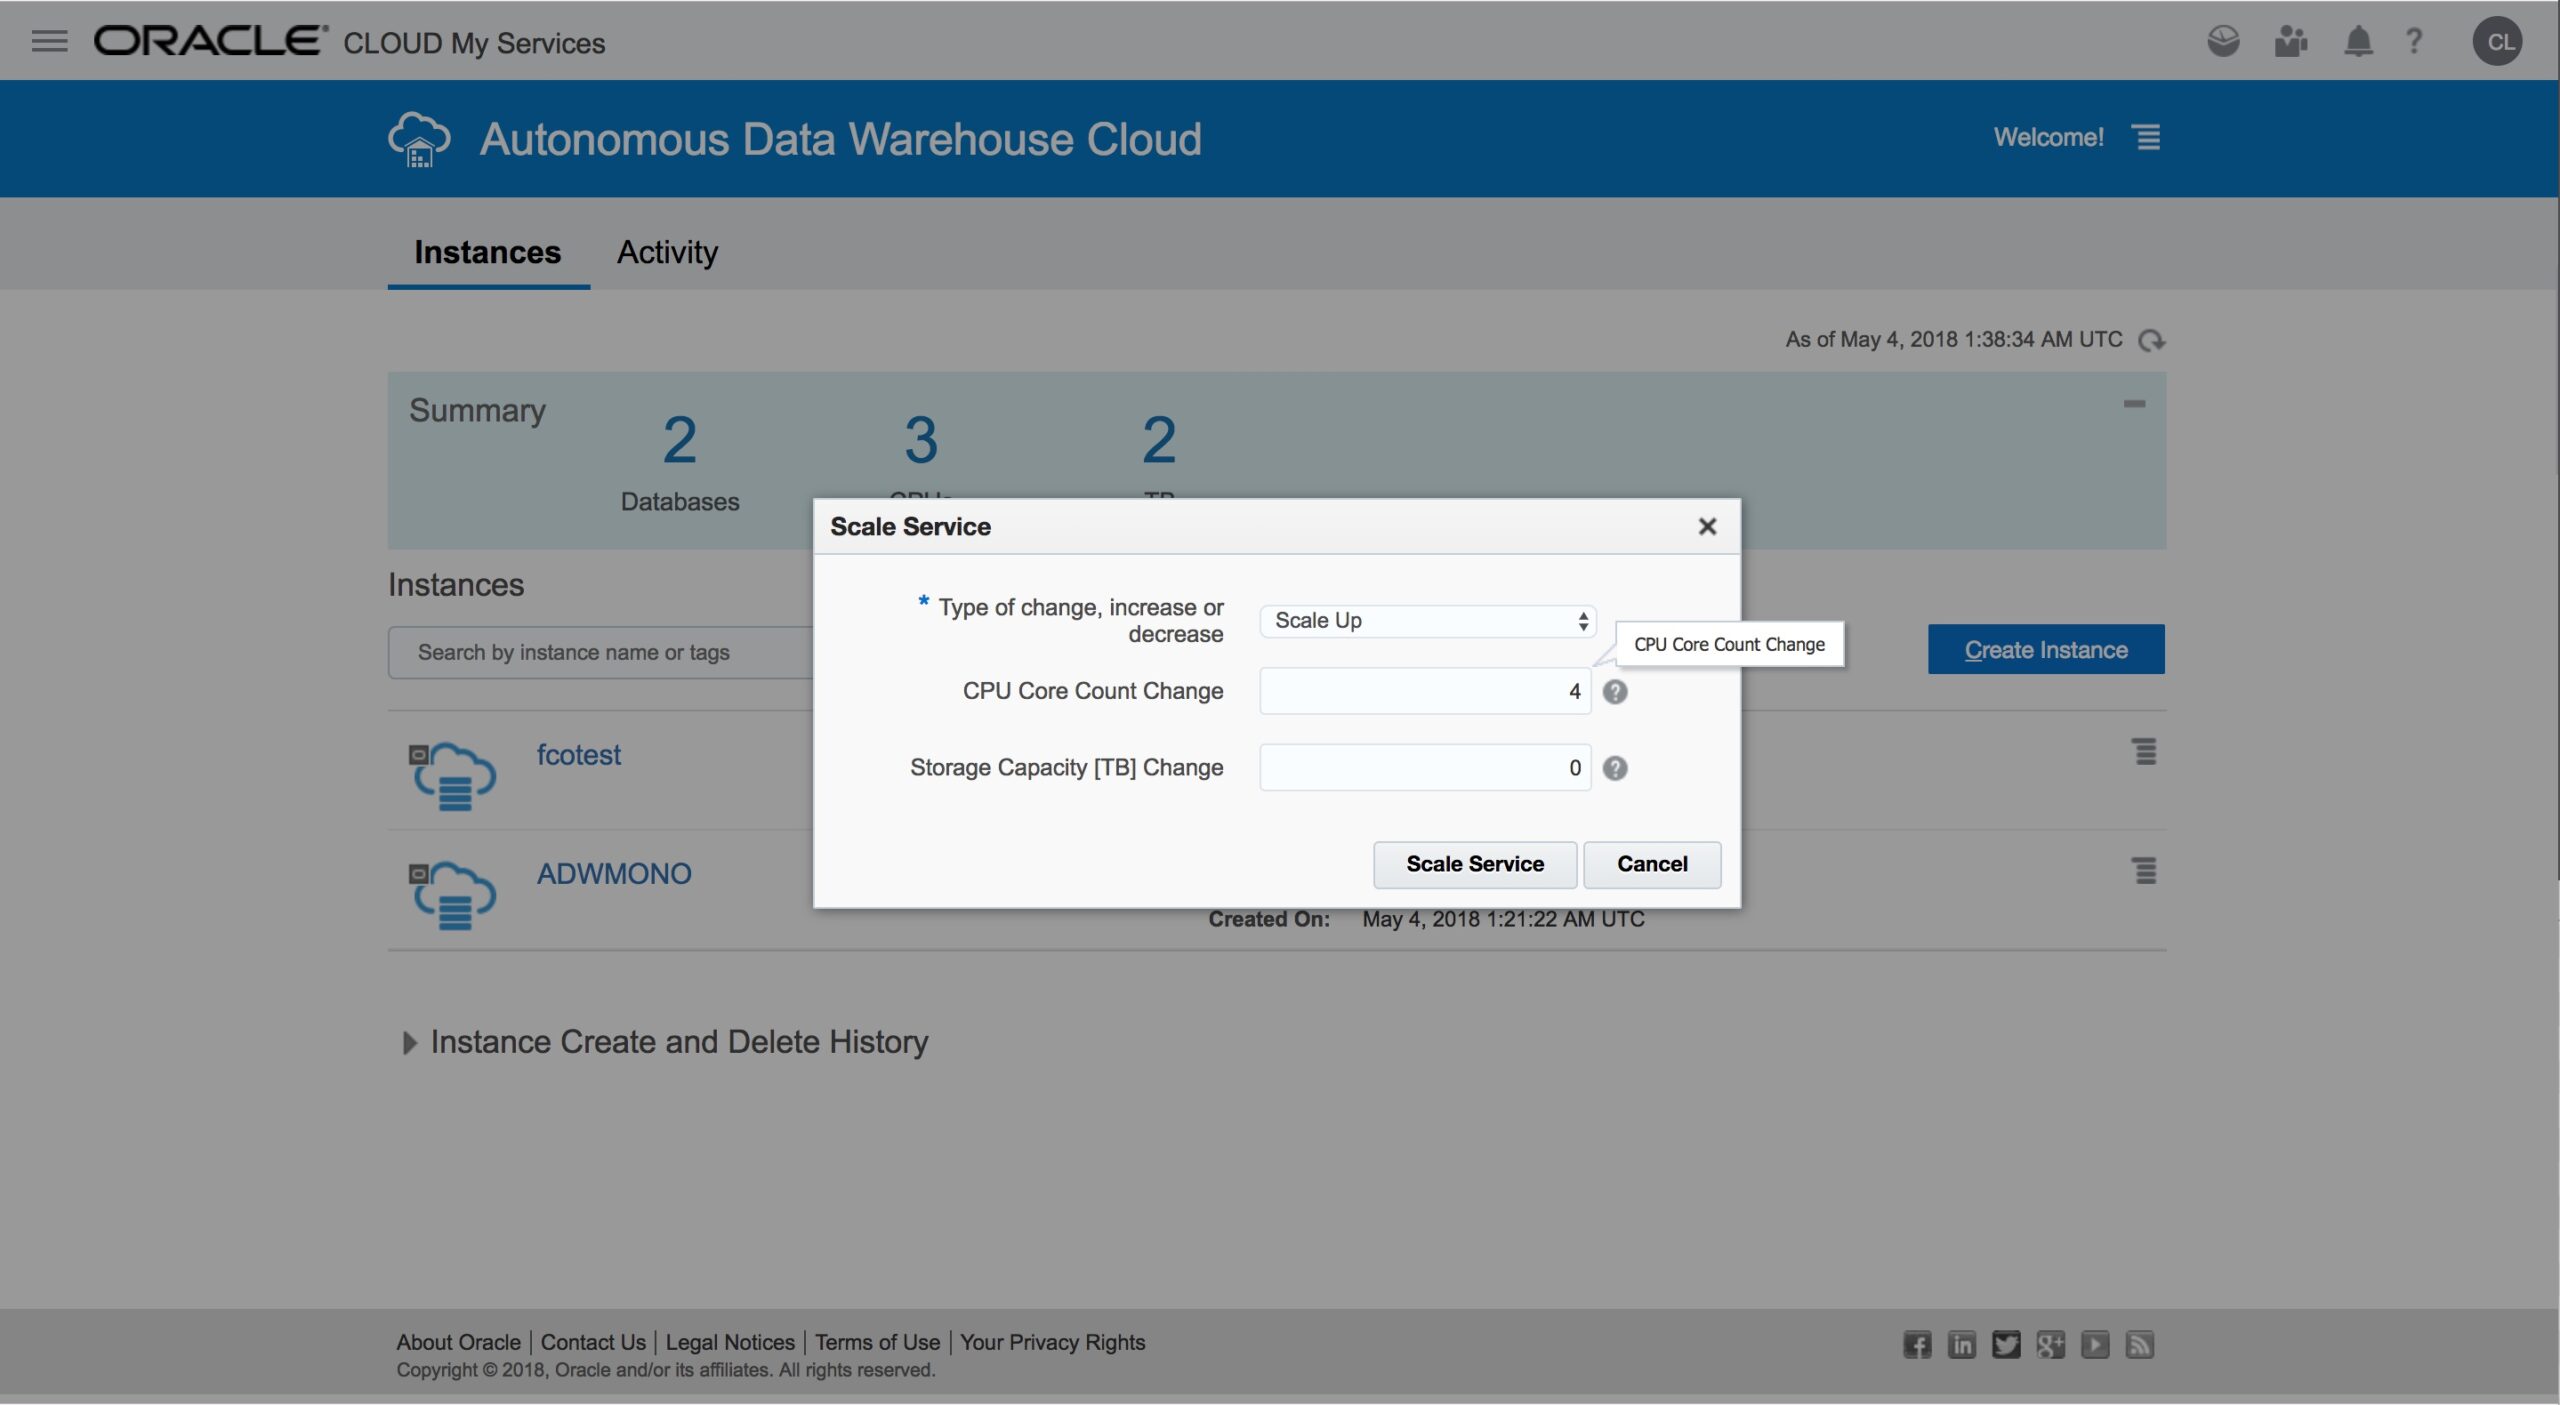
Now select “Scale Up” as the type of change, and double the number of number of CPUs by entering “4” and then click on “Scale Service”.
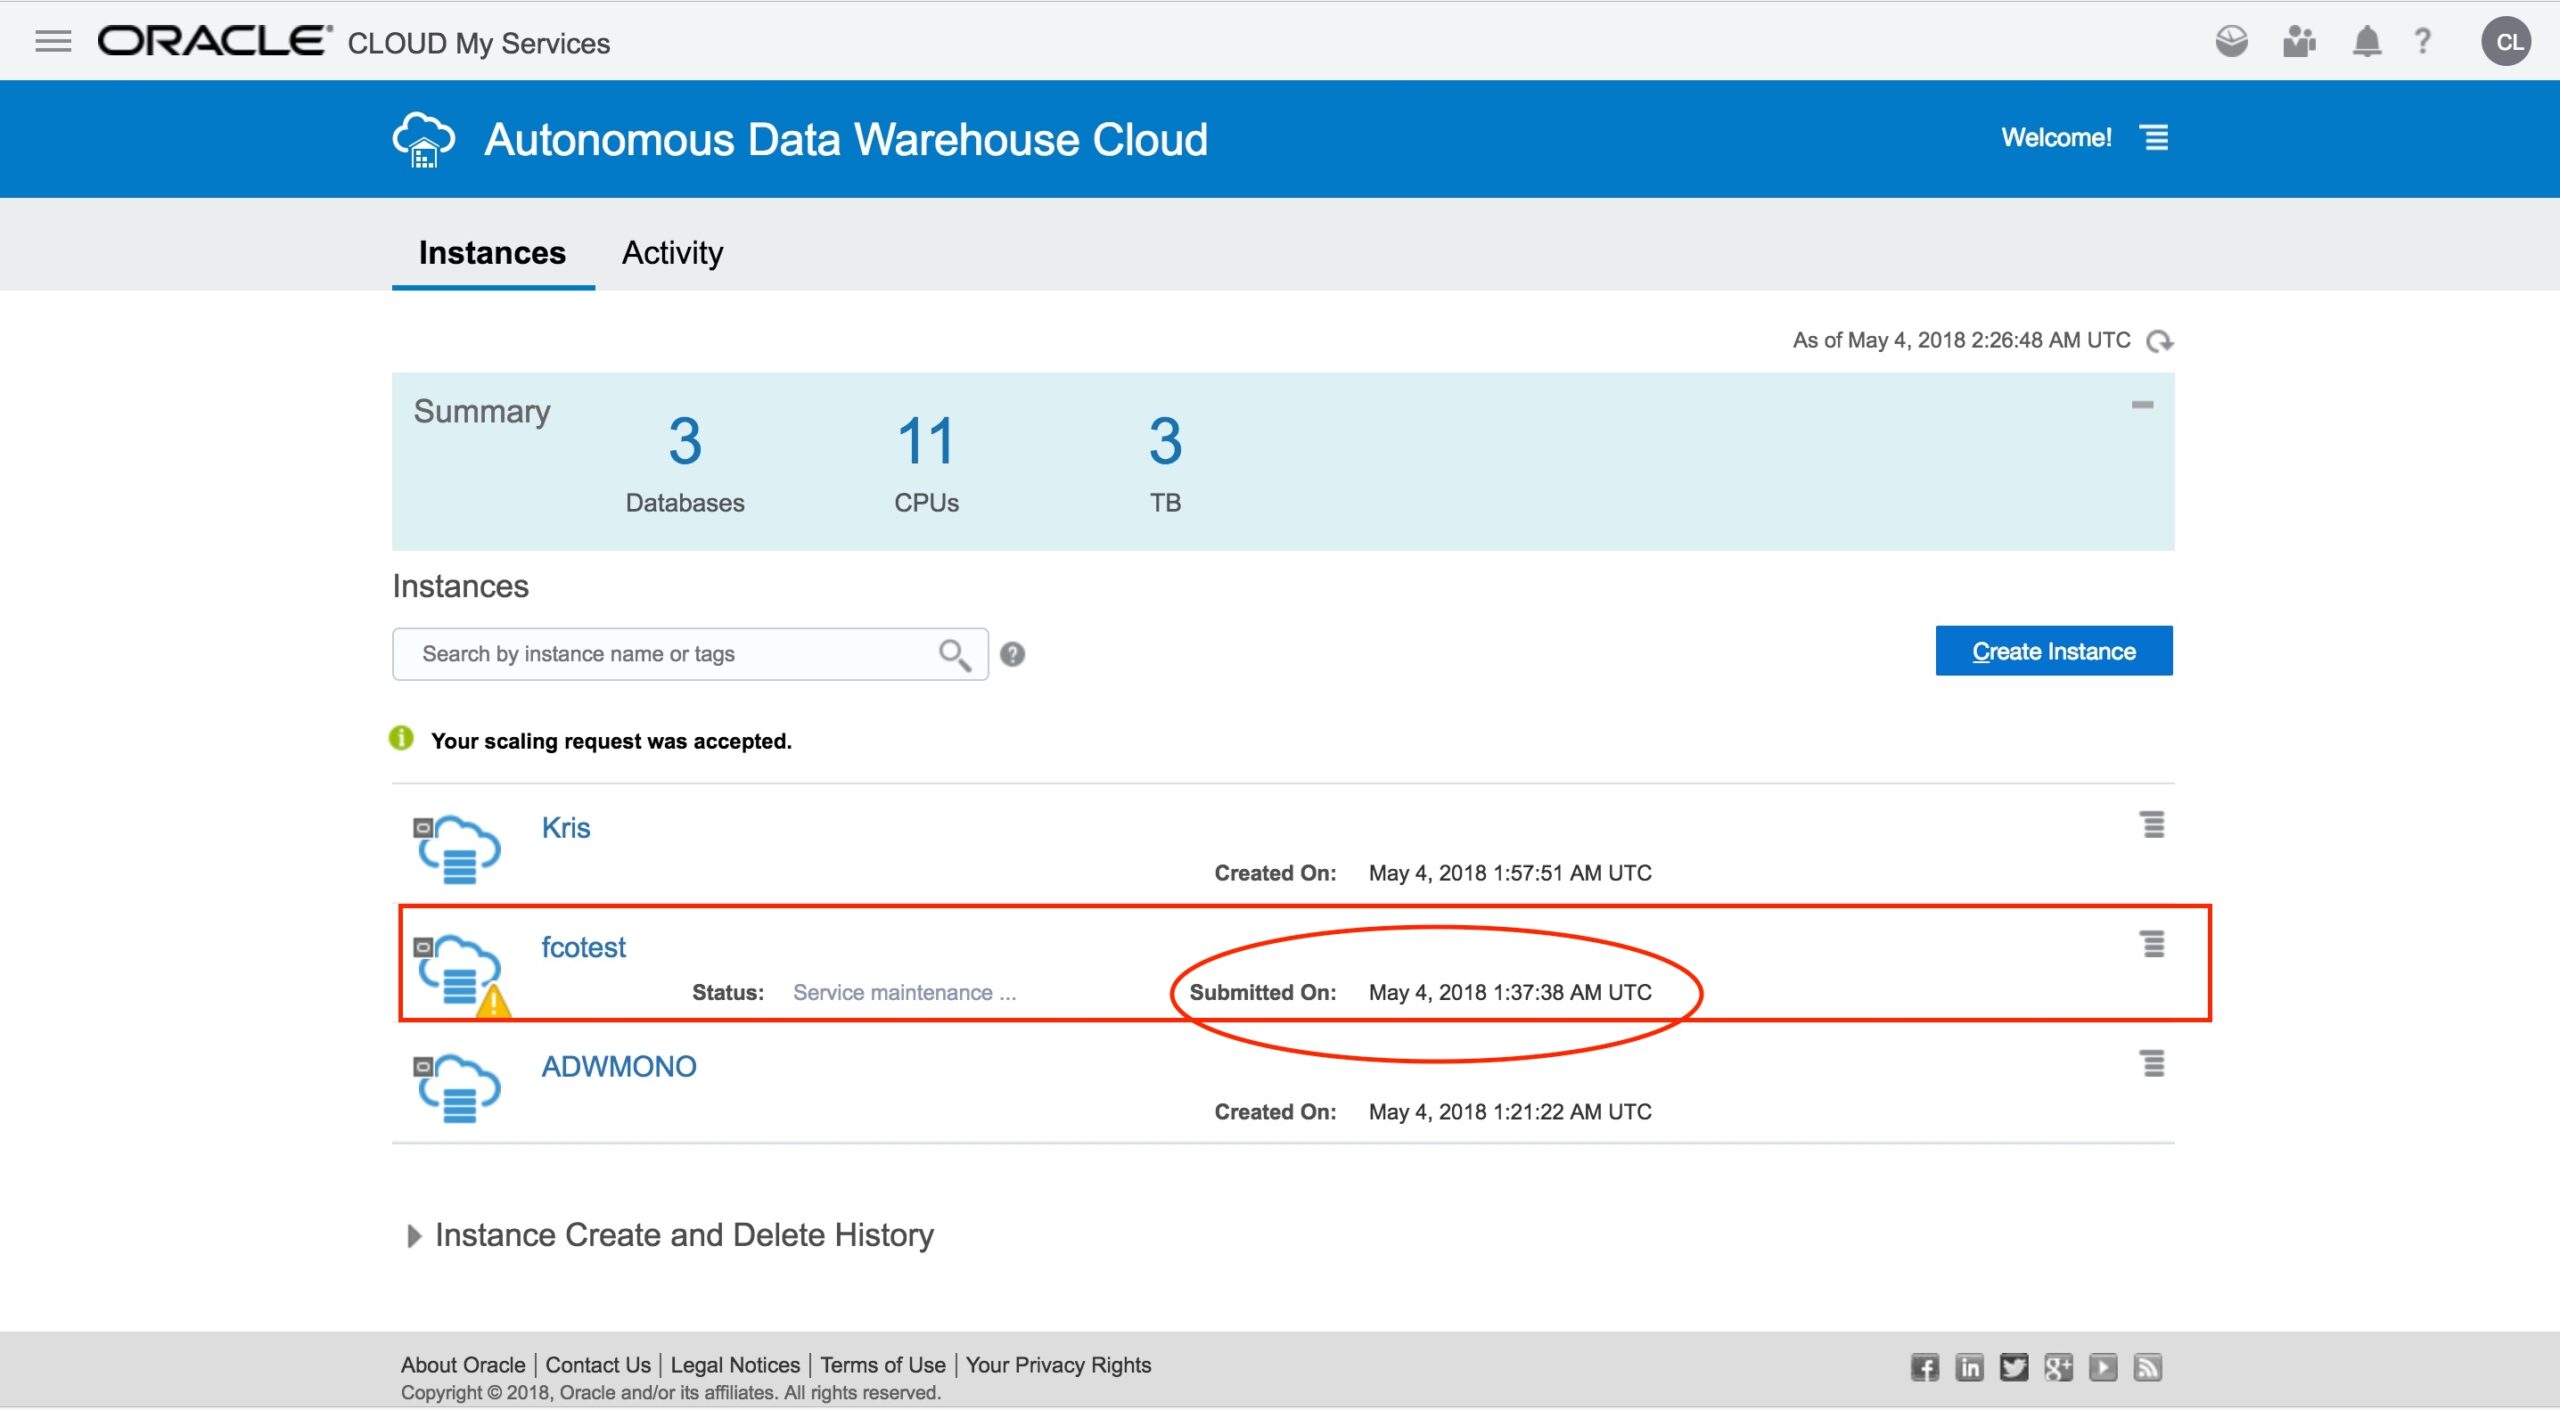
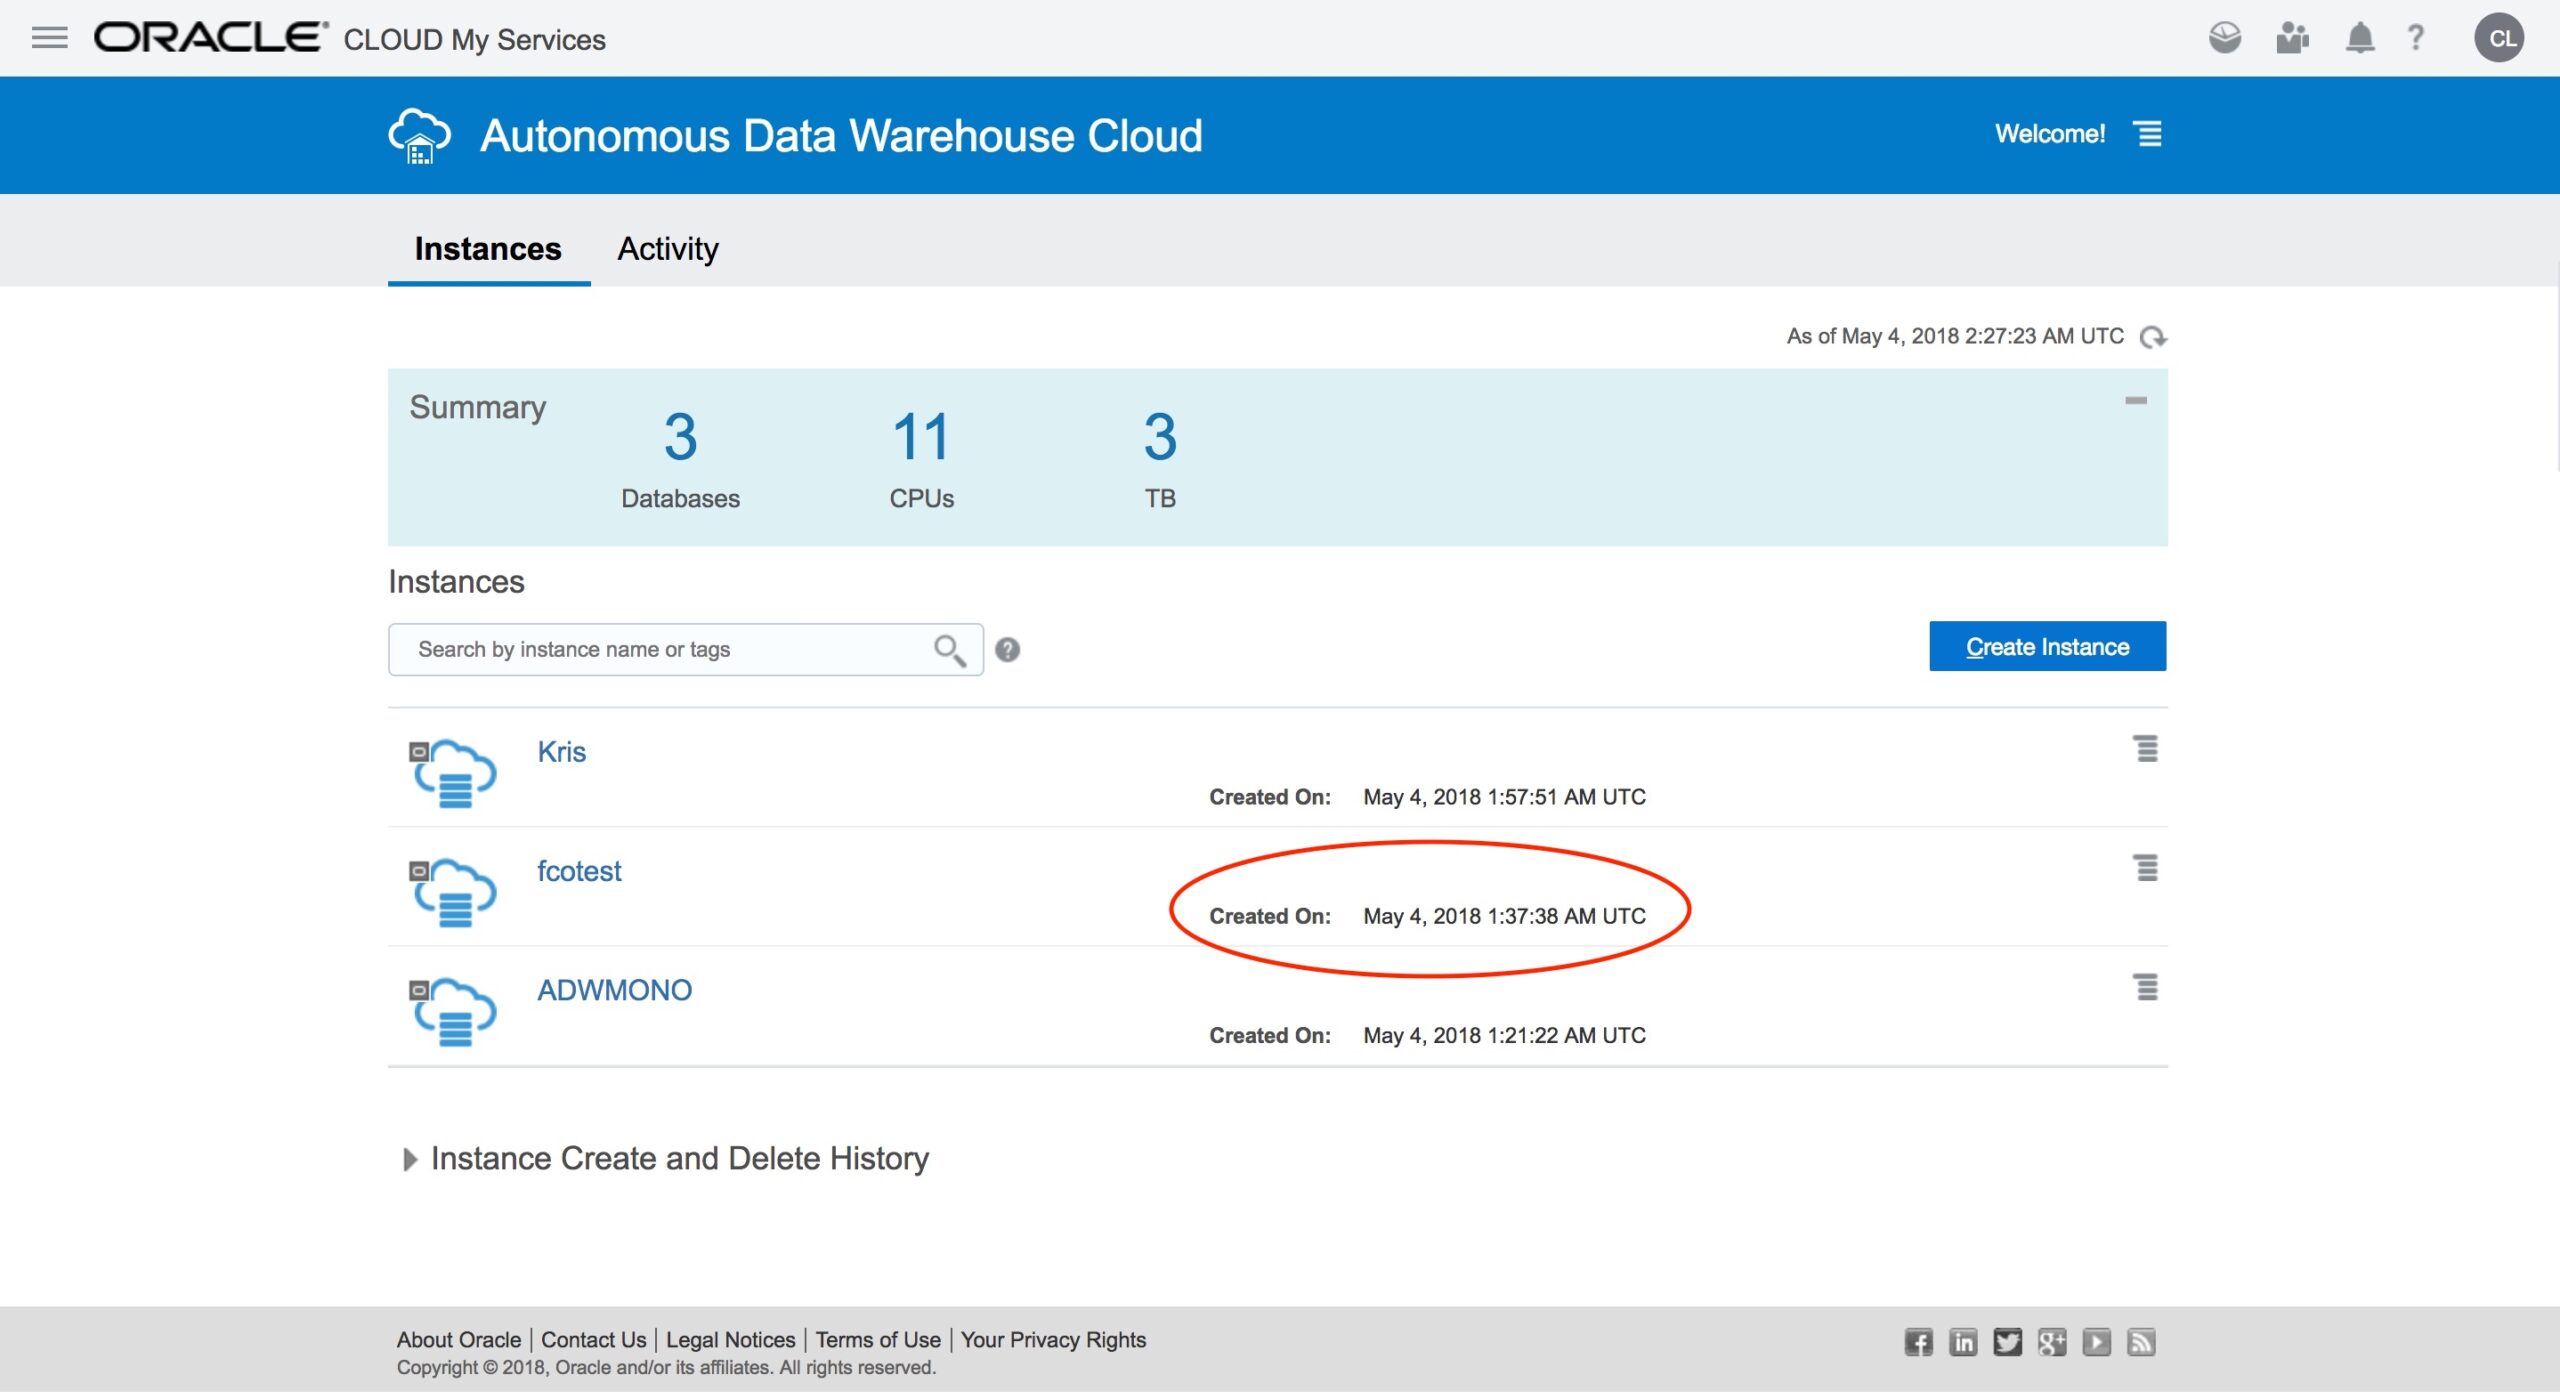
As you can see, the change was instantaneous as per when we created the instance and you can also verify that the SQL Developer active connections were not disconnected in the process.
Now lets run the query using the LOW service again and it now executes at 6.109 seconds (not much change when comparing it with the previous run, 3.154 seconds, in other words, doubling the number of cores on this scenario tripled the performance of our query).
Now lets run the query using the HIGH service again and it now executed on 1.134 seconds (a huge change when comparing it with the previous run, 6.581 seconds that was executed with only half of current available number of cores).
This is the first of a serie of tutorials on ADWC. Please be tune that more will be coming soon.
If you liked this tutorial please share it within your peers and comunity!
Kind Regards,
Francisco Munoz Alvarez
Oracle ACE Director
Big Thanks for Real Nice Contents !!